Many photo editors prefer using Lightroom for portrait refinement. You may create a number of effects using this software depending on the type of portrait that you need to refine. One of the reasons why Lightroom is very popular among photo editors is the fact that it allows for settings synchronization. This proves to be a time-saving feature particularly when you need to work on a set of images that were clicked in similar scenarios. When you are satisfied with shadow-highlight proportions and white balance, you can get the other images in that set synced smoothly using the same settings. You can then refine the other images.
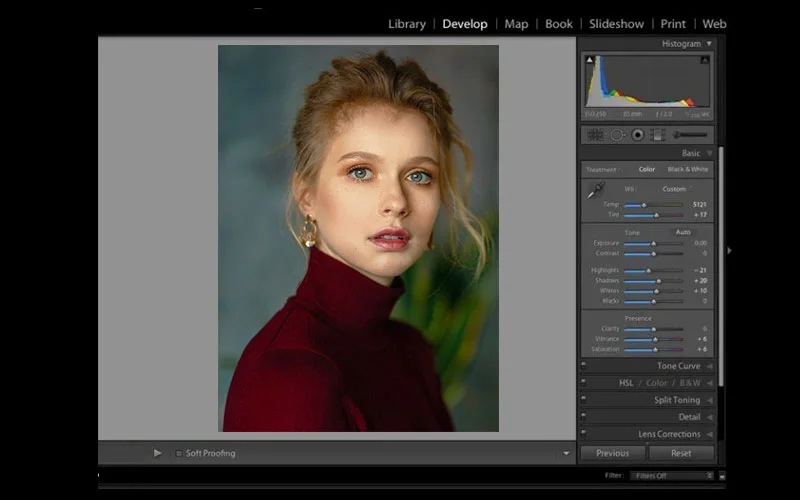
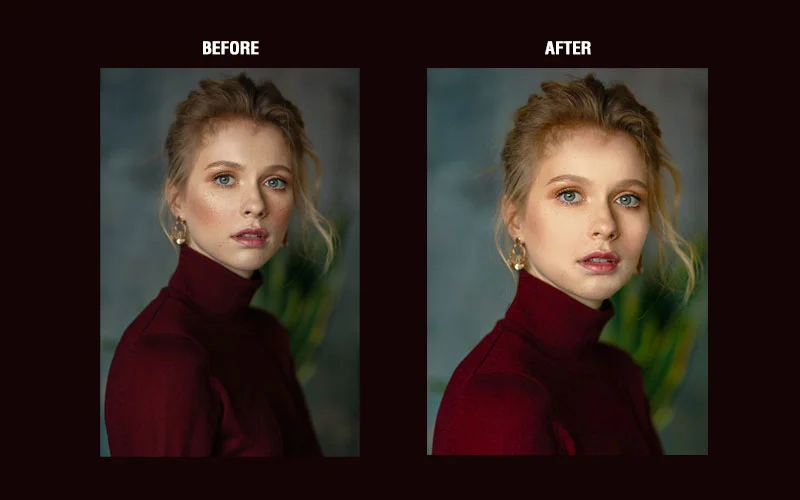
In the image that we have chosen to provide a Lightroom portrait editing demonstration, the subject’s hair and the background appears to be almost merged. We would perform skin tone smoothening and then add a bit of a shine in her eyes. When you follow these steps yourself, you can also consider experimenting with the sliders to find out the different effects.
Quick Overview
- Get your File Imported
- Modify the white balance
- Fine-tune the highlights and shadows
- Enhance vibrance and saturation
- Crop the image
- Perform skin softening
- Refine the adjustments
- Perform brightening of the eyes
- Apply color to the subject’s mouth
- Perform teeth whitening
- Lighten the background and subject’s hair
-
Get your File Imported

Go to the LIBRARY module, and then get the file imported in Lightroom. In this case, we have developed a custom sharpening preset, which is very useful for portrait refinement. We use this preset particularly when we import a large batch of images together. You may find it quite easier to create Lightroom presets. In LR’s right-hand panel, select the “Apply during Import” tab. Then select ‘user presets’ under the Develop Settings menu. Next, select the preset that you want to use on the imported image. When file
-
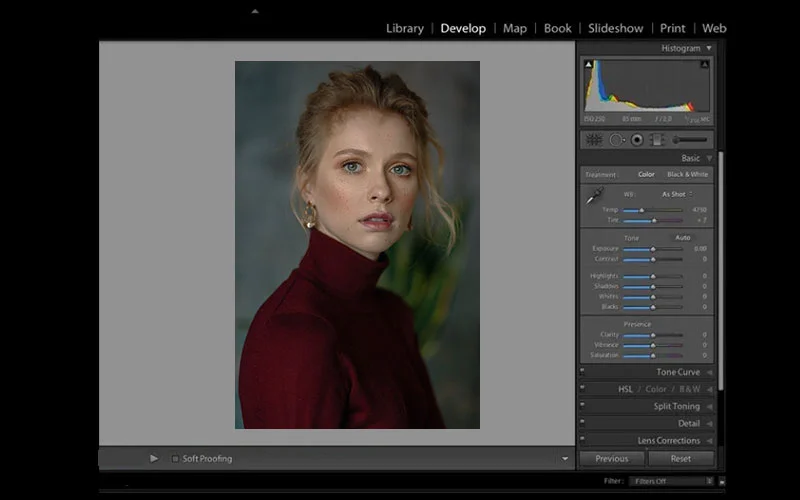
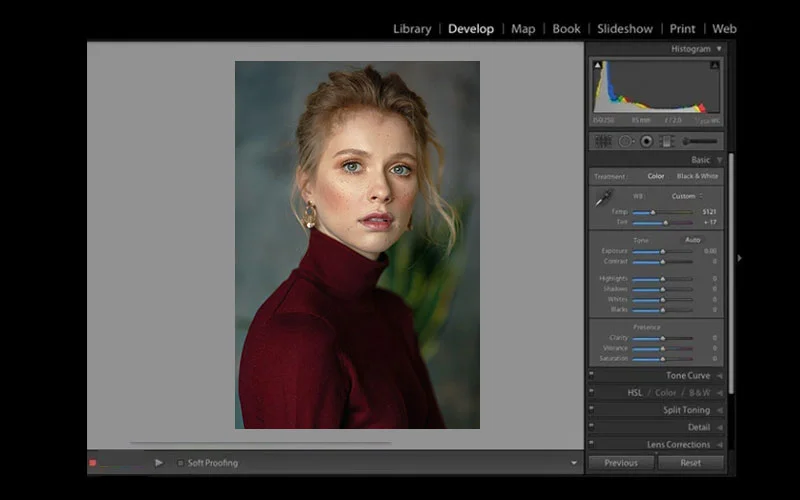
Modify the white balance
This image has a color tint that’s somewhat cold. You can adjust the white balance in multiple ways. You may make use of the eyedropper tool if the image features a neutral surface or a wall. The reference that we are using now has no neutral section and so we have transferred the sliders below the white balance portion in order to add a bit of warmth.
-
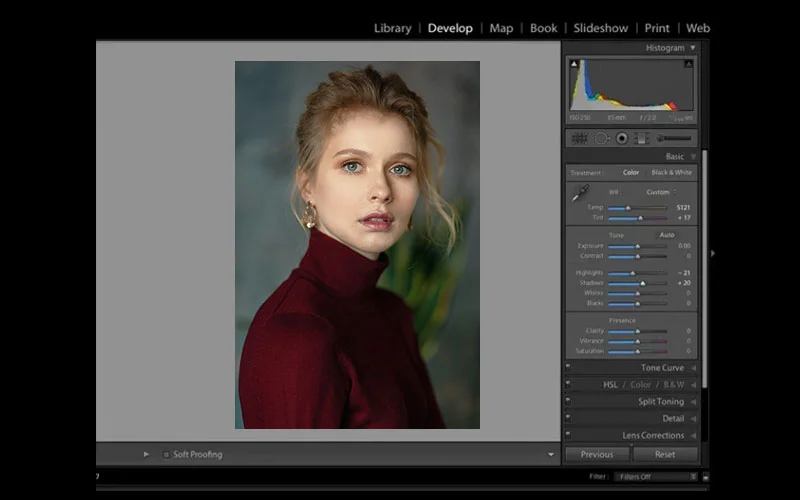
Fine-tune the highlights and shadows
The subject’s skin tone is a bit on the lighter side while the background and the hair are quite dark. You can address this imbalance by lightening the shadows and fading out the highlights. You may consider fine-tuning the outcome if you feel it to be necessary.
-
Enhance vibrance and saturation
The photo still appears dull. Go to the presence tab and adjust the sliders so as to boost the saturation and vibrance. Then shift the white slider up to instill a cleaner look. At this point, the subject appears to be having a realistic skin tone.
-
Crop the image
You may crop the image during any phase. We chose to crop this image in order to get a well-balanced portrait.
-
Perform skin softening
Check the skin properly by zooming in. If you are working on the portrait of a young subject who has flawless skin, you do not need to do a high degree of skin softening exercise. You should begin by choosing the Brush option. You should set your brush with the necessary settings. You can use presets for teeth whitening and skin softening if you want. Set the slider value between -35 and -40, the contrast to a value of +35, and assign a value of +15 to the Highlights and +20 to sharpness. This would allow you to retain the contrast and prevent the face from looking flat.Your skin softening touches would depend on the type of skin that you need to refine and the kinds of effects that you need to generate. In this case, we would make the skin tone uniform and instill a soft, glowing feel. If you need to work on the photo of a mature individual who has been photographed under a strong light, you need to follow a different approach. The skin will appear softer if you use lower values for the clarity slider. You should increase the value of the clarity slider in order to instill a ragged appearance. When you decrease clarity, the image will appear flattened out. In that case, you may increase the highlights and contrasts and darken the shadows so as to strike a balance. Use a large-sized brush to touch throughout the face while maintaining a 100 percent value for the flow and feather.
-
Refine the adjustments
Select the option “Show selected mask overlay” below the image in order to check which image portions the brush modifications have impacted. It may often cover the mouth and eyes, which we do not want to happen. Select the erase brush option and then eliminate the brushed-over look and feel from hair, mouth, and the area surrounding the eyes. Keep on using the adjustment brush for this activity.
-
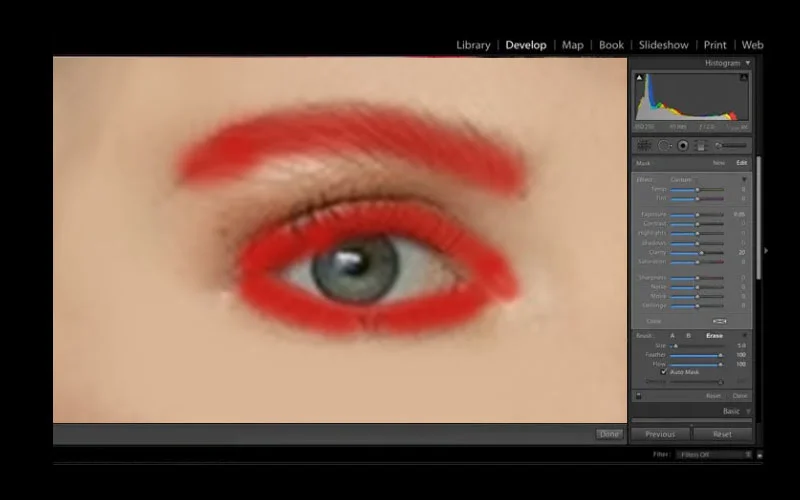
Perform brightening of the eyes
You can instill clarity and glow in the eyes by using the Adjustment brush. Zoom in to get a better view. When you improve clarity, you end up darkening the affected portion. You can balance this effect by using the exposure slider. In this image, the iris saturation has been increased to a certain extent to brighten the blue of the eyes of the subject. Exercise a little bit of caution in order to prevent an unnatural appearance.
-
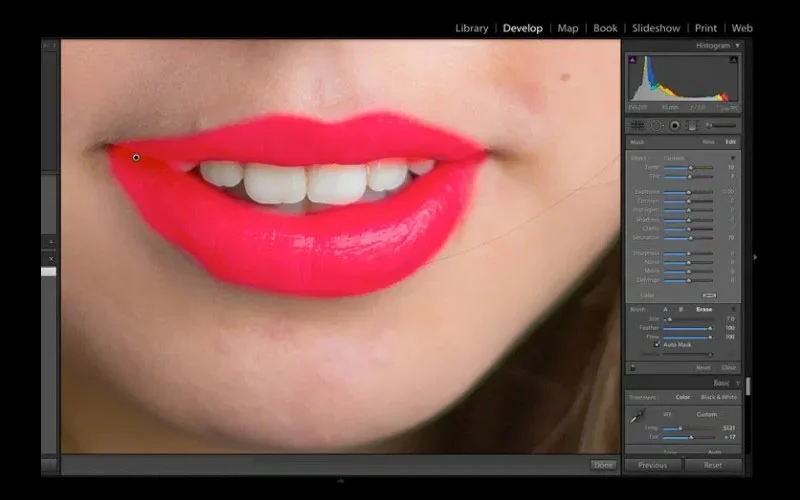
Apply color to the subject’s mouth
We would apply the same technique as we applied with the eyes. Boost the saturation and improve clarity using the Adjustment brush. You may change the lip color by pushing up the tint and temp sliders.
-
Perform teeth whitening
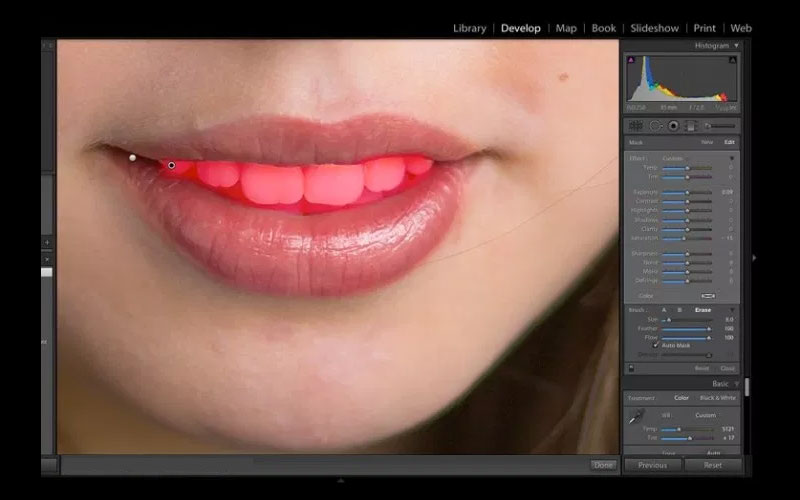
To perform teeth whitening in Photoshop, apply the brush tool while keeping the value of the saturation slider low. Keep the exposure slider value increased to a certain extent. Be cautious with this process in order to prevent overdoing.
-
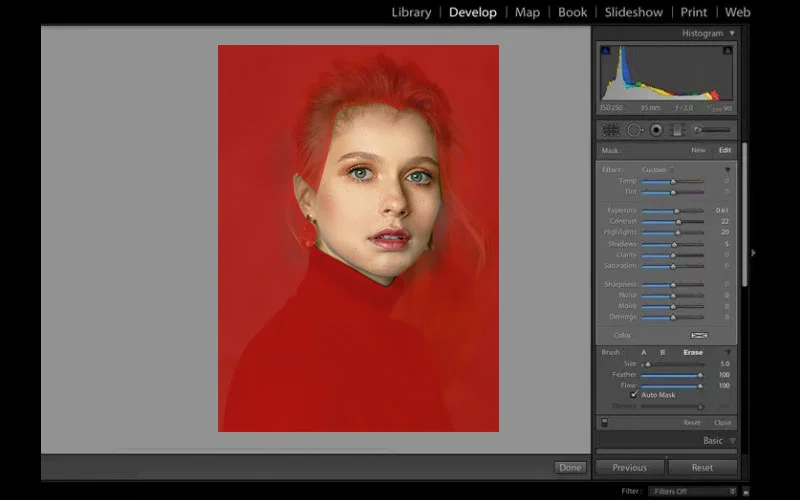
Lighten the background and subject’s hair
We have lightened the tone of the background and the subject’s hair, which has reduced the contrast between the background and the subject’s face. This has also made the hair and the backdrop appear separated from one another. The final outcome that you get is an enormous improvement on the raw camera image.


What Next?
Image editing in Lightroom is all about your personal preference and the style that we discussed is just one of several styles. Do let us know what your preferred style is.
Though Lightroom doesn’t give features like pixel bending, it will help you to a great extent. However, if you lack confidence, you can always outsource portrait retouching services.
PGBS has emerged as a synonym for quality photo editing services. A fleet of experts having considerable experience in the concerned niche work here to achieve excellent outcomes for our esteemed clients. Making an optimal use of the mix of right software tools, projects are delivered with perfection and within the stipulated timeframe.
Moreover, as a customer friendly photo retouching company, we always try to keep our services highly cost-effective. Multiple packages are there and you can select the most appropriate one that completely suits your actual and exact needs. To know details, get in touch with us, at your convenience. We have a 24/7 customer support team.