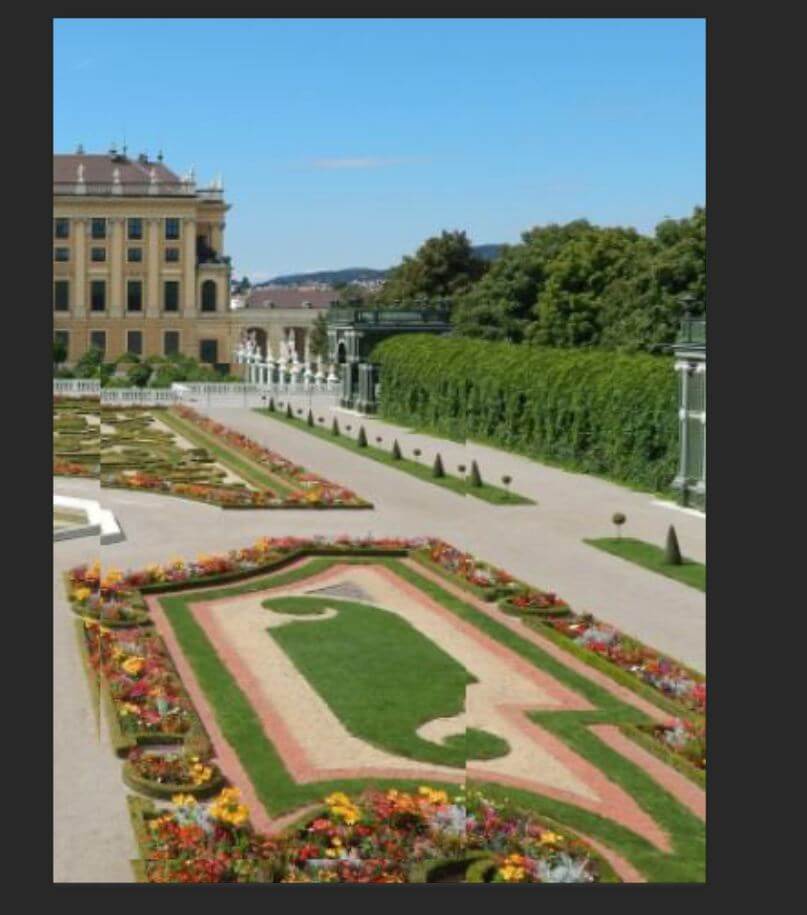
Panorama stitching errors can result in inaccurate merging. Trying to fix the same in Lightroom alone won’t work and the files have to be exported to Photoshop or another editor.
Working on the picture
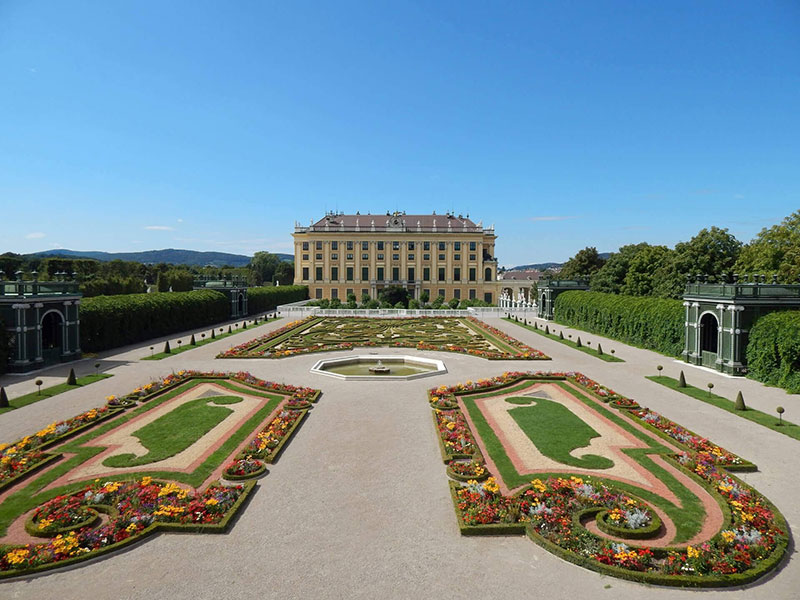
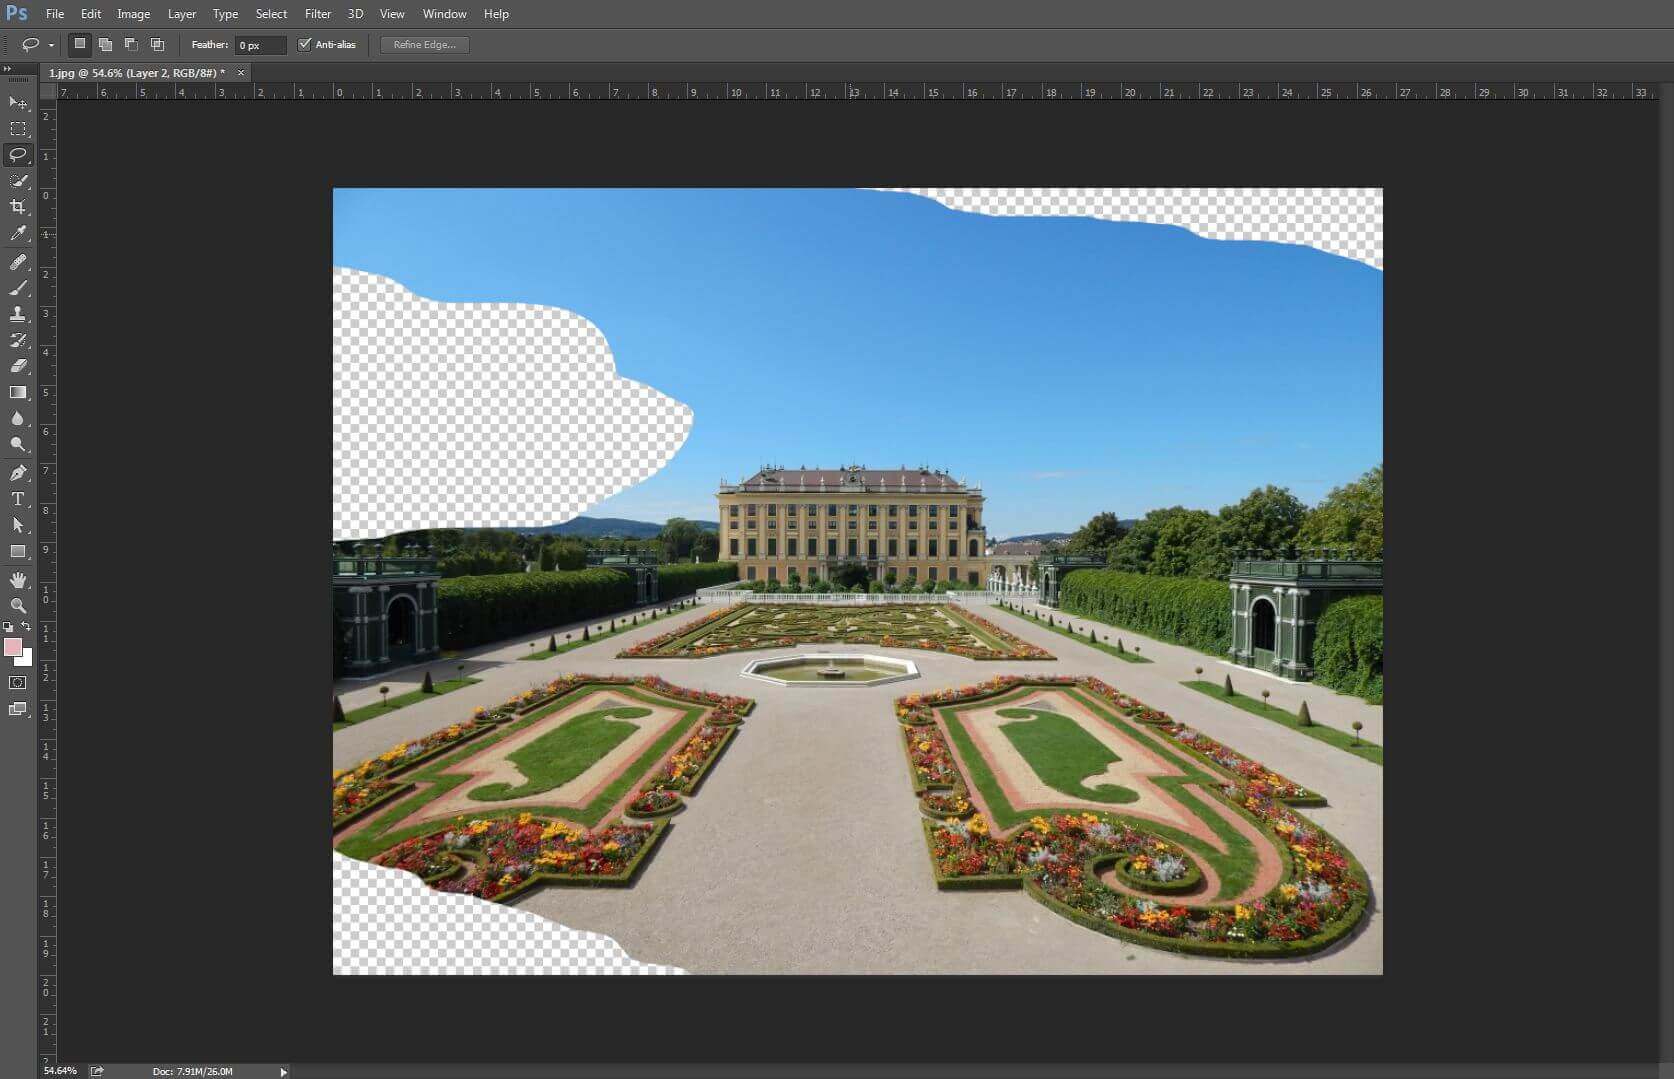
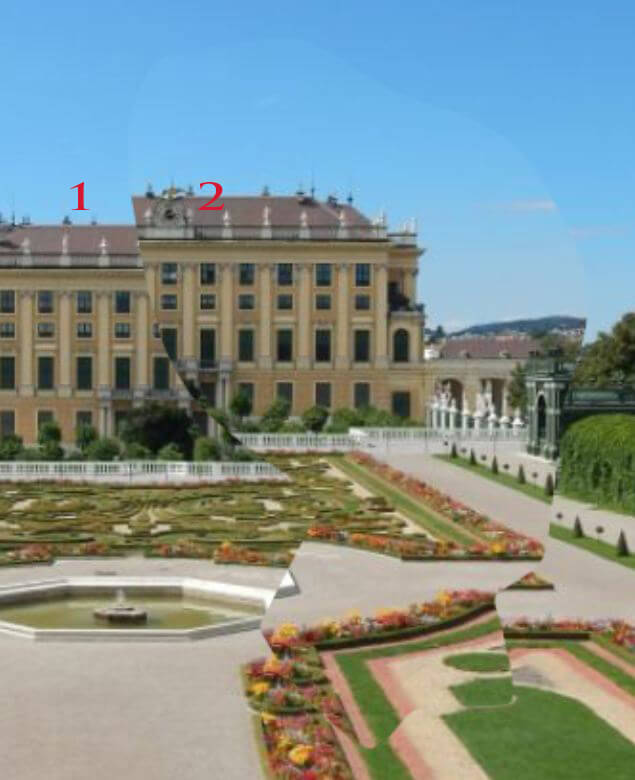
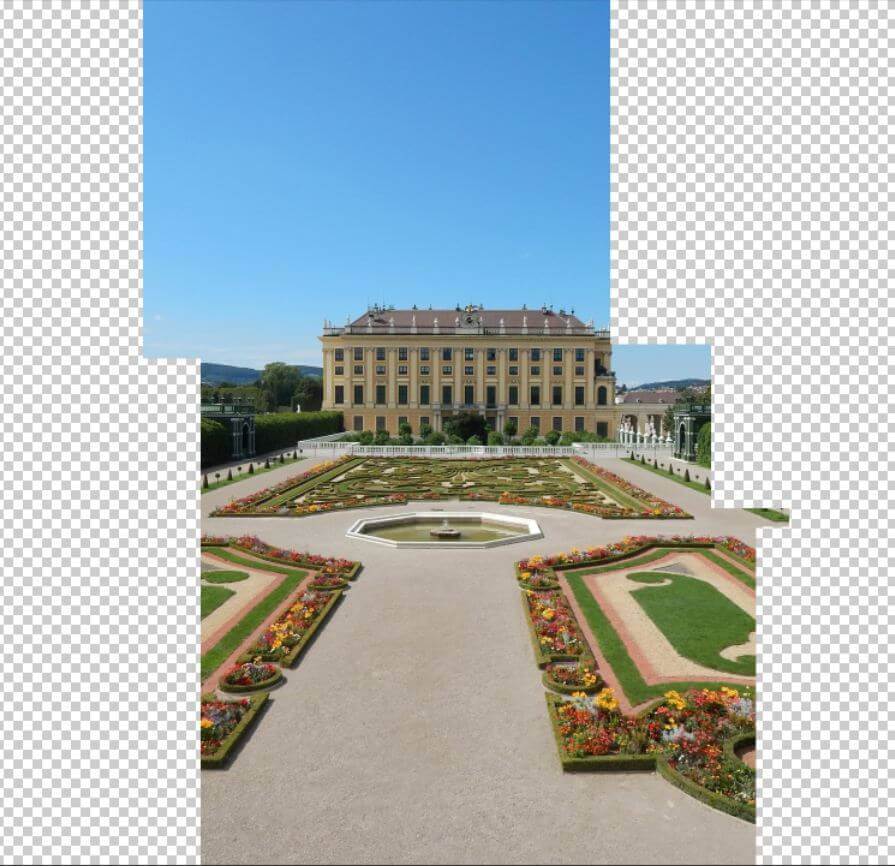
Start with a panorama featuring fragmented files inherent with errors and distracting space around the central image. Elimination of out of focus aspects would result in presenting the main subject in the correct perspective which is the very first thing to do. The adornments of the subjects should not get botched up while stitching.
Photo-merging the fragments
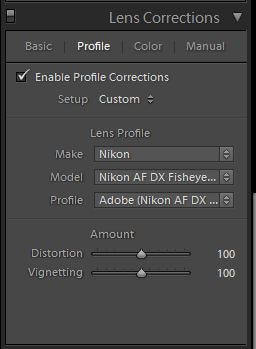
Start by importing the fragmented raw source files in Lightroom and process the same for rectifying color, sharpness, noise, vignetting, and other distortions. The ‘Lens Correction’ tab would help in these and ensure that shabby patches do not surface in the finalized version. Vignettes may be apparent through the Brenzier panorama technique were a widely set aperture is used. In the Auto Layout, carrying out corrections with Photo merge would result in the dullness of highlights. Lens Corrections has the advantage of adequately applying corrections for every lens by utilizing metadata information intuitively. Once corrected, the images need to be exported to the Photo merge tool in Photoshop using ‘Merge to Panorama in Photoshop’ from the ‘Edit in’ option available by right-clicking an image.
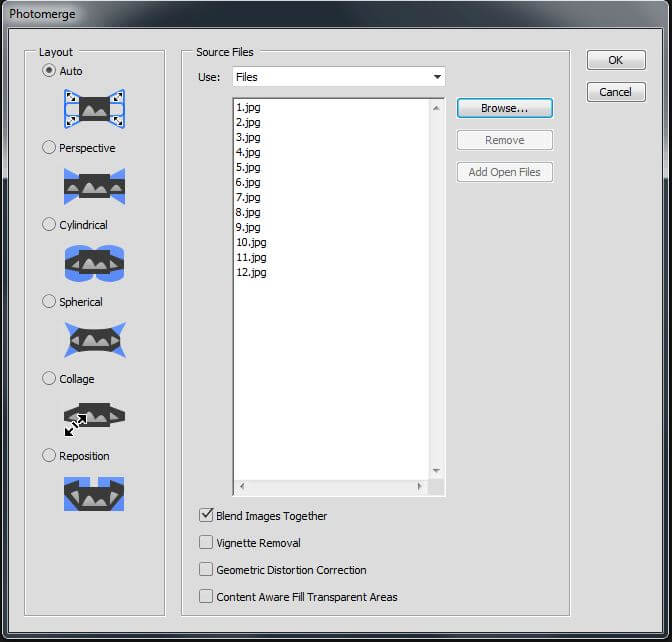
Use your preferred layout for merging. The auto-layout may disorganize the eventual panorama, so the Reposition layout is advised. Stitching is started by checking ‘Blend Images Together’. If you hit Ctrl, Shift, E together, the image is flattened due to the collective merging of layers upon application of layer masks.
Detecting flaws
Flaws can be induced by image corner stretching by wide-angled lens and parallax. If Photoshop opts for stitching panorama from slightly varying images, the subject’s appearance would be erratic and look contrived. This is one of the pitfalls with panorama stitching in Photoshop. However, closer detection would reveal these flaws if not readily apparent.
Setting errors right
If you are wondering how to fix panorama merging errors, they can be ironed out with a minimum of 3 techniques.
In the first case, you have to select the strategic merging layout. But, redundant images can still induce error. For a narrower view angle, if a plethora of images is used, the unwanted ones would definitely impact the final rendering. To overcome this, you need to consciously weed out those images that would not have a bearing on the final outcome. Reduction in source files would reduce stitching errors. Ensure that overlaying of images is proper and don’t hesitate to snap more images to get a stellar results.

The second technique involves mindfully cropping the initial panorama. This way you can decide your finalized frame and excess blending of images won’t be required.
If the aforesaid techniques fail to yield dynamic results, you have to resort to conventional layer blending. Overlay the panorama with strategic pictures and substitute the panorama stitched with Photo merge with mere 2 images. For Photoshop Photo merge, you may consider dragging and dropping the same.

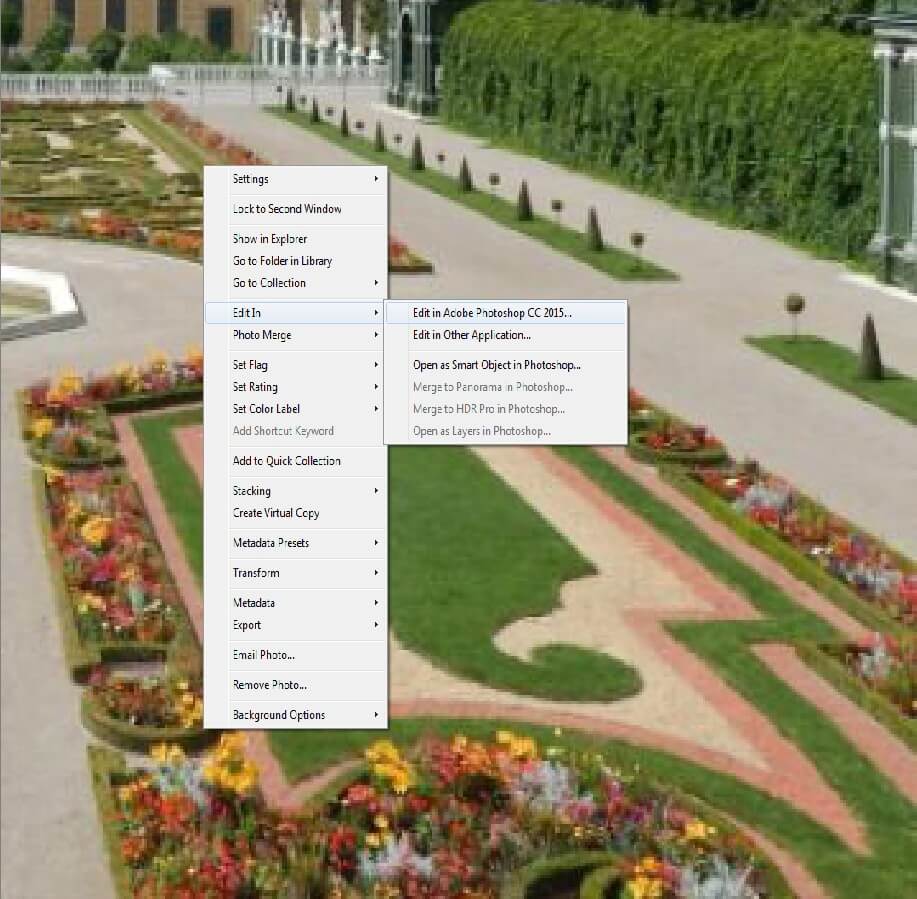
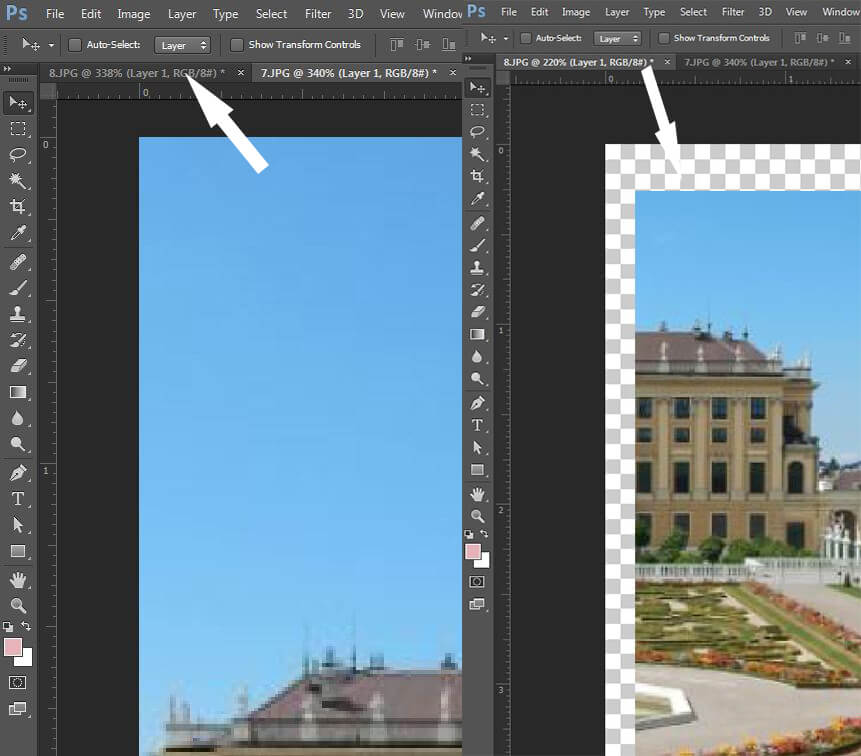
Start by identifying the most perfect fragment raw image in Lightroom which would be used for overlaying stitch-related flaws. Your focus should be on using bare minimum discrete files. For opening the image as a discrete object in Photoshop, start by right-clicking the Lightroom image and selecting ‘Edit In’-‘Edit in Adobe Photoshop’. Upon opening, the image is to be dragged and dropped on panorama as a fresh layer. Selecting ‘V’ would activate the ‘Move’ tool. Press the image and don’t release the cursor unless the panorama document opens. In the Layer tab, this image layer should be at the top.
For keeping Lightroom from importing the duplicate as TIFF, closing the recent image without saving would work. Next, new layer has to be aligned with panorama layer. Selecting the layers and choosing ‘Auto-Align Layers’ would mechanically do this. Select Reposition Layout.
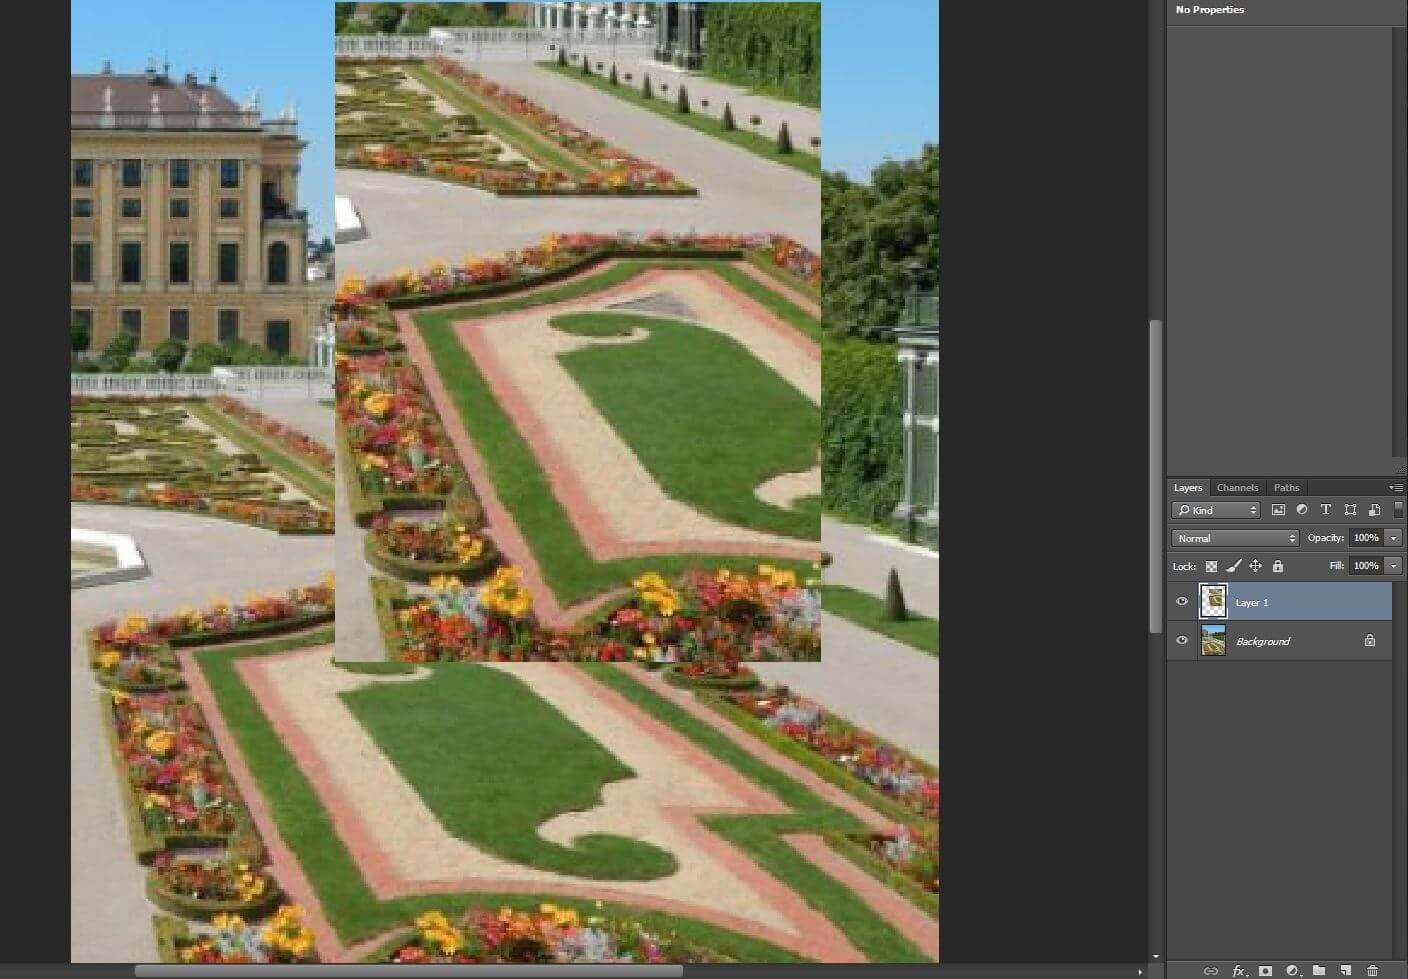
There are a lot of photo editing companies for photographers but still if you want to do this manually, start by changing new layer’s opacity to 50% and then zooming it properly for perfect alignment. Use Move Tool, next, to drag the same to suitable location. Select strategic alignment points carefully to avoid mismatch errors. Once done, change the new layer’s opacity back to full for complete overlaying of panorama layer. Now, repeat the same for next layer to be used for stitching errors correction. The alignment points of first and second new layers should be properly chosen to wipe out traces of merging upon overlaying. After this, layer masks come into play. The second new layer will be subjected to gradual blending with first new layer.
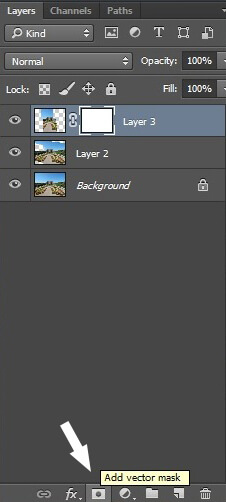
Creation of layer mask
From above, choose the second new layer for preparing its Layer Mask. By the side of the thumbnail representing the second new layer introduced for correction, a new thumbnail would be visible that stands for the Layer Mask. This robust Photoshop tool comes with Eraser and Brush adjuvants that serve to enhance the transparency of the layer or reduce the same in controlled manner. Eraser tool allows for rendering certain parts of the layer transparent by deleting the same even without the intervention of the Layer Mask. Application of Layer Mask is irreversible. This implies that adjustment at any handle is not possible without discarding the point or completely applying it to the worked upon layer.
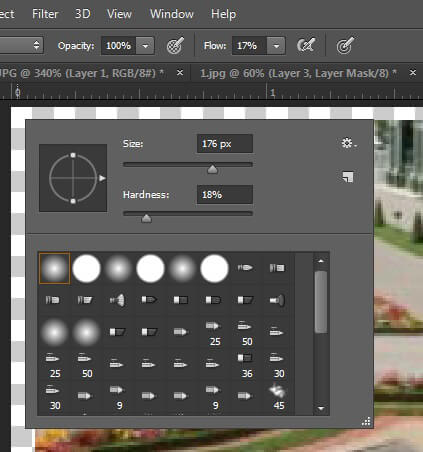
Left click on the Layer Mask thumbnail would activate it. By hitting ‘E’ on the keyboard, Eraser tool would be selected which would be used for the purpose of rendering parts of the second new layer transparent. Underneath the newly transparent layer, the first layer would merge seamlessly creating a continuum. The settings of Eraser tool has to be adjusted for making the effect of blending less visible. The Opacity, eraser size, opacity, and flow have to be set precisely for making the transition invisible to naked eyes. It is advisable that the edges and top of the layer be addressed first for allowing smooth fading into panorama. Hardness and Flow are to be set at 20%, opacity at 100%, and brush at 900px. Brush application would render regions transparent and blend with background. Selection of correct settings make out of focus blending a breeze. If you inadvertently apply mash and eraser tools to area that were meant to be in focus, it would be a blunder. You can undo the mistake by hitting ‘B’ on keyboard. Similar to erase tool, the settings and attributes of the Brush tools should be meticulously arranged.
The aforesaid steps are to be iterated for blending all correction layers with panorama layer. The new correction layers overlap each other and hence need to be blended for smooth transition. Working with Eraser tool carefully would pull off the effect.
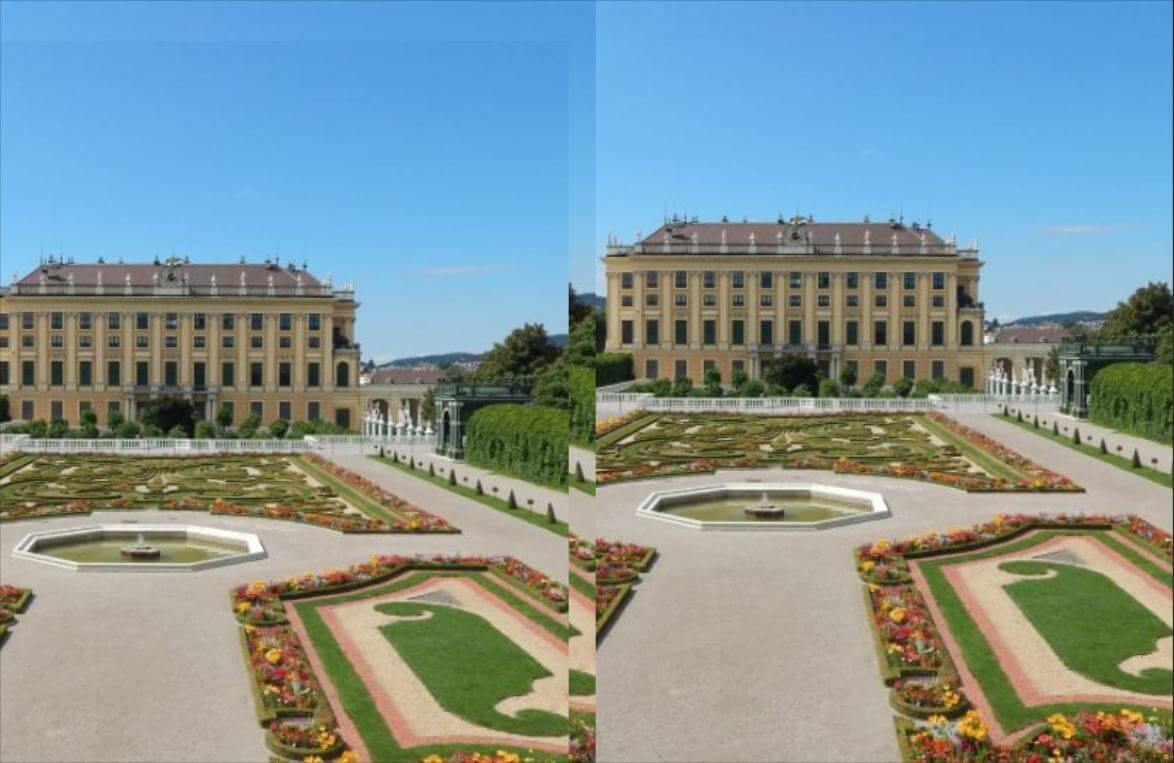
Completing the error fixing process
Error fixing has to be strategically completed without leaving any sorts of flaws unaddressed. This is a step that a typical company offering panorama photo stitching services carries out with immense care.
Wrap up by flattening the panorama through merging of the entire array of layers in a single entity. You can press Ctrl, Shift and E together to accomplish this. To achieve the needful aspect ratio, crop adequately. Now that you are done, close the file and don’t forget to click on the save button. Any mistake would foil all your efforts and you don’t want this to happen. The final panorama can be viewed in the Catalog Library in Lightroom.

Also read the blog how to create a panorama image in Lightroom, to get further details and if there are any image editing projects for which you need our expertise to be leveraged, we would be happy to help.