Visual appeal plays a vital role these days. Digital platforms are evolving, and customers are getting numerous options to choose from many. In the case of ecommerce or real estate listings, eye-catching images create a major impression on a viewer. Real estate photo editing can be a crucial factor influencing the buyer’s decision. The success of your marketing strategy depends upon a good visual representation of the real estate images. Real estate is a competitive field. A well-maintained property needs to be showcased with high-quality photos to impress your buyers.
Capturing images is the first step in the post-processing technique. However good your camera is or how skilled your photographer is, the images captured will have to go through a real estate photo retouching process. Factors affecting the photo quality include its clarity. So here, the color and exposure adjustments are necessary to make your photos presentable.
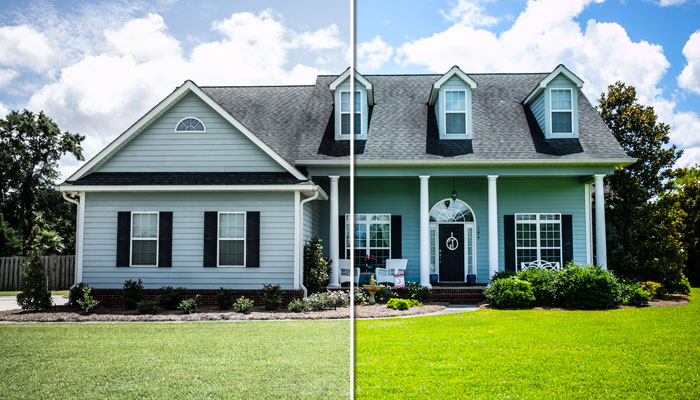
How about a Green lawn in front of the property? How important is a green lawn when you need to sell your property? Curb appeal is important; it is an affordable technique for making the whole exterior look enchanting. A lush landscape sets an expectation of what’s to come through. This can help you set the perceived value for your property. Lawn landscape is the first thing a viewer sees, and it greatly impacts sales.
With exterior photo editing, editors can create the most attractive green lawn using Photoshop tools.
By using three different methods, this article will help you replace the grass on a lawn using Photoshop software.
First Method: Consider Hue/Saturation
Outstanding real estate images play a major role in attracting your customers. Making it look perfect from the inside and outside is in the hands of the editor. Think of a real estate property with yellow or brown colored grass? How will you feel? Will you have any interest in looking at that property? No! You will think that the property is not maintained and might go for other options available.
Here comes the role of lawn replacement editing, with the help of which we can use different parameters in Photoshop, including hue and saturation.
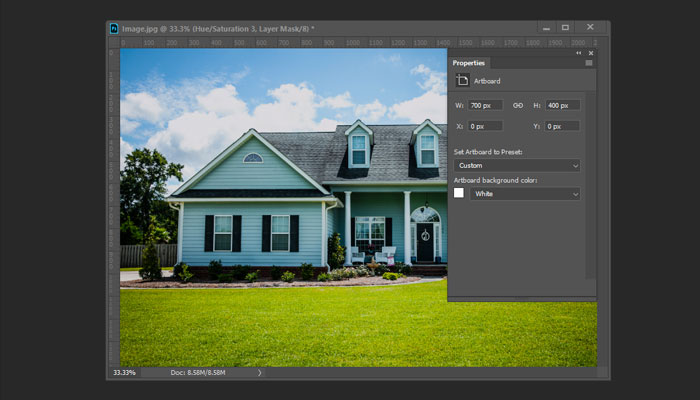
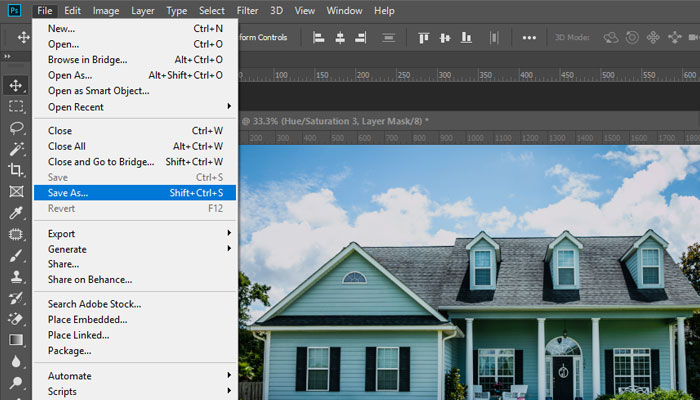
- Open your image in Photoshop and create a new layer.
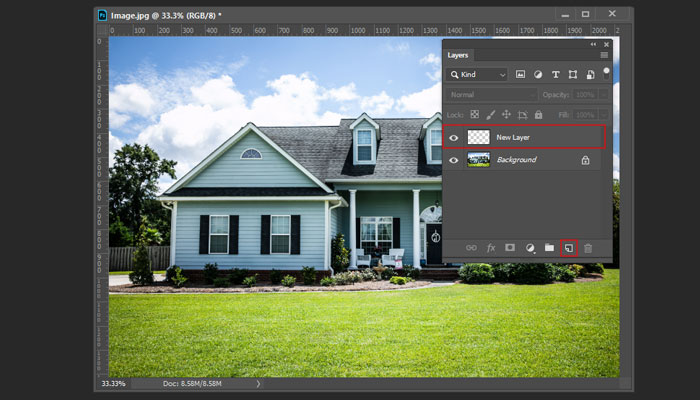
- In the right corner of the editor, you have an adjustment panel. Select that panel.
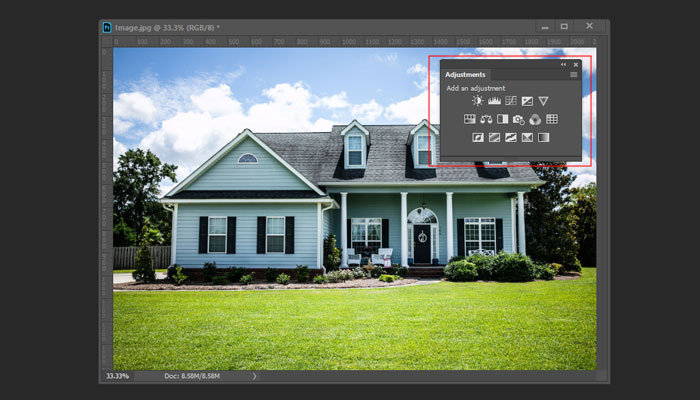
- Click on the icon of Hue/Saturation. Grass replacement editing using this method needs adjustments in intones, color brightness, and intensity. Three different parameters need to be changed.
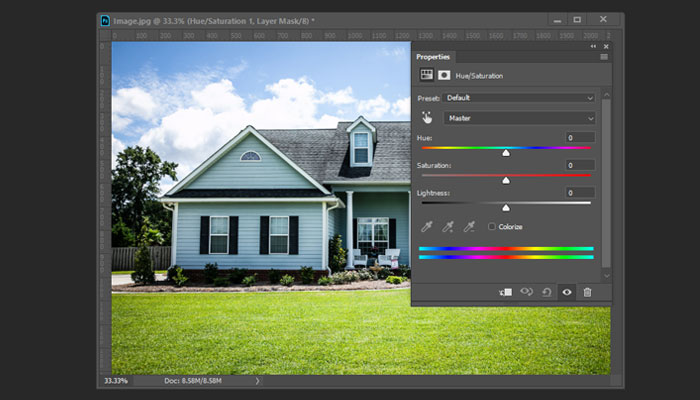
- You have to adjust the settings accordingly and choose the yellow color. Those settings will be based on how light or dark is the yellow color in your images.
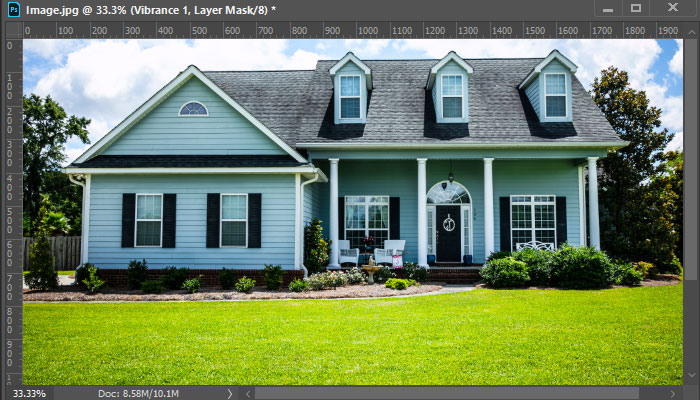
- Lastly, merge all the layers and save your work.

Don’t miss any single detail while carrying out grass replacement. The green lawn should look attractive to increase the chances of sales.
Second method: Use brushes to convert Yellow Grass to Green
Using Photoshop brushes in real estate grass change technique can help you make the photos look natural. It is a much more straightforward method, and the steps include
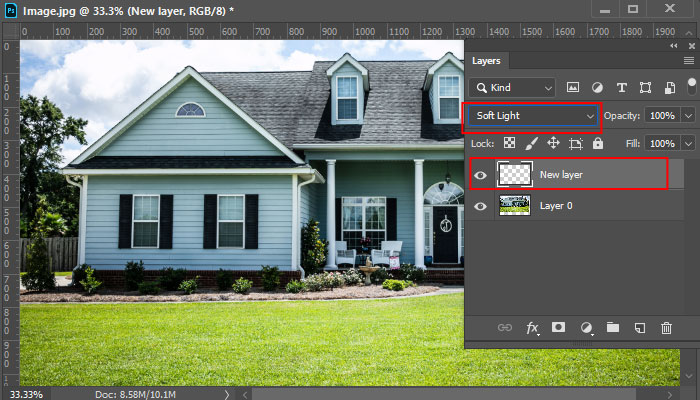
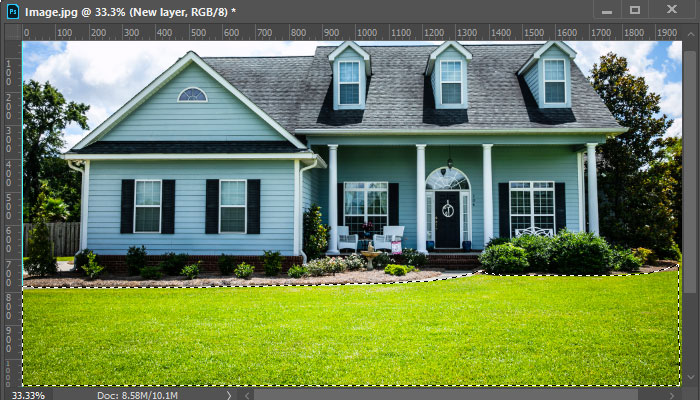
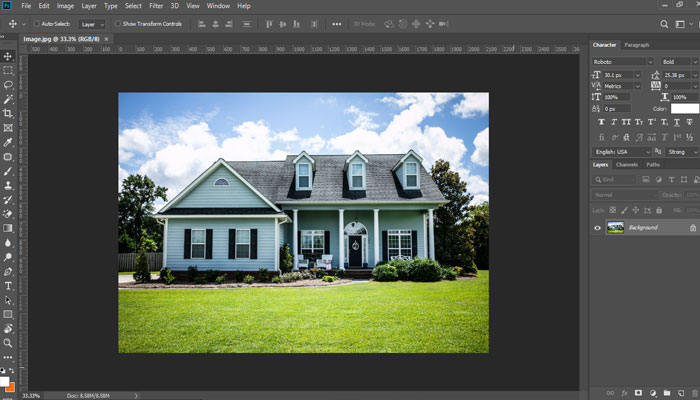
- Upload the real estate photo in Photoshop
- A new layer has to be created, and a soft light blending mode has to be chosen
- Choose the desired green tone setting, which depends upon the lighting and the existing color of the grass.
- The Brush tool is located in the standard toolbar. Select that tool
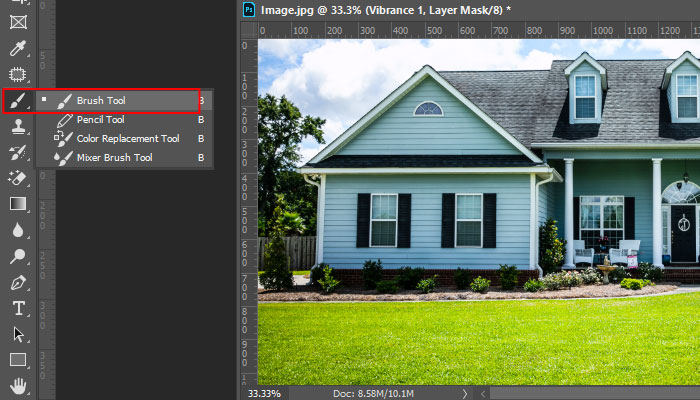
- Using the brush, you have to draw all over the area where you want to fix it. This will help apply a new color without impacting the original texture of the grass and the brightness.
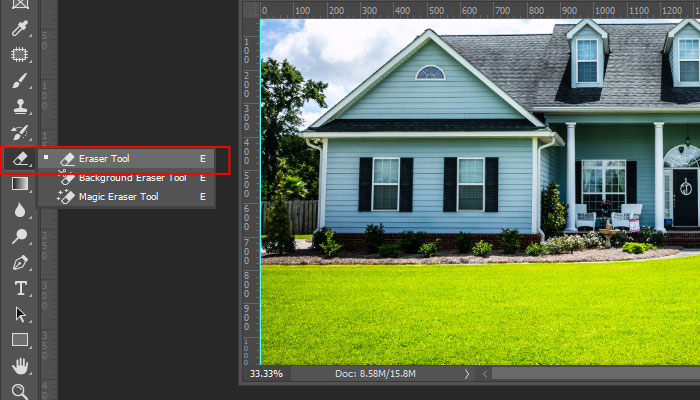
- The Eraser tool helps you to restore the damaged parts, if any. It is found in the second group of icons.
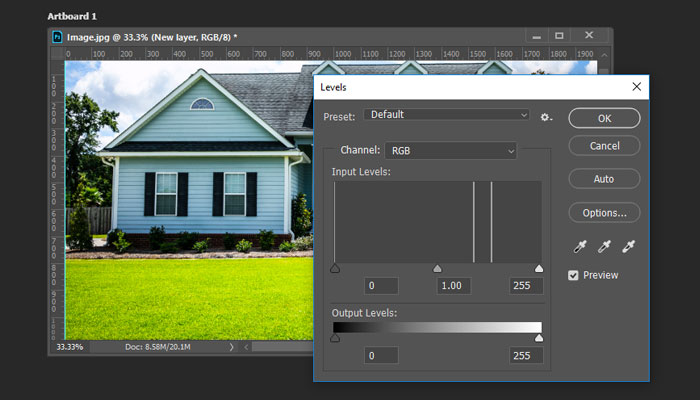
- Open up the levels on the layers panel with a single mouse click or use the combination of Ctrl+L. To make the grass layer brighter, you have to move the right control point to the left.
- To achieve a more realistic effect, adjust the opacity of the grass. Keep it around 60 to 70 percent. If you still feel that the grass still looks unrealistic, use special brushes that will allow you to fill in empty spaces and make the lawn denser.

- Merge all the layers and save.
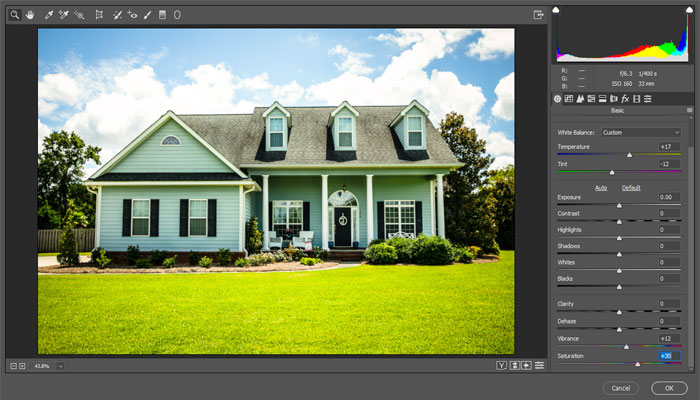
Third method: Use the magical Camera Raw Filter to make the grass greener
This is the perfect method for a newbie to create a green lawn in Photoshop for the first time. A few mouse clicks and the lawn replacement editing using Photoshop will be done.
- Upload your photo
- Click the Filter option, and get “Raw Camera Filter.”
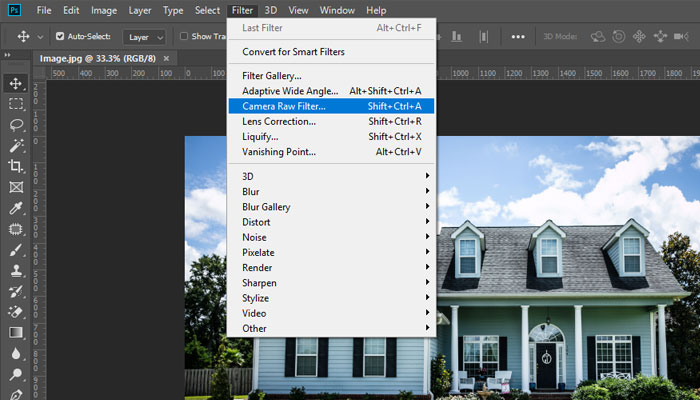
- There is a Channel Mixer to adjust the green and yellow colors in three different tabs.
Wrap up
It’s not that hard to carry out real estate photo editing. If you follow all these steps perfectly, you can realistically edit lawns. Yes, as it’s said, you need to practice. Practicing can help you bring out the best photos to impress your buyers.
But if you are a busy photographer and have no time to try out all these steps, outsourcing real estate photo editing can be beneficial for you. We have expert photo editing professionals who are talented and trained to offer affordable real estate photo editing services.