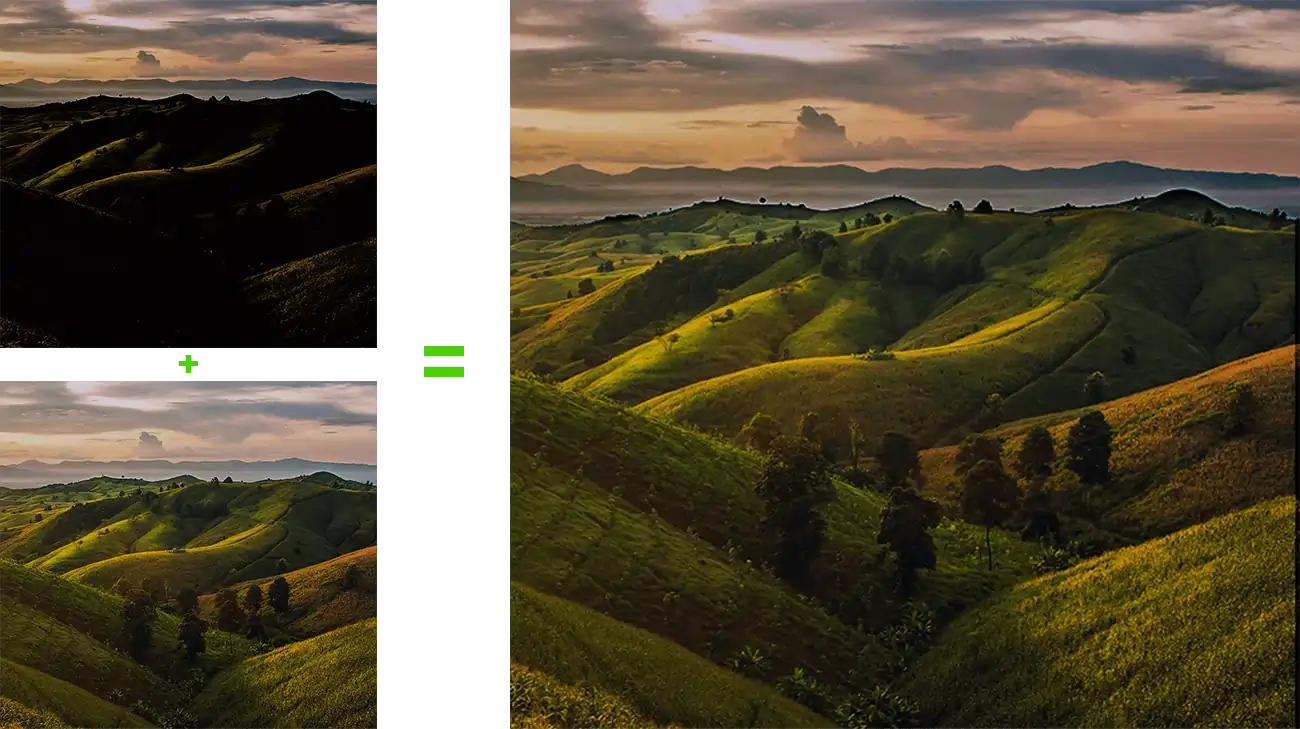
Combining two, or multiple photos together to create one single flawless photo is part of photo editing, which is required for commercial and personal users alike. However, you do not need to be an expert professional to carry out the photo merging process.
Just a few of the right kinds of Photoshop techniques can help you get a lovely collage of photos, or a remarkable landscape.
So, if you are curious enough to know the method and techniques to merge photos in Photoshop, stick with us till the end. This blog will act as a guide for any aspiring photo editor, or someone who wants to composite a series of images with their workstation at home. Let’s get rolling!
Why merge two photos together?
Getting the perfect photo isn’t easy. It’s also not so easy to capture all the good things you see with your eyes with your camera. In such cases, merging or combining two or multiple photos can only save the day!
Furthermore, there are other reasons as well for grouping multiple images together. Such as when someone blinks in a group photo, the lighting isn’t good, or there’s an unwanted shadow overlapping the face of the subject. Therefore, it is recommended for every photography professional to always take multiple photos.
Well, the reasons can be many, but the solution is one. Switch to Photoshop!
With this best photo editing tool, compositing multiple images having various visual components or double exposures is surprisingly easy. Simply put, merging images in Photoshop can be a lifesaver!
There are also HDR image blending features in Photoshop for automatically merging advanced high-dynamic range photos, but we will discuss them in another blog. Today, let’s delve deep into multiple photo blending techniques using Photoshop.
A step-by-step guide to combining images in Photoshop
If this is your first time trying your hands at image blending with Photoshop, it can be a tricky affair, but with constant practice, you can get the perfect image. Check out the steps.
Step #1: Select the number of images to merge

This is the first step whereby you choose the photos you intend to merge.
Start by selecting the same and ensure the photos are shot with the same focal length lens. If you try to combine two photos shot with different lenses (for example, one with 24 mm and the other with 50 mm), that will not allow you to merge them seamlessly. Keeping the lens perspective intact is the first thing one has to maintain.
Next up is the lighting; make sure there’s not much difference in the lighting between the two or the set of photos. Anything else will produce an artificial-looking image.
Also, ensure the resolutions of the photos are the same. You cannot merge a low-res photo with a high-res one.
Check the white balance and adjust it if necessary, making it as similar as possible in case the time and location vary between the photos.
Step #2: Now open the first photo
Open the first image you want to start with. In case you notice the primary subject of the photo varies in size, start with the one where it appears smaller.
This trick is to safeguard the quality of your photo, as increasing the photo often results in distortion. On the other hand, downsizing doesn’t result in significant quality compromise.
(If you have two photos with similar resolutions, then no need for resizing).
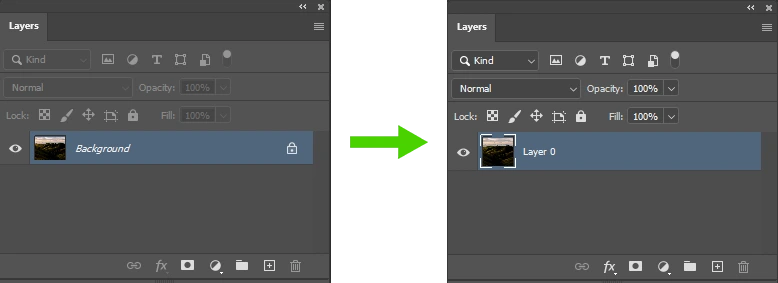
Next, select the padlock option located on the right of the layers in the “Layer Menu” and unlock the background layer.
Step #3: Now open the other photo
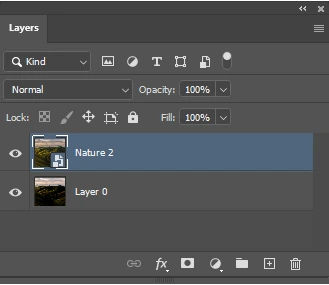
Once you are done with the first photo, select the second one from your file, drag it and bring it on top of the first to align them perfectly. Remember, this alignment is crucial and must be error-free.
Use the transform handles around the corners and the edges if you want to resize the photos. These options will come with an overlaid X symbol on the image and a toolbox that comes with it.
However, refrain from enlarging any of the photos beyond 30%, else there can be a noticeable difference in the enlargement’s clarity compared to the actual photo.
Step #4: Align or reposition the photos to match
This step is tricky. But not to worry; this guide will break down each step for you.
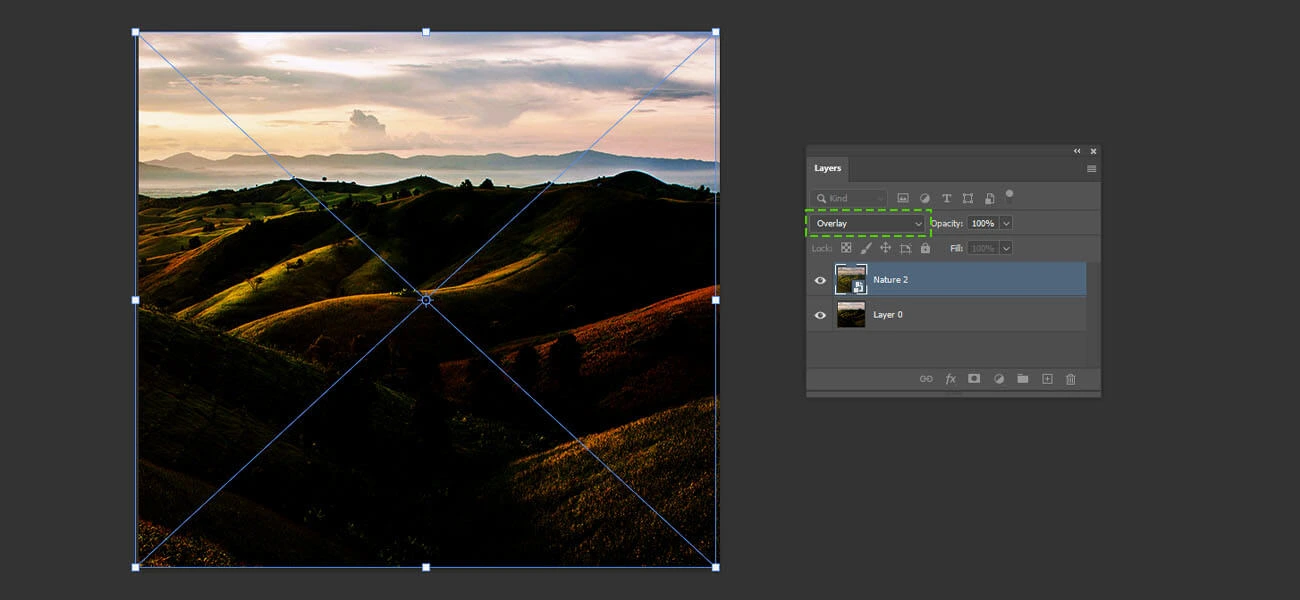
This step is about positioning the photos. First, select “Overlay” for the first image on top. Selecting this option will set the first image’s layer blend mode to overlay, letting you see the second one clearly under it. Doing this also helps to match the images with accurate precision.
Now, go to the top menu and click Edit > Free Transform (keyboard shortcuts: CTRL+T for Windows. Cmd+T for Mac) and select the Move tool. This will allow you to position the top image with all the parts of the top layer you think look good.
Here, you might want to use the resize handles to rotate, shrink, or enlarge this top layer to ensure both layers look similar.
(If the main subject or your camera position moves even a bit, it will be impossible to match the two photos flawlessly. Hence, be extremely cautious and do not move your camera or the photo’s subject).
Once you are satisfied with the placement of the photos, press “Enter”, and then change the top layer’s “Blend” mode back to “Normal” mode from “Overlays”.
Step #5: Create a “Layer Mask” and remove the unwanted parts
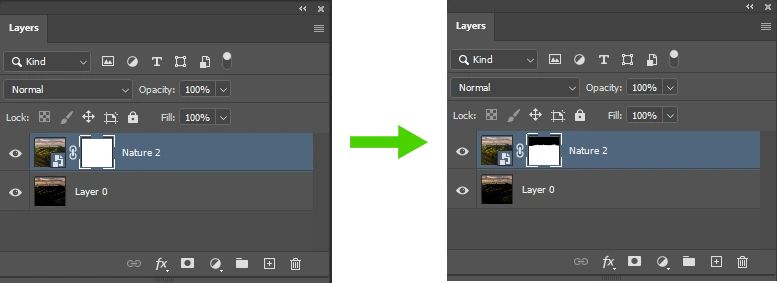
Start by selecting the top layer, select the “Add Vector Mask” icon from the bottom of the “Layers” panel and add a layer mask. Once you create the mask, you can erase the parts from the top of the image you want to get rid of.
Now click on the vector mask icon and create a white mask; this means the mask has full opacity, and most of the elements are visible now.
Then select the “Brush” tool, set the opacity to 100%, and set the color to black. Start brushing over the areas you intend to erase; begin with the areas far from the retainable parts else one faulty brush stroke can erase those.
Once you eventually start moving towards the good parts, try minimizing the brush size of your eraser tool and lowering the opacity.
(One handy tip is to use a soft brush at this stage; this will ensure the brush strokes don’t impact the desirable parts, as well as make the transition smooth).
In case you make an error and erase over a good part, simply set the color to white and lower the opacity to 0.
Step #6: Analyze the accuracy of the results

In this stage, try switching the layer visibility on and off in the Layers panel to check if anything remains to be worked on. Simply press the “\” (backslash key) to highlight the layer mask to check the accuracy of the masking or whether any part hasn’t been erased correctly.
(This is especially recommended to the first-timers who have just begun their career in photo editing, or those amateurs who want to try photo merging on Photoshop at home).
The masked part will show up in a red mask. Adjust the mask density to check the photo (or photos) under it. If any work is required, continue using the brush tool until you are satisfied with the result.
Alternatively, you may use the “Dodge and Burn” tools to lighten or darken the top layer to ensure both layers have similar skin or color tones.
Step #7: Now “Merge” both of the layers
It’s finally time! Begin with the merging process of the two or a bunch of photos you have been working with. Make sure the masking is proper and merge the layers.
Select Layer > Flatten Image from the top menu. Photoshop will give you a confirmation message box if you want to eliminate any color layer in between and combine the images. Once you select yes, any hidden layers will be discarded if you have them.
Once you are satisfied with the combined photo, save the Photoshop file, File > Save.
Finally, you get a photo that is perfect from every aspect!
Apart from the “Flatten Image” method, there are a few more ways of doing it, though. Let’s discuss them also to make this guide complete.
Try using the option “Merge Visible” (keyboard shortcuts: Ctrl + Shift + E for Windows. Cmd + Shift + E for mac), and get all the visible layers blended.
However, remember in this alternative method, the user won’t be asked to discard any hidden layer, which might be a little problematic later on if they want to edit the photo further.
Along with this option, there’s also a hidden keyboard command or shortcut – Ctrl + Alt + Shift + E for Windows, or Cmd + Option + Shift + E for mac.
This shortcut command will enable Photoshop to merge all the visible layers and create a separate layer with the combined photos.
Over to you now!
There you have it! A complete step-by-step guide to merging photos in Photoshop. You can have a bucketful of reasons to try this superb photo editing technique while working for clients, mainly in eCommerce, fashion and apparel, wedding photo editing projects, etc. Because in most of these photoshoots, the subject either blinks accidentally, or the exposure or lighting doesn’t seem perfect, and so on.
Besides, for architectural and real estate photo processing too, professional photo editors leverage this editing technique to capture the actual essence of the property. With the steps mentioned above, feel free to experiment at your workstation and hone your skills. Hopefully, you will find them helpful and practical.
In case you need more expert help with advanced photo post processing services or find it too challenging to do it all by yourself, professional photo editing companies are there to help you out.
Usually, these third-party agencies have highly trained and skilled photo retouchers who are thorough with such photo and exposure blending methods in Photoshop and other advanced photo editing software and can do it even more flawlessly.
If you like this blog on blending photos, share it with your acquaintances, and keep visiting our website for all new articles!