Image resizing is a common photo editing need. Not all images we click will be the exact size we want, which is why we resize. With the free Adobe Photoshop version being accessible to all, almost every other person will be using it to resize their image. But does everyone know how resizing works?
When you resize an image, it changes the pixel information. The same also happens when you enlarge or crop your photos, and the quality gets lost. However, you can easily avoid this if you are aware of the right technique and keep a few things in mind.
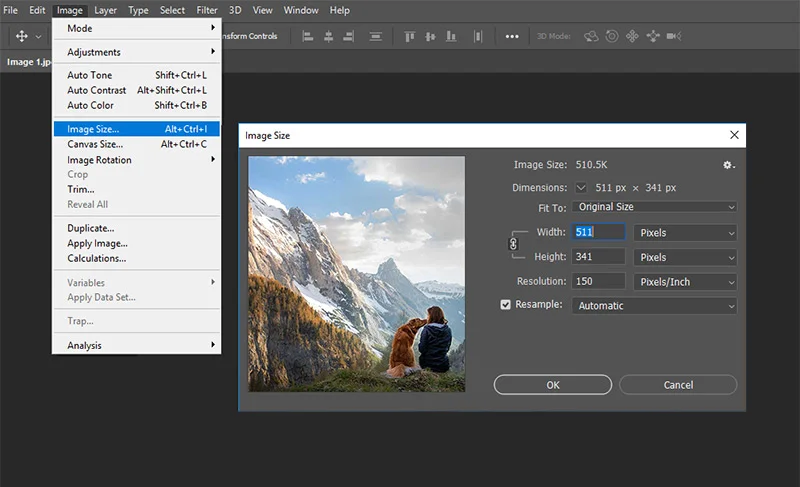
An easy way to increase or decrease the image size in Photoshop is to navigate to Image > Image Size and enter the desired height and width in the dialog box.
In this article, we’ll guide you with a step-by-step process on how to resize an image in Photoshop while losing quality so that you can learn how professionals do it.
Key Summary
To resize an image in Photoshop, press Ctrl+Alt+I for Windows (Cmd+Option+I for Mac). It will open the Image Size dialog box where you can enter the new dimensions for the canvas/image. Enable Resample, and click OK to resize.
The Free Transform option (Ctrl+T / Cmd+T) also lets you change the image/layer dimensions, but it allows more actions, like scaling, rotation, skewing, and warping.
Steps for Image Resizing in Photoshop without losing quality
Follow the below steps to resize the image while preserving its quality.
Step 1:

Open the desired image in Photoshop.
Step 2:
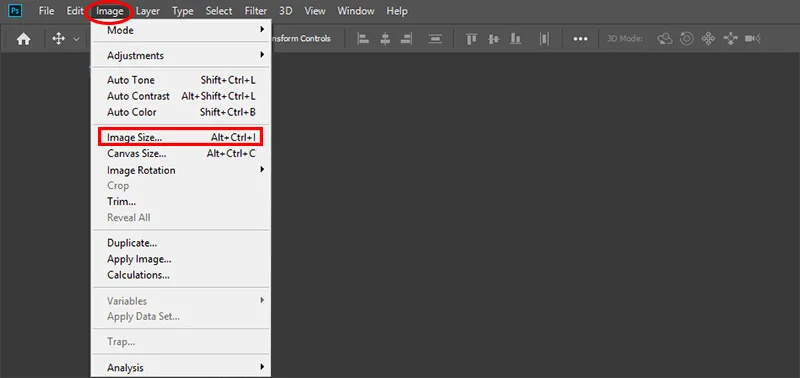
Go to the top of the window and select Image.
Step 3:

Now, select Image Size. A new window will appear.
Step 4:

Measure the height and width of your picture and highlight the link icon to preserve the proportions. It will adjust the height automatically when you are changing the width or vice versa.
Step 5:
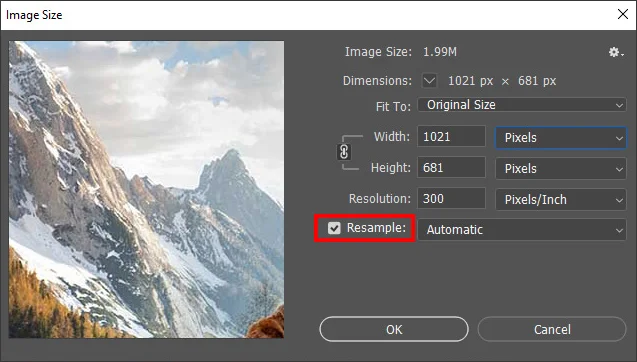
Choose Resample for changing the pixel number. This will change your image size.
Step 6:
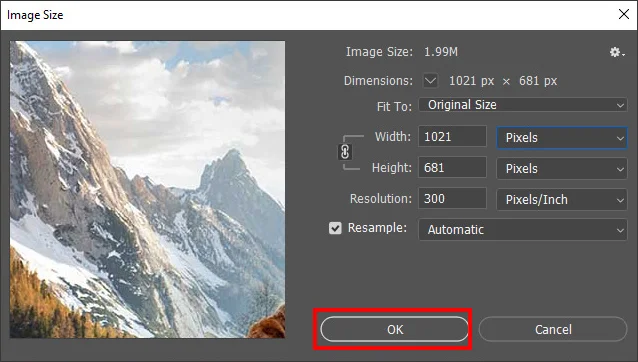
Now, click OK.
Steps for Resizing Using Free Transform in Photoshop
Free Transform, in Photoshop, allows you to resize an image as well as perform other actions like scaling, rotation, skewing, and warping.
Step 1:
In the Layers panel, select the layer you want to resize.
Step 2:
Go to the menu bar and click on Edit and then on Free Transform. You can also use the shortcut Ctrl+T (Windows) or Command+T (Mac) to activate Free Transform.
Step 3:
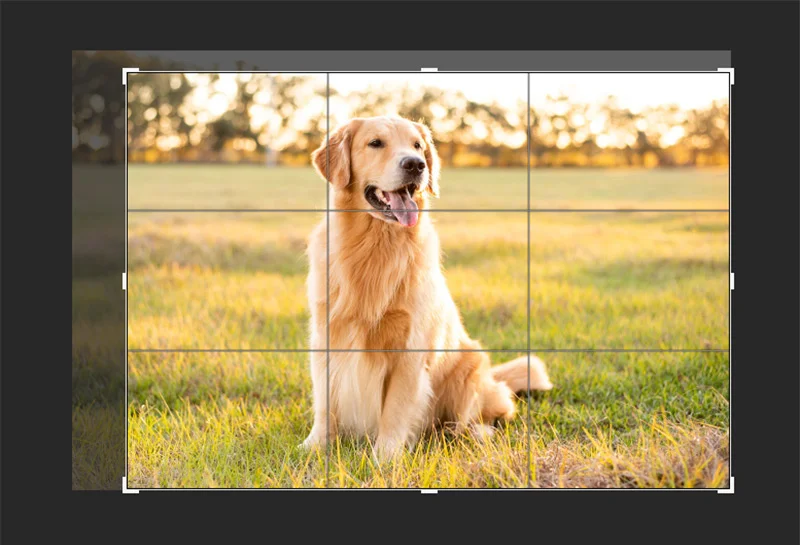
A blue bounding box with handles (small squares) will appear around the selected layer for which you have activated Free Transform. The handles will appear at the corners, edges, and center of the layer.
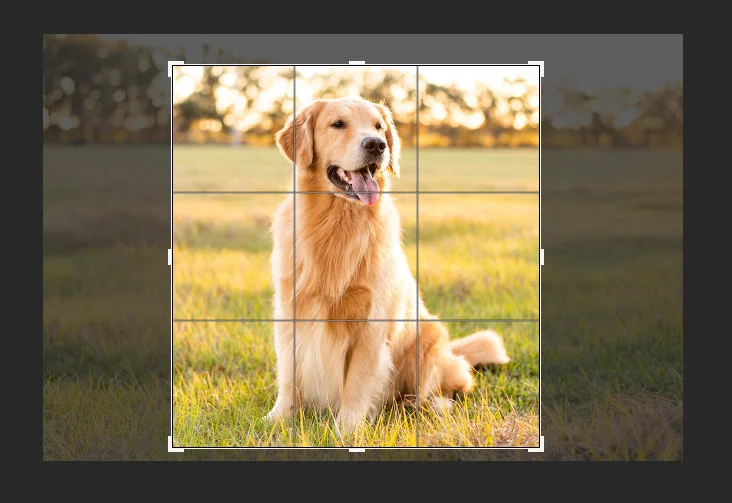
Click and drag any corner handle to increase/decrease the layer size. If you want to maintain the same proportions, hold down the Shift key while you click and drag the handles.
To resize the layer in one dimension, click and drag the handles at any of the edges.
Step 4:
Hit Enter/Return to confirm the resizing changes, and the blue box with the handles will disappear.
Steps for Image Cropping or Straightening in Photoshop
This was just basic image resizing. However, if you wish to go a bit more advanced and try out image cropping or straightening, then you can follow the below steps.
Step 1:
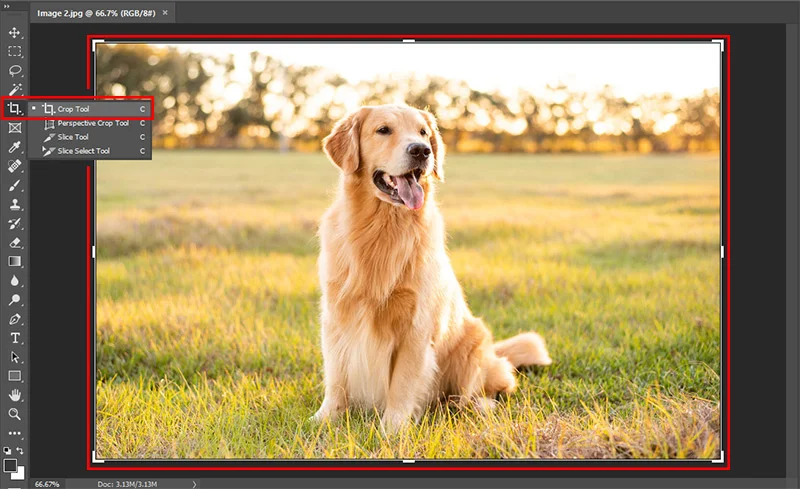
Choose the Crop Tool from the Tools panel. A crop border will appear.
Step 2:
Drag any corner or edge of the crop border for adjusting its size.
Step 3:
Now, position your image by dragging it inside the crop border.
Step 4:
For image straightening or rotation, try dragging the outside corner of the crop border.
Step 5:
Go to the Options bar and click the check mark. Otherwise, you can also press Enter for Windows or Return for Mac to complete the cropping.
Additionally, you can also learn how to set the resolution and expand the canvas in Photoshop.
These might come in handy when you’re resizing your pictures. Continue reading to learn how to do it.
Steps for Setting the Image Resolution in Photoshop
Step 1:
Select Image and then, Image Size. A dialog box will appear.
Step 2:
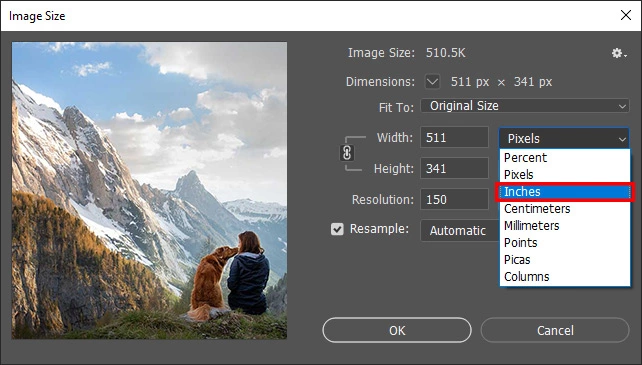
Set the height and width to desired measurements i.e inch, pixel, centimeter, millimeter etc. for printing purposes.
Step 3:
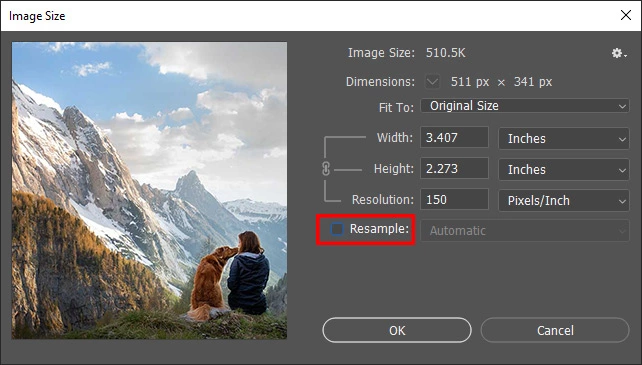
Deselect the Resample. Doing this will help you retain the original pixel number.
Step 4:
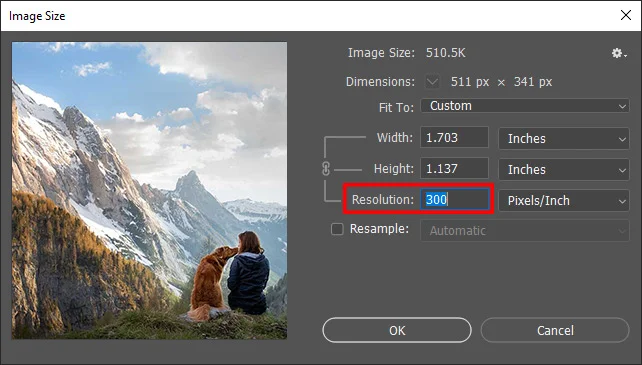
Go to the Resolution field and set the number of pixels per inch(PPI) as per your needs. For example, if you’re printing on a desktop inkjet printer, you can set it to 300 DPI. Once done, the number of inches in the height or width field will change.
Step 5:
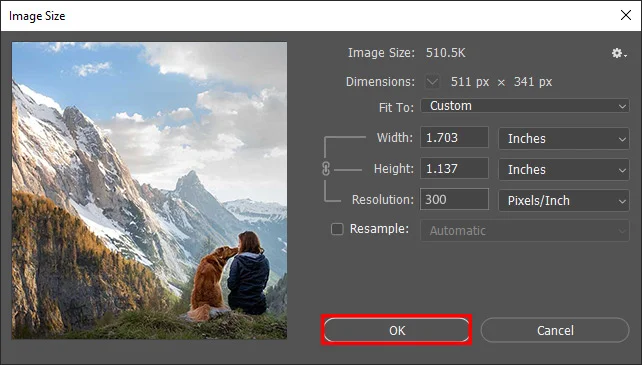
Now, click OK.
Steps for Expanding the Canvas in Photoshop
Step 1:
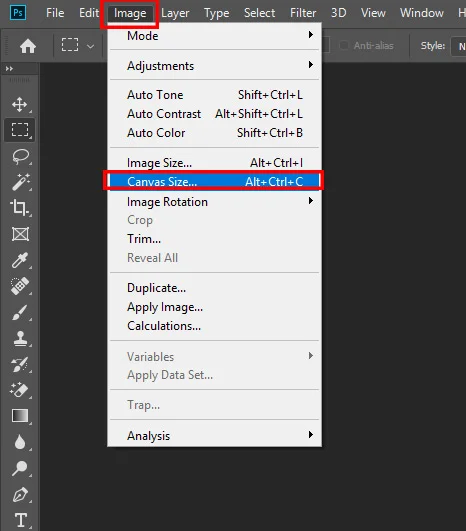
Select Image. Now, choose Canvas Size.
Step 2:
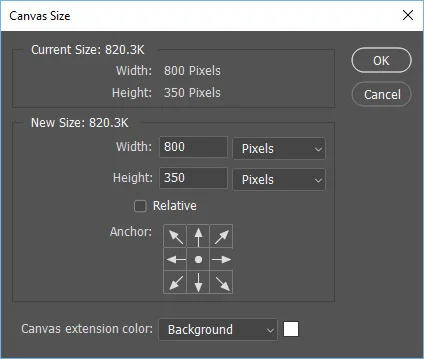
Enter the needed amount of height and width for adding the canvas.
Step 3:
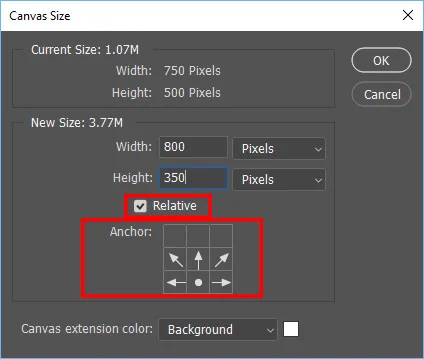
Choose Relative and then, select anchor point. It will be available in the canvas diagram. Your canvas will be added where the arrow points.
Step 4:
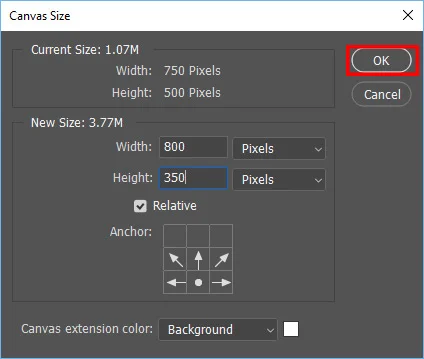
Now, press OK.
Tips and Tricks for Image Resizing in Photoshop
- Always keep copies of your original photograph and try it out on them first. So, in case a particular image gets destroyed in the process, the original image will still be safe.
- Magnification is the key. To determine the true quality of a picture, try viewing it at 100%.
- If you usually scale images to a particular size, then you can use resize presets.
- If you’re wondering how to make an image bigger in Photoshop and still retain the quality, then third-party plugins can help. You can use plugins like OnOne’s perfect resize, Alien Skin Blow up, etc.
- Instead of resizing the image once, try doing it twice. The first resizing can be done for photos, while the other one can be done for graphics. Later, you can combine both to get a clearer image.
- For batch photo editing, try using Image Processor Pro in Photoshop. Just go to the File menu, click on Automate, and then Image Processor Pro.
- While measuring the height and width of your picture during resizing, you can measure it in pixels if you’re using it online. However, if you’re planning to use it for printing, then measure it in inches or centimeters.
- In the Auto Resolution option, select the desired dimensions and export the file. This option allows you to export the file without affecting the resolution.
We hope that the above step-by-step guide helped you learn how to resize an image in Photoshop without losing quality. Since Photoshop is a popular photo editing software, knowing how to perform basic edits like these can be useful in the long run. So, practice and also make use of other photo editing tips to improve your skills as a photo editor.
If you still think it’s a bit of a hassle, then you can hire a reputed photo editing services company that offers Photoshop services.