The outcomes of modern-day photography are actually their refined versions that are generated through basic or high-end photo editing tips and techniques. Today’s photographers use diverse editing techniques to add beauty to their photos and to modify them in the way they want. These adjustments can be made either through on-site camera adjustments or through photo post-processing techniques.
This article would guide beginners with top 14 professional photo editing tips that would allow them to create awe-inspiring image versions. But what new photographers should know is that they should experiment with multiple image refinement ideas and play with concepts in order to find out what works best. If you are a new photographer, you may either go for a DIY approach or you may choose to do business with a professional photo editing company to handle this task on your behalf.
Here are the key areas that you may want to pay special attention to after you done with your photo culling process.
-
Exposure Corrections
Exposure is defined as the volume of light that touches the image sensor or the film. You need to manipulate exposure in an appropriate manner in order to get an image that would serve your purpose or support further refinement efforts. Here are three major exposure components that you may want to check and refine at the time of photo editing process:
- ISO: This denotes the camera’s sensitivity to light. Lower ISO means darker image and vice versa.
- Aperture: Aperture is the hole that allows for passage of light. Large apertures produce a small depth of field and the reverse holds good as well.
- Shutter Speed: This is the speed of the shutter at which light enters through it. Slower speed means the entry of more light through it. When you modify these components, you can get image versions of varying color, focus, saturation, clarity, depth of field, etc. This would have a tremendous impact on image quality.
-
Address Low Light Issues
Taking pictures in low light leads to undesired photographic outcomes. However, major family events as well as public events such as art shows, sporting events, etc., are organized during the late evening. So, photographers should take proper initiatives to click quality photos during these situations.
Here’s how they can address the low-light conditions:
- They should allow more amount of light to get inside, so select a larger aperture.
- They can get a vibrant image by increasing the ISO.
- They can minimize the motion blur by reducing the shutter speed. The image may appear a bit grainy, but this can be fixed with appropriate post-processing techniques. For example, if you are using Photoshop for editing pictures, the “Reduce Noise” tool under the Filter option can be used to get rid of the ‘grainy’ effect in an effective manner. New photographers should avoid experimenting with flash because it might lead to the generation of overexposed images. They can experiment with indirect light if they have off-camera flash, but they should leave this option if they are in doubt.
-
Address Low Resolution Issues
The ‘best’ resolution for any photo is defined by the way a photographer plans to use an image. For example, printed photo books demand the use of high-resolution images since they look clearer, finer, and sharper.
Photographers can click photos at high resolution and then scale the resolution down based on the requirement. This applies to images appearing in printed copies; online images form an exception to this rule.
Online images always have 72 pixels-per-inch (PPI) as this reduces the probability of long load-times and at the same time, makes images look good decent. Notably, online images appeared blurred when they are printed. So, it is a good idea to click pictures in high resolution and then scale them down.
Advanced photo editing software comes equipped with the capability to upscale image resolution. The Resample Image tool of Photoshop can be used to increase PPI. However, this is a less-than-optimum solution and the images won’t appear as clean as they might have appeared if they were shot at a high resolution.
-
Image Resizing
Modern photo editing software allows for easy image resizing. Photoshop, for example, features “Image Size” under Image tab. It supports the modification of pixel dimensions, resolution, and document size. One might experiment with framing during the image resizing process. For instance, while shrinking an image, re-centering of the subject and removing some parts out of the frame might be necessary. On the other hand, while enlarging an image, the subject can be shifted a bit to create negative space.
-
Enhance Focus
It is a good idea to switch off auto-focus and experiment with manual focus. While this may sound difficult, your effort will be justified. Today’s high-end cameras come equipped with sophisticated autofocus, but you may still find that your camera is searching for the object of focus. With manual focus, you are more empowered to compose a shot in your own way.
Consider using single autofocus. It would let your camera know that you want to focus on a single subject. If your target is active, pair up the continuous autofocus feature with the burst mode.
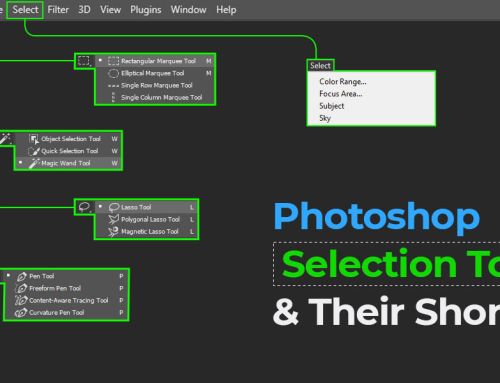
In Photoshop, you will find the Focus Area option, using which you can make the subjects stand out. For defocusing the background to a greater extent, try using the Lens Blur option.
-
Reduce Motion Blur
Lock the camera down to decrease motion blur. All you need to do is to use a tripod and allow technology to do its work. This is more of a “work smart” strategy than a “work hard” technique.
At times, you may find tripods to be less effective. In that case, you may need to exercise creativity during such situations. You can use fence posts or benches as makeshift tripods or you may use yourself as a tripod by resting your arms on top of a desk or by inclining against a wall. Also, try increasing the shutter speed because a faster shutter speed registers lesser movement. If you use a 100 mm lens, the shutter speed should be 1/100 of a second. You can reduce motion blur to a greater extent during the photo editing post-processing phase.
In Photoshop, you would find the option for Shake Reduction under Filter tab. You can add some dynamism to the image by selecting Motion Blur to induce a motion blur effect. If you can’t do it yourself, you may consider paying for one of the reputed photo editing services available in the market.
-
Frame the Subject
Many photographers just choose to center the subject and leave it at that point. While this is a conventional approach, it does not make an image look interesting. When you frame the subject, you will find a better way of self-expression. You can use the Golden Ratio to add elegance to your composition. Imagine how a Fibonacci Spiral can impact the viewers’ perceptions! You can also find ways to frame the shot inside another frame. Typical examples of such shots are photos that are clicked through a window, photos of a child shot through playground apparatus, or the photo of an individual who’s surrounded by trees at a biking park. During the editing process, you can modify framing by rotating it, cropping it, or pulling it with the mouse. It’s as easy as this!
-
Enhance Image Color
It is quite difficult to use color sliders given the fact that there are so many options that can lead to so many possibilities. There may be times when the changes would feel dramatic and the palette that you intend to create may turn out to be difficult to achieve. You can handle these difficulties by determining the effect that you want to achieve. Are you to looking to make color changes so as to be able to achieve surrealism? Do you want a certain color to make the strongest impact compared to other colors? In that case, you should work on enhancing the contrast. If you are looking to generate a particular emotion, you should use the warmth slider to instill a kind of a vintage effect. You must make sure to pay attention to every color in an image. For example, an image showcasing a forest may focus on hues of yellows, reds, and oranges, but you should check if the blue color of the sky is complementing these vibrant colors well. You may want to use the blue slider in order to enhance the color of the sky. What you should remember is that the choice of color is your freedom of expression and that there’s nothing called right or wrong.
-
Perform White Balance
White balance is all about levels of color and not about exposures. If an image has an unpleasant color tone, you can rectify it by adjusting the white balance. You should know that JPG files capture very less data compared to RAW files. With these files, you cannot perform white balance adjustment to a greater degree. Major photo editing programs would allow you to choose preset modes such as ‘cloudy’, ‘flash’, and ‘daylight’. This would let you set a lighting grade for the image during the time it was clicked. Many programs have ‘tint’ and ‘temperature’ sliders that you can experiment with in order to improve the overall image lighting.
-
Adjust the Contrast
Contrast refers to a range of dark to light shades. High level of contrast can make all tones in an image appear too dark or too light. If the contrast is very low, the image will appear quite flat and no element in it will appear prominent. So an image with a mid-level contrast is ideal. You can modify the contrast in order to achieve your desired level of exposure. You can use the photo histogram tool to adjust the exposure easily. You will find this on the screen when you use major photo editing programs. An image that is exposed well will have most of the tones grouped at the center. A histogram having a spike at its left indicates the presence of a lot of dark areas in an image. On the other hand, a spike to the right side indicates light tones. The histogram will prove to be a very useful tool if you start using it regularly and get familiar with it.
-
Adjust Sharpness
With sharpening, you will get a crisper image. You will find several sharpening tools in many software. The sharpness is measure on a 0-100 scale. You can begin the process ay 50 percent and then scale up or scale down as per requirement. It is a good idea to experiment with multiple sharpening tools. For instance, you can try out the ‘structure’ tool that can make object edges appear sharper in an image. Sharpening elements to a high degree is not required if you are using an image over social media. On the other hand, this will really give results if you want the image to be printed.
-
Crop and Clean Image
It is a good idea to ensure that the horizon is horizontal when you click a photo. If this is not possible, you can opt for image straightening. Image cropping will allow you to reposition the subject or to remove unwanted elements. You can clean image by using the spot healing and clone stamping tools.
-
Select best software for editing
Before you start working on images, you should consider certain critical factors to ensure that you have a smooth and efficient editing journey and that you get desired outcomes. These considerations would typically include the choice of photo editing programs, some of which are open-source, free options while some are expensive programs that professionals can use for their projects. Certain advanced photo editing programs are cloud-based and run on a monthly subscription-based model while others can be accessed in return for a one-time price.
With cloud-based programs, you will be able to use the latest features as such programs get updated on a timely basis. You can even use the cloud as storage; however, this would invite additional charges. Apps of such photo editing programs are available on major mobile devices so you can edit images anytime, anywhere. Notably, you should have online connectivity to use these apps optimally. When it comes to budget, the cost of buying a photo editing program will be low compared to the price that you may have to pay for a cloud-based program.
Another key parameter that you should be aware of while performing photo editing is the concept of destructive and non-destructive photo editing. There are certain photo editing programs that are designed to conserve the original image data. This is called non-destructive editing. There are other programs that support the saving of edited files rather than the original images. This is referred to as destructive editing. You may not want to use these programs because you will definitely want to refer to the original image if you make some mistakes. So, you should choose programs that would let you create several versions of the original images.
Final Thoughts
Image importing and sorting is another key consideration. Digital photography is awesome because it lets you take several shots in your attempt to get some really wonderful outcomes. So you should take time to decide on the images that you would wish to edit once you import images to your computer and get them organized systematically.
Photographs get a livelier outlook when you get them edited by professional editors. There are several reputed photo editing companies out there and you may want to compare their packages and pricing in order to be able to find your most suitable partner.
Christa Elrod 


Christa Elrod serves as a senior graphic designer at ProGlobalBusinessSolutions. She is a creative designer with robust skills in typography, UI/UX designs, printing designs, video post-production, and 3D designs. Possessing years of experience across diverse industries, Christa loves to educate fellow designers with her experience and domain knowledge.