We have brought forth a tutorial that would guide you and other new photo editors on how to change the background color in Photoshop. In this article, we would show how you can use certain Photoshop tools in order to change the background color of an image or to make an image transparent. One way to change image background is to apply the selection technique, which is also referred to as the clipping path technique.
But before we proceed further, let’s discuss why background removal is so important. Images with white backgrounds are primarily used on Ecommerce platforms to ensure maximum visibility of the actual subject. Product images having backgrounds often distract the attention of the customers who may fail to observe the actual product that is being sold. This may translate into low sales conversion.
Method 1: Change background color in Photoshop using Quick Selection Tool
Select a photo that you should be working on. Let’s use this simple photo having an ordinary background as our learning sample:

This image is characterized by a high level of contrast and this would make the background removal process easier.
Use the Quick Selection tool to sample an object. Notably, the tool can interpret object edges and would help you to select along the defined edges of the object, which are clearly visible in the image.
The Quick Selection feature is better than the Magic Wand tool because it comes equipped with an inbuilt edge detection capability. This is useful when specific portions of the image need to be selected. Using this tool, you can easily select as well as mask specific parts of a photo, which means that you can change one portion of an image while keeping the rest of the portions as is. This is your best option if you need a product to be showcased in diverse settings against various backgrounds and when you need to eliminate a background completely, which is discussed in this article.
Step 1: Creating a new duplicate layer
Begin by creating a fresh layer by selecting ‘Duplicate Layer’ under the ‘Layer’ option.

Look at the Layer toolbar located on the right portion at the lower side.

Step 2: Switch off the visibility of the original background.
Switch off the actual background to prevent it from getting viewed and ensure that you select a fresh layer.
Step 3: Click on the Quick Selection tool.
Click on the Quick Selection feature and select the Select and Mask option on the toolbar lying at the top.

The Mask window and the Select feature get displayed.

Just observe how the toolbar at the left side gets modified into masking tools. We are going to point out the tools while moving through the tutorial.

The panel at the right side now gets transformed into Properties section.
Step 4: Time to apply the brush tool
Ensure that you select Quick Selection tool in the toolbar to the left. Brush over the object that you wish to retain. In this example, the subject is the watch.
With this tool, you will get very good results. However, some portions of the subject are yet to be selected.

Step 5: Now select the rest of the areas that were not selected before.
Go on using Quick Selection tool to sample the rest of the unsampled portions.
Take a look at the right-hand panel and check the drop-down list in the View mode.

You can experiment with a number of view modes, which would let you have a varied perspective on the sampled portion. In this example, the Marching Ants feature may be familiar to you.

With the Overlay mode of view, the unselected portion of the photo gets masked. In this example, the background is the unselected portion. This is a second way for Photoshop to let you take a note of the selected as well as the unselected portions.

Since this image has a high degree of contrast, you will not find it difficult to sample the subject easily and promptly. When you need to work on an image that has a lesser degree of contrast, you need to first click on Refine Edge Brush feature in order to touch those areas that should be sampled.

Make use of Global Refinements feature located in Properties toolbar in order to refine your selection to a high degree. At this place, you can change sliders into several options including feather, smooth, or contrast.

You can sample the subject by opting for Quick Selection feature in the same way what you did before. However, now you should click on Select Subject option found in the toolbar at the top.

It would generate quality outcomes when the image has a high contrast.
If you don’t feel happy with the outcome, you should check out the 2019 November Adobe Photoshop edition, which features the Object Selection feature.
Useful Article:
Method 2: Change background color in Photoshop using Object Selection Tool
This feature would allow you to sample an object or a portion of that object in a photo. Examples of such objects are pets, cars, people, furniture, clothes, etc.

Start by drawing a rectangular section surrounding the object. This tool would select the object within the specified region automatically.
This tool can be used efficiently on specified objects compared to regions that have no contrast.
Step 1: Sample the subject.
Sketch a rectangle around the subject.

The tool for Object Selection performs a very good object selection job.

At this point, we have selected the image subject and are now happy with the outcome. In the following stage, your job is to alter the background color to white.
Step 2: Turn the selection upside down.
When you select the subject, overturn the selection in order to select the background.
Step 3: Go to the inverse menu and select it.
Opt for Inverse menu feature under the Select Menu option.

You have now selected the background; running ants are now visible along the boundary of the image.

Step 4: Use the Delete key.
The background will get removed as soon as you choose Delete. The disappearance of background gets represented by the checkerboard outline.
Step 5: Activate the color picker feature.
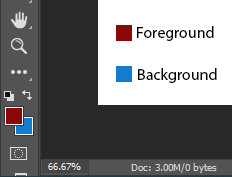
Go to the left portion of the toolbar and select the foreground color.

Step 6: Color Selection
The color of the foreground should be ideally white. The RGB numbers are 255,255,255 for white.
Step 7: Brush Selection
When you ensure that the white is the foreground color, you should select a large brush.
Step 8: Start the brushing operation.
Apply the brushing function on the image for altering the background color to white.

Step 9: Choose deselect option
Go to Select option and then click on Deselect option when you are done.

Now you have got an image having white background.
Pro tip to change background color in Photoshop using shortcut
If you’d like to use a foreground color for the layer, on Windows, press “Alt + Backspace”, and on Mac, press “Option + Delete”. To use the background color, use the “Ctrl + Backspace” keys (Windows) and “⌘ Command + Delete” keys (Mac).
To conclude
What you should note is that there is no single method to execute a photo editing work in Photoshop. This means that that is more than one way how you can handle a particular activity. So anyone searching for “Photoshop change background color to white” should know that Photoshop has numerous tools that perform diverse functions in diverse ways so as to generate similar outcomes often. Expert image editors have in-depth knowledge of how they can use Photoshop’s shortcut keys to change image background color, which allow them to generate extraordinary outcomes within a quick turnaround time. They even make photos appear realistic through an finest use of the Liquify tool as well as the Drop Shadow tool. Once they get clear specifications from their clients, they can make the most out of Adobe Photoshop Elements 2020 to generate outcomes that would serve specific business needs.