Photoshop commands the respect of creative artists worldwide due to the rich repertoire of tools it offers for performing literally any type of enhancement, retouching or tweaking. Working with the background of the images is equally easy.
With Photoshop, you can easily accomplish following image backdrop related functions
- Modify the image background or make the background white
- Crop the subject seamlessly from an image and put next to the same against a new background
- Removing the image background
Why do you need to work with an image background?
Often, we come across difficulties in capturing the perfect shot with our camera or smartphone. The spontaneity of the situation gets ruffled due to distractions or distortions in the background which have to be rectified to heighten the aesthetic appeal of the picture. Sometimes, you need to segregate the image’s subject from the backdrop to offer it a distinctive, attention-grabbing feel. The isolated image may be needed for displaying on banners of your sites or for preparing various digital promotional campaigns. Manipulating the image background to give importance to the subject can prove to be a terrifying task even for professional photographers. You can extract a subject from the background impeccably with the help of Photoshop’s quick selection tool.
What is Quick Selection Tool?
Quick selection tool is one of the many selection tools available in Photoshop used for selecting areas with similar color and tone in the photos. It shares a bit resemblance to the Magic Wand Tool in Photoshop but overcomes its limited abilities.
Aside from similar tones and colors, it can also look out for similar textures in the photograph. The tool is more like a brush not like the Magic Wand, which has a click-on feature. So, with Quick Selection Tool, you can easily select the areas by painting the brush over the picture.
Besides, it also possesses an auto-detection feature. It means Photoshop can automatically detect and select the edges when you select an area. It works best for pictures having well-defined and high-contrast edges.
Using Photoshop’s Quick Selection Tool
Get ready with the image you want to start with photo editing process. The image can be spontaneous with a hazy backdrop with lots of noise. Extraction of an image from a still background may prove less challenging compared to a busy one. Often creative artists face difficulty in working with such a scenario as a selection tool needs to be skillfully wielded.
In this article, you can see how to use “Quick Selection Tool in Photoshop” for various purposes.
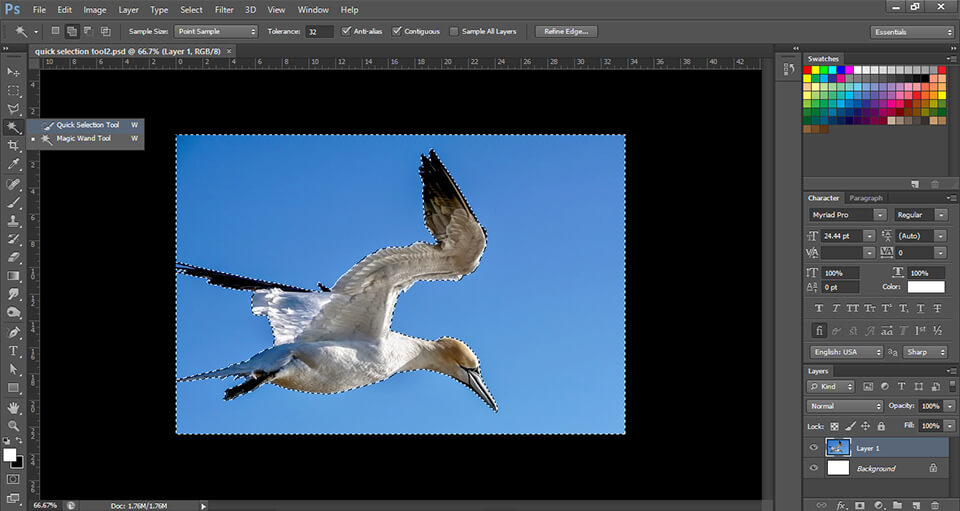
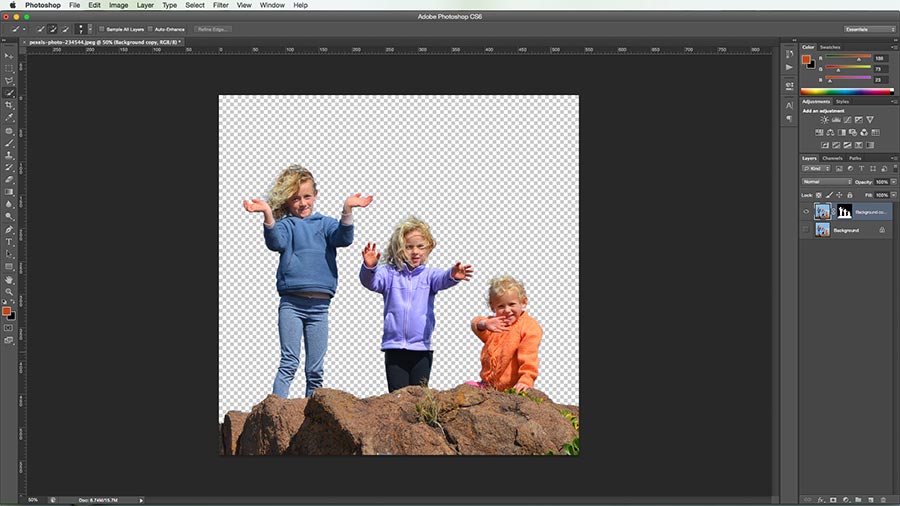
Selected Image For Changing Background
The challenge was further compounded in previous versions of Photoshop. This is because optimal usage of selection tools such as “Lasso and Magic Wand” was restricted by the presence of colors that resembled each other. Further, patterns that complemented each other also posed difficulty. The latest version of Photoshop has intended to overcome this problem with the aid of new selection tool. The usage is relatively simple.
The appeal of the image can be enhanced further while removing the clutter in the backdrop by making it appear in the form of a portrait rather than a captured photo. With the strategic use of an image editing tool, you can easily pick up a subject from one backdrop and place it in a different background. The ‘Quick Select Tool’ is a fantastic tool for accomplishing image extraction from background impeccably. This tool bridges the usage of anomaly gaps that you may have experienced with earlier versions of the selection tools available in Photoshop. The new tool extracts the subject from an image in a seamless manner. This implies that you won’t have serrated edges that would give the feel of cut and paste. Instead, the edges would be streamlined with surgical precision which would give you the semblance of a freshly captured image in a fresh canvas. This is the beauty of the new ‘Quick Select Tool’.
Choosing quick selection tool in Photoshop
In order to use quick selection tool for removing the background, you need to navigate to the Toolbox Palette of Photoshop. and select the ‘Quick Selection Tool’ in the Tools Panel located on left side. The initial appearance of the tool is that of a Brush. The size of the tool can be easily changed by pressing the bracket keys on the keyboard.
Fixing missing tools in Photoshop: If you don’t find the Quick Selection tool, then customize your Photoshop toolbar by choosing Edit > Toolbar. Drag and drop the missing quick selection tool from the extra tools list option.
Note: If you are using Adobe Photoshop CC 2020, 2021, or 2022 you can find the quick selection tool below to the Object Selection tool
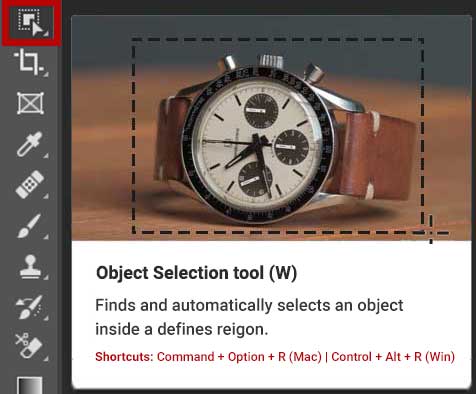
Object selection tool in Photoshop 2022
In the Windows OS shortcut for the Quick selection tool is “W“. If you need to change the option between the magic wand tool and quick selection tool, click on “Shift+W”.
With the” [“ key, you can reduce the size of the tool. Conversely, you can press “]” to expand the tool’s size. You need to use your discretion to choose the size that best works for your project.
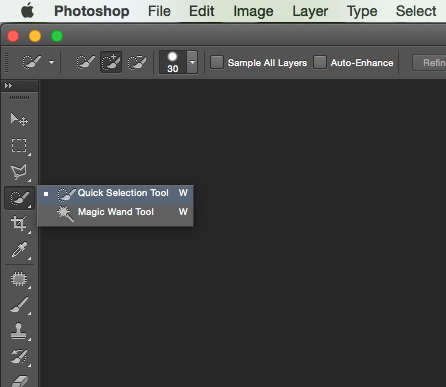
Selecting the Quick Selection tool
Selecting the subject
To select the subject, you have to merely drag the quick select tool over the area you need to alienate. Once the marching ants animation is visible on the edge, you need to stop. The smart tool would spontaneously take note of the difference in pixel density in the majority of cases and would embrace the edges accurately. If you observe that the tool has selected an area that is not in your original design, you have to simply press the Alt key. This would shift the tool to ‘deselect’ mode and you have to simply drag the marching ants formation to the area that has to be selected.
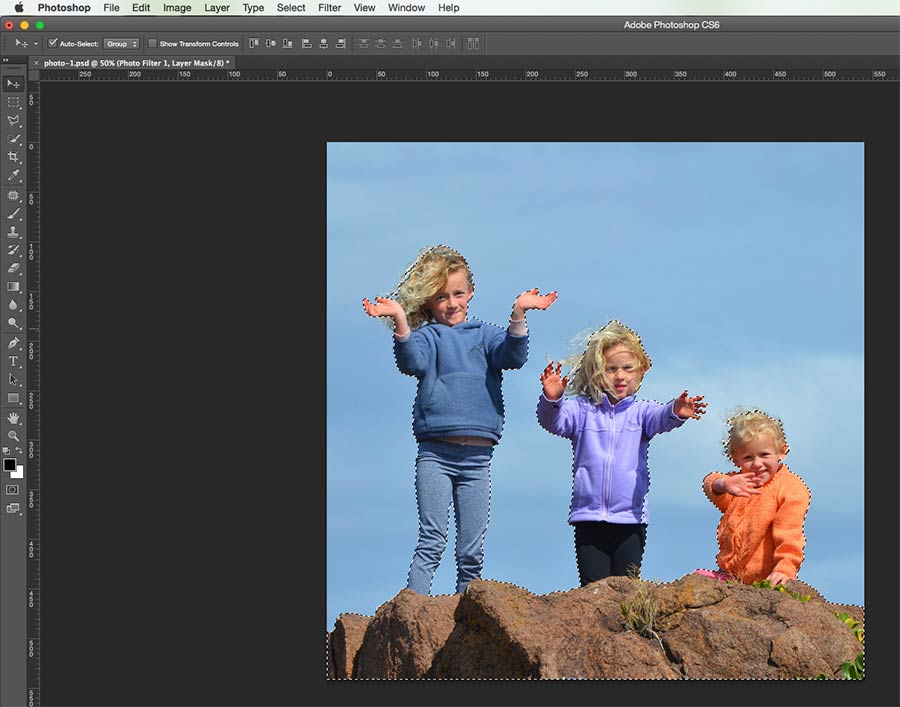
Selecting The Image Subject
For deselecting the selected subject use the below shortcuts
- Ctrl + D (Windows)
- Cmd + D (MAC)
Edge refining
After completing the selection of the desired area, you need to select the ‘Refine Edge’ option available from the top menu. This tool intuitively carries out adjustment of the pixels surrounding the edges which have been selected. The jagged edges would be refined and the segregated image’s edge would be realistically smooth.
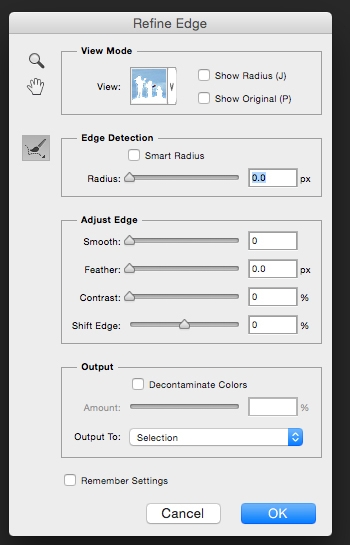
Refine Edge Tool Options
After the ‘Refine Edge’ tool has been clicked, you would come across a popup menu. Through this menu, you can go about selecting the best background option by viewing the image against available backdrops. For those of you who have worked with layer masks, selecting the ‘Mask’ overlay can be your best bet. With this view in place, checking the backdrop along with selected area simultaneously becomes easier. However, viewing the selection with black as the backdrop color will give you a clear picture of the appearance of the edge in the event of everything getting selected meticulously.
Shortcut for using the Refine Edge tool
- For Windows Users : Ctrl + Alt + R
- For Mac Users : Cmd + Opt + R
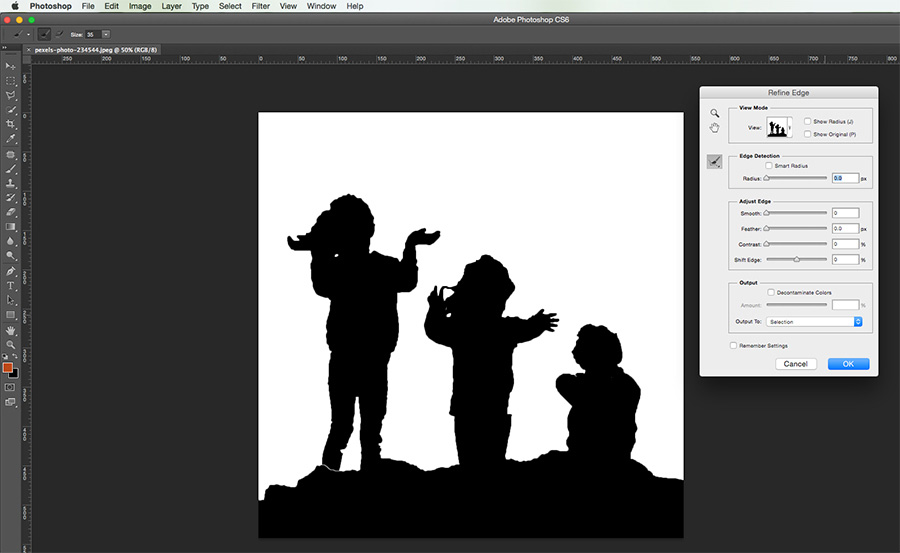
You can easily switch between views by clicking on the drop-down menu for accessing ‘View Options’ box. You need to browse through various views to get a perception of the way data is displayed. Refinement of an edge can be further accomplished by moving the ‘Adjust Edge Sliders’ and accessing the options for smoothing, feathering and refining the edges as per your requirement. The safest option is to select the ‘Black and White’ view. You just need to move your cursor over the ‘Black and White’ box for clicking on the same. Edges can be viewed in crisp manner against a black backdrop.
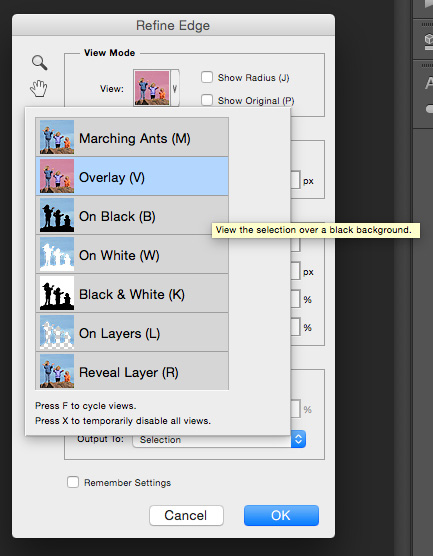
View mode option in Refine Edge Tool
Shortcuts For Using Options in View Mode (Windows)
- Marching Ants Mode: Shortcut key is (M).
- Overlay Mode: Shortcut key (V).
- Black Mode: Shortcut key (B).
- White Mode: Shortcut key (W).
- Black & White Mode: Shortcut key (K).
- Layers Mode: Shortcut key (L).
- Reveal Layer Mode: Shortcut key (R).
You need to ensure that the edges have been clearly demarcated without any pixelation or chunkiness. If any distortion is observed, you need to refine the edges again until the crisp result is obtained. In case, the edge has some projections which can prove to be an eyesore, you can set the same right with ‘Edge Detection Smart Radius Box’. Clicking on this box would allow you to work on a slider which can be moved right or left to make the edge more transparent or prominent. You need to ensure that the remaining portion of the edges is not altered in an unwanted manner.
Using Edge Detection Brush
The edge can be rendered more transparent by selecting the brush icon located on the left side of ‘Edge Detection’ box. You can apply the brush carefully around the edge portions which you want to be more transparent. Switching between different Views would give you a clear picture of what is getting eliminated and what is retained for final display. If inadvertently, a portion of the edge is removed to a large extent, you can undo the action of brush strokes by clicking and holding the ‘Refine Edge’ brush. This would bring forth the ‘eraser’ tool which would nullify the action of brush strokes. This is similar to the functioning of layer mask used regularly.
Using Edge Detection Brush
Next, clicking on ‘Decontaminate Colors’ option lying in the bottom of the ‘Refine Edge ‘box within the ’Output’ section would allow you to select a number. Usually, the selection of smaller value like 2 or 3 is recommended but it depends on the image. Now, the Output has to be changed to ‘New Layer with Layer Mask’. You would observe that the clutter which had characterized the background is no longer present. The backdrop has become crisply transparent using this Photoshop tool. The subject in the image is on a fresh layer and is ready to be singularly used for various purposes.
Layer Mask Option
Setting a new background
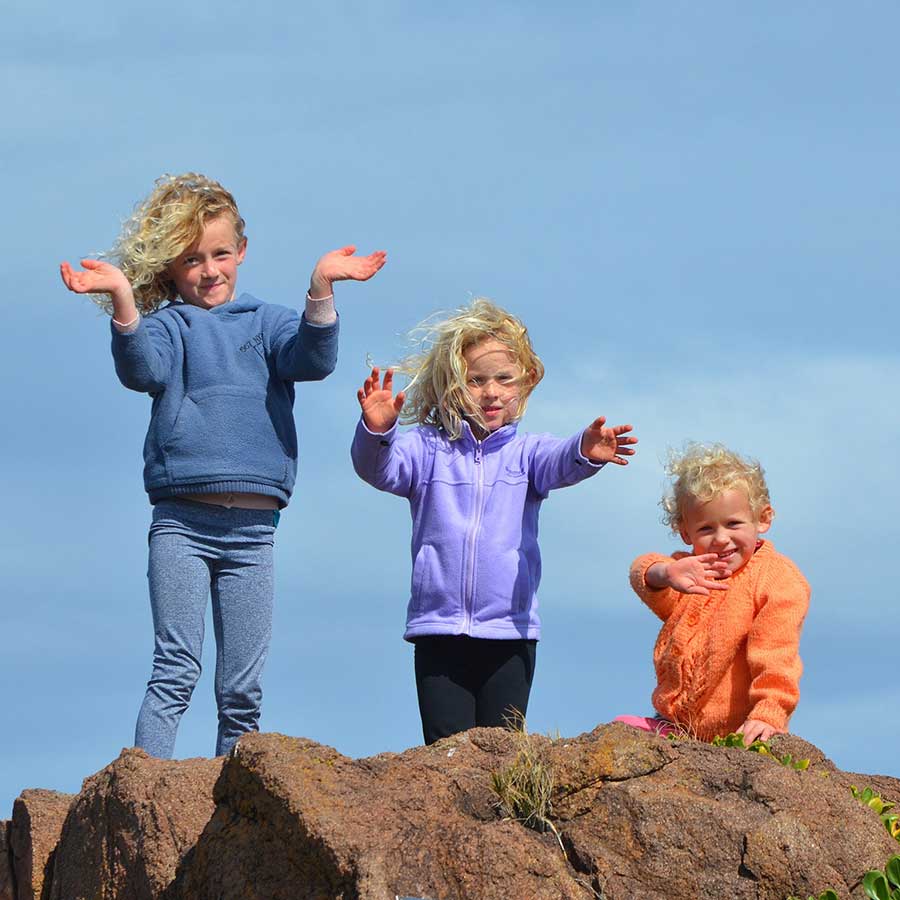
You now can set a new background for the freshly retrieved image. Use the ‘Move’ tool for dragging the new background against the image. With this new layer, both the subject and new background merges seamlessly and naturally complement each other. The background layer is to be dragged beneath the masked subject layer. If the image already had a background which you want to conceal, you can make the layer invisible. In order to give the finishing touch, you can tweak the colors a bit. Offering a warm tone through warming Photo Filter and layer mask would help you accomplish this. The image that you have before you would definitely be better and aesthetically more appealing than the original photo you had started with.
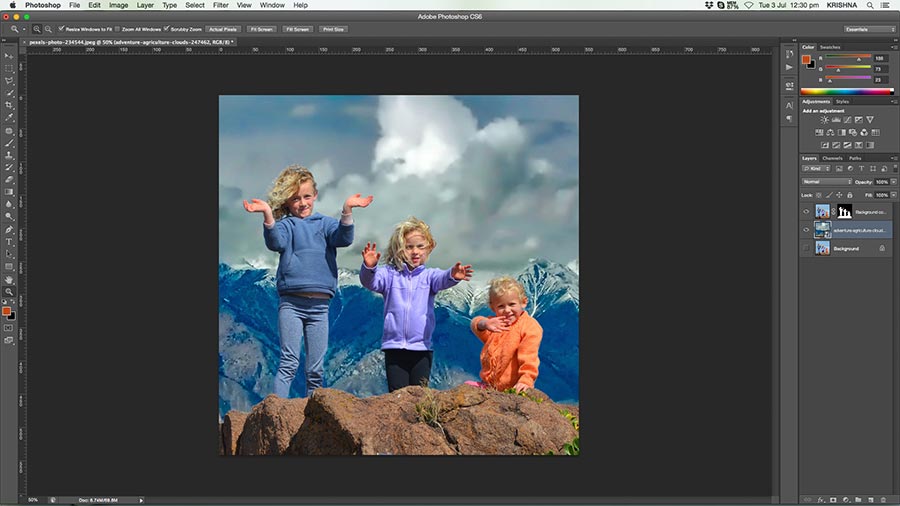
Changing background in Photoshop
Practicing with different images would help you excel in the usage of ‘Quick Selection’ tool.
Still Confused on how to use this tool? Seek assistance from us
Experts at PGBS can help you with flawless image extractions from the difficult and heavily cluttered background using clipping path technique. Accurate transparency and needful detail retention are assured in our Photoshop services. We have extensively trained professionals who wield complete command over the entire array of tools available in Photoshop. You can trust us for any kind of affordable photo editing services and high-end retouching services.
Frequently Asked Questions
Other Useful Photoshop Tools Used for Background Removal