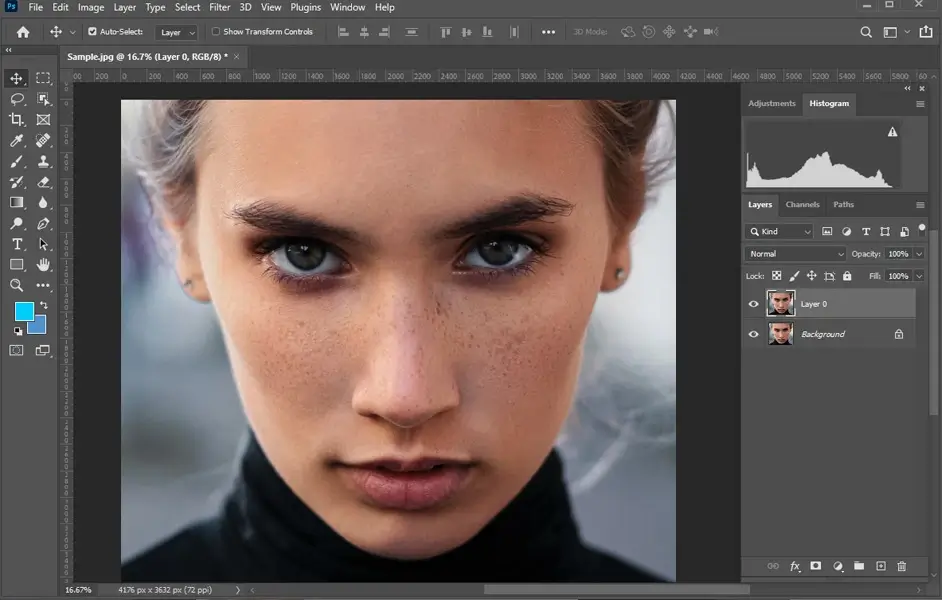
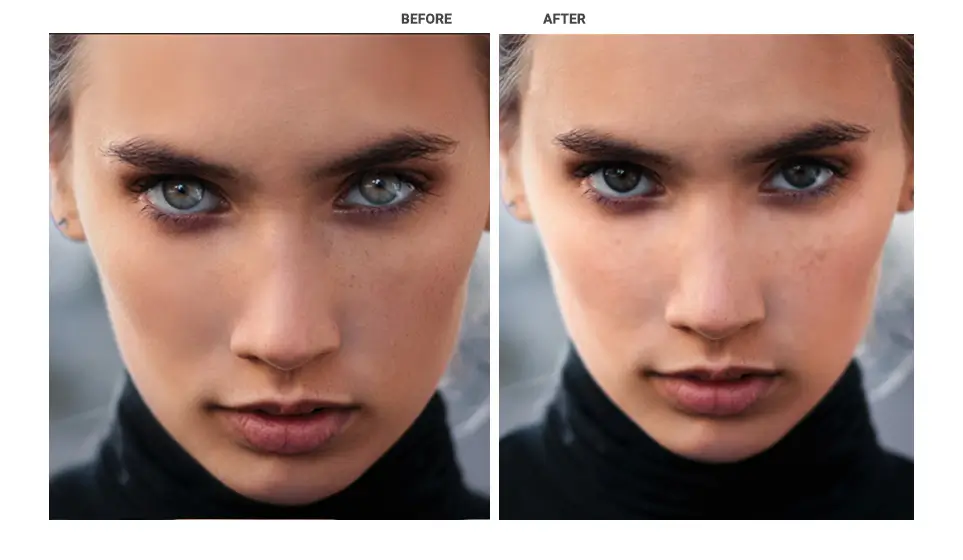
Photo retouching and editing are carried out by expert professionals to highlight a photo and bring out its prime highlights. If you are a photo editing enthusiast and want to learn more about the headshot retouching techniques, stick with us until the end.
Why do headshots photo need retouching?
All kinds of photos, be it corporate images, individual portraits, magazine covers, or fashion photo shoots – any image that needs to be showcased in front of a wide range of target audiences to achieve the desired objective, require some sort of photo retouching or removing any imperfections.
8 Steps headshot retouching in Adobe Photoshop
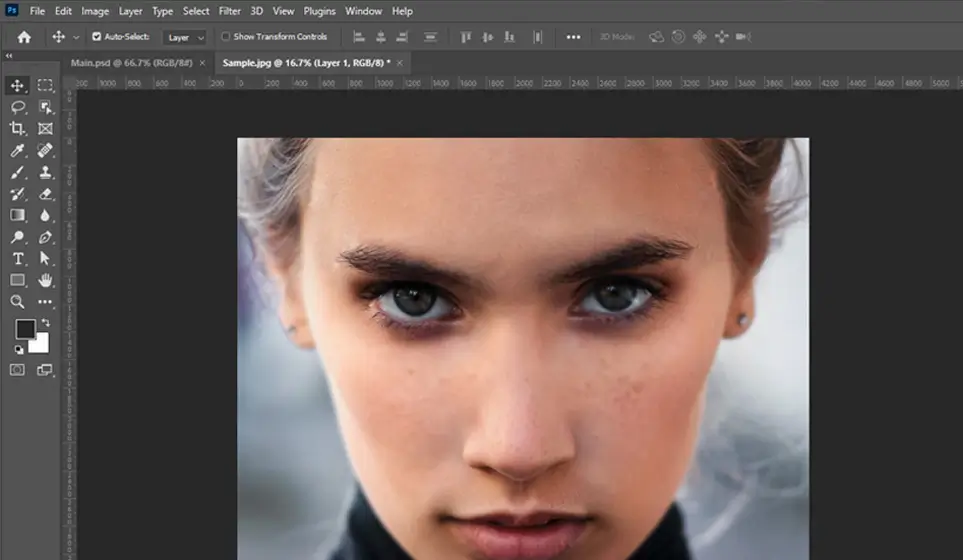
Thankfully, Adobe Photoshop comes with numerous comprehensive tools, brushes, and filters that an image editor can leverage in their post-processing workflow.
Edits such as fixing bumps, specs, and blemishes, smoothing frizzy hairs, popping the color of the eyes, whitening the teeth, color grading, adjusting hue and saturation, fixing brightness and contrast, fine-tuning contours and highlights, etc.
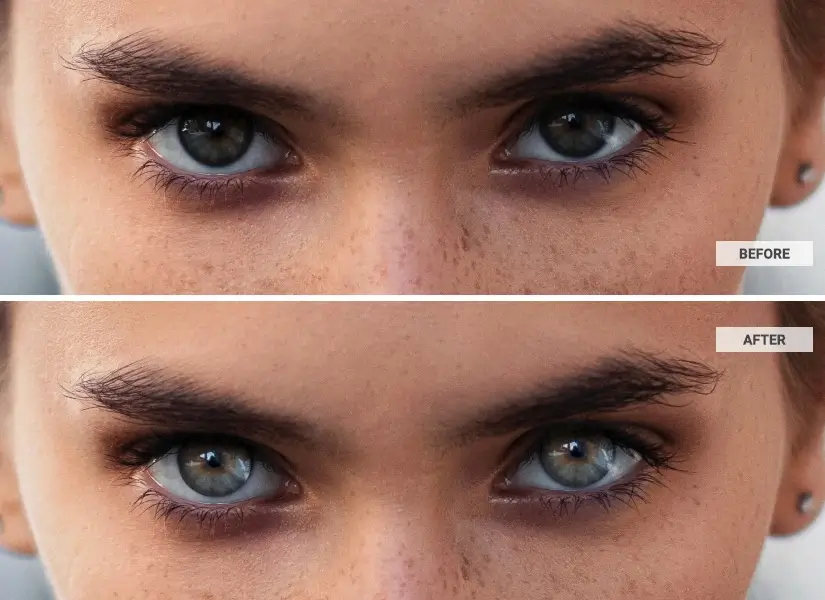
Let’s look at the top eight practical techniques with step-by-step instructions for creating the best, most natural-looking headshot photos.
-
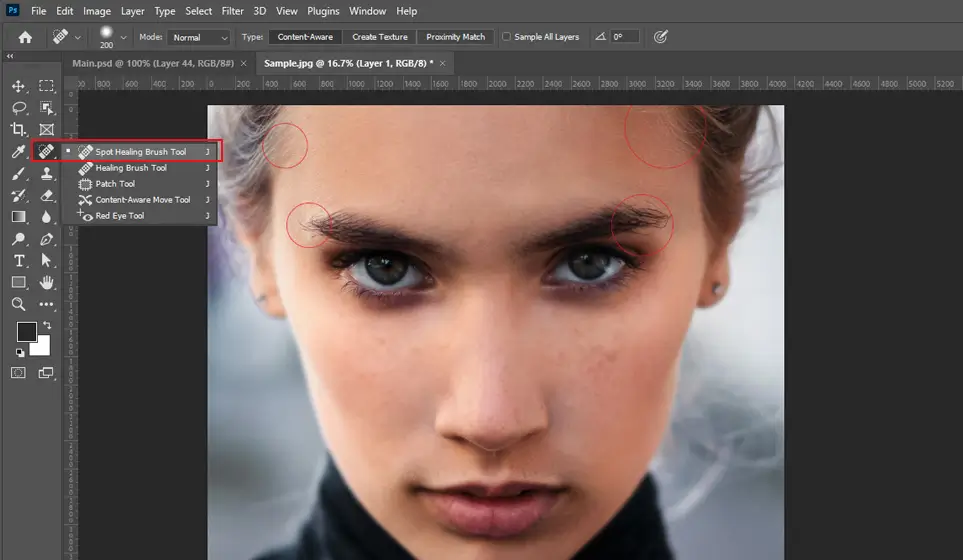
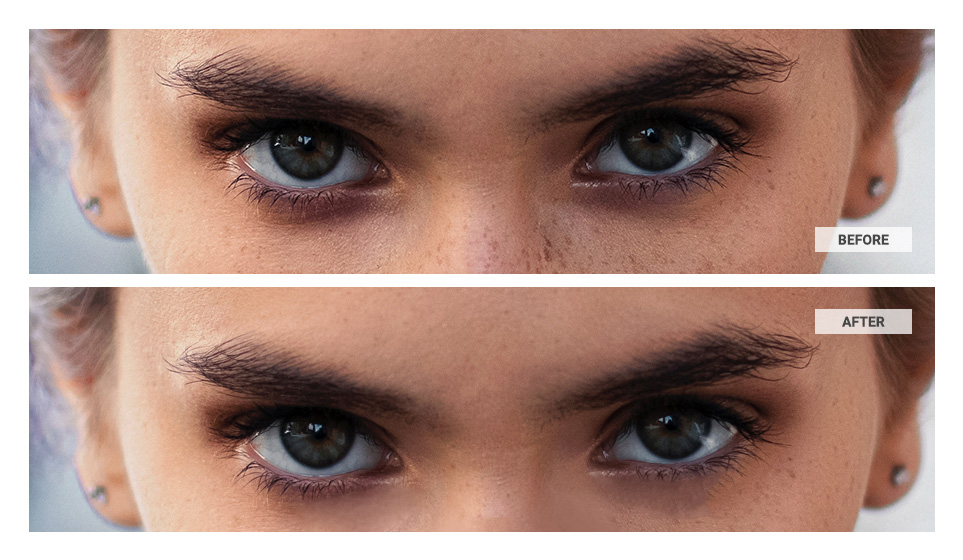
Rev up the subject’s eyes
Eyes are the most prominent feature of a subject that onlookers notice first. Hence, the eyes should look perfect and strikingly bright without looking unnatural. Start by brightening the eye iris.
- Draw an ellipse over the subject’s eye iris.
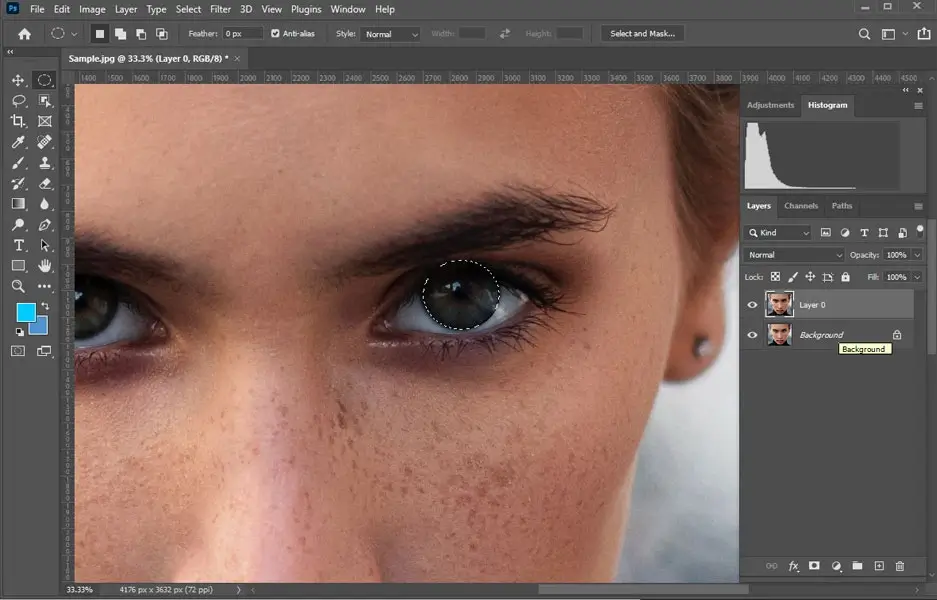
- Boost the contrast and the color with the “Radial Filter”. This will give an added impact to the eyes.
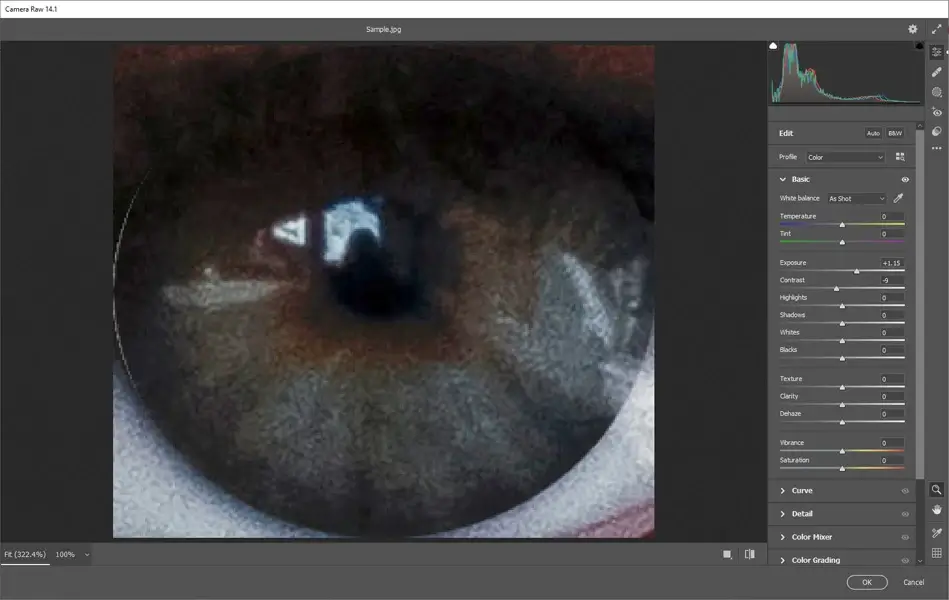
- Select the “Camera Raw” filter and click the “Radial Filter” in the toolbar.
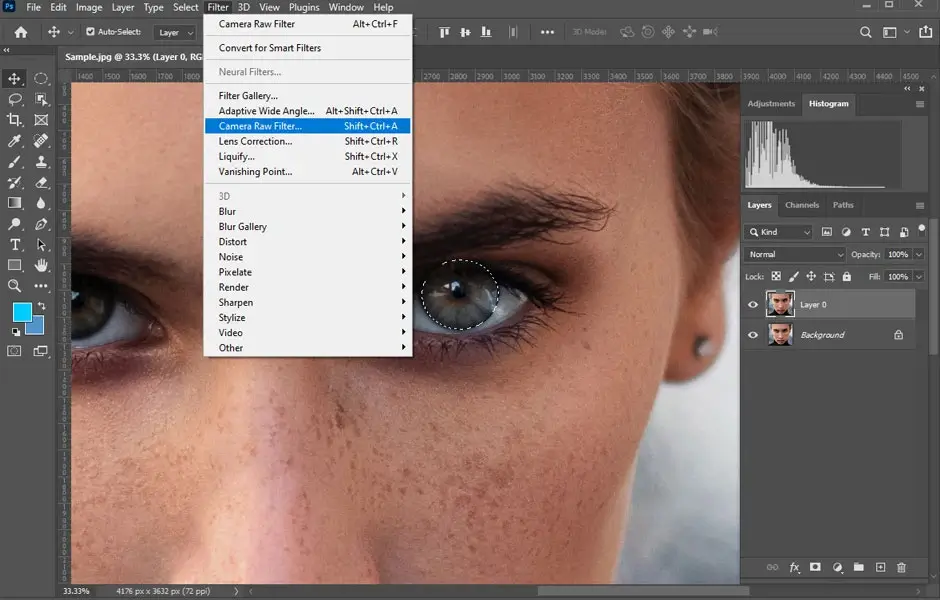
- Select the “Brush” tool and omit the outer parts.
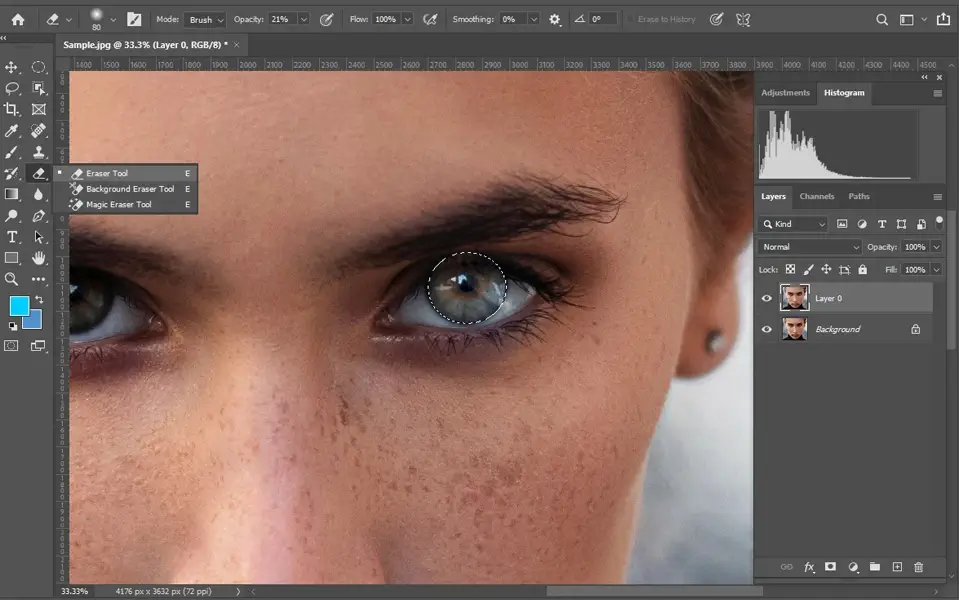
- To make the iris appear darker, reduce the “Exposure” on the “Radial Filter” menu.
- For an added accentuation of the iris, you may darken the edges slightly; this will give the appearance of depth. Then remove the center of the circle with the “Brush” tool.
- Draw an ellipse over the subject’s eye iris.
-
Eliminate the highlights or hotspots
Too many highlights can make a headshot look unappealing, making the subject look sweaty and greasy. To fix this issue, use the “Patch” tool. This is one of the most useful tools for retouching headshot in Photoshop and is widely used by retouchers for removing unwanted hotspots.
- Roughly select the area surrounding the highlighting area.
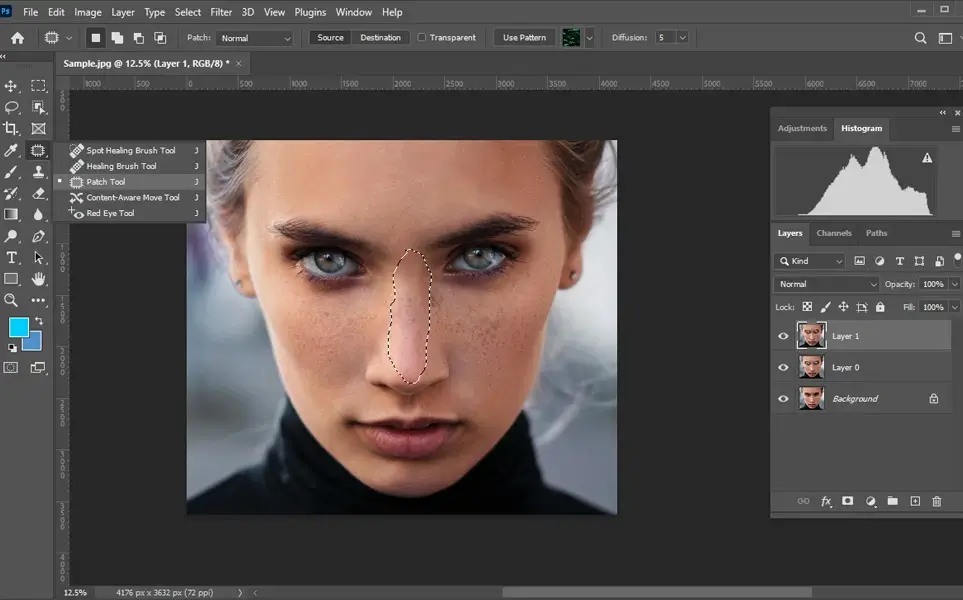
- Drag the selected area towards a relatively clear part.
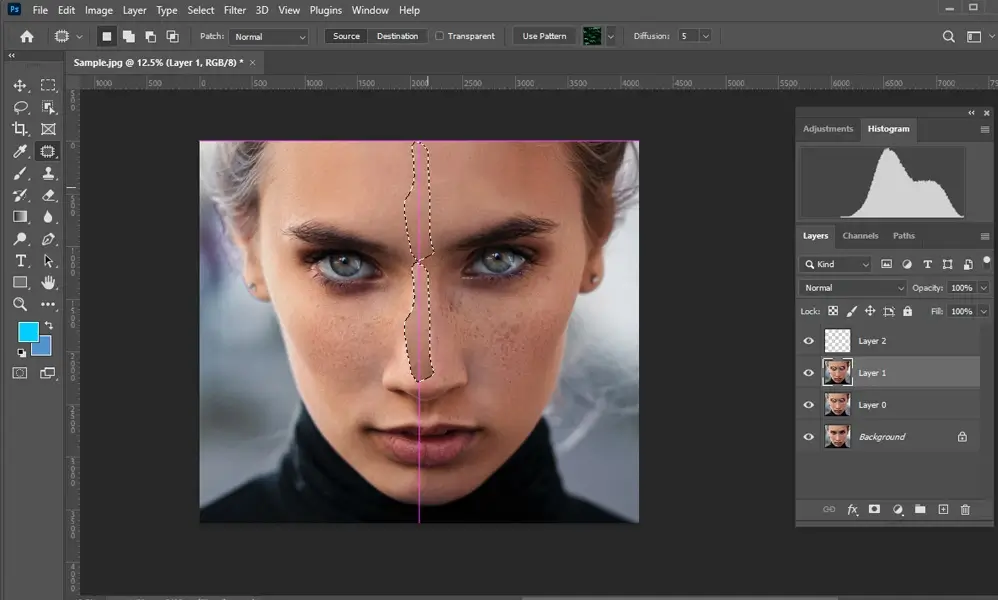
- Create a separate new layer and then adjust the “Patch” tool to “Content-Aware Fill” and click the “Sample All Layers” button on the right from the tool menu.
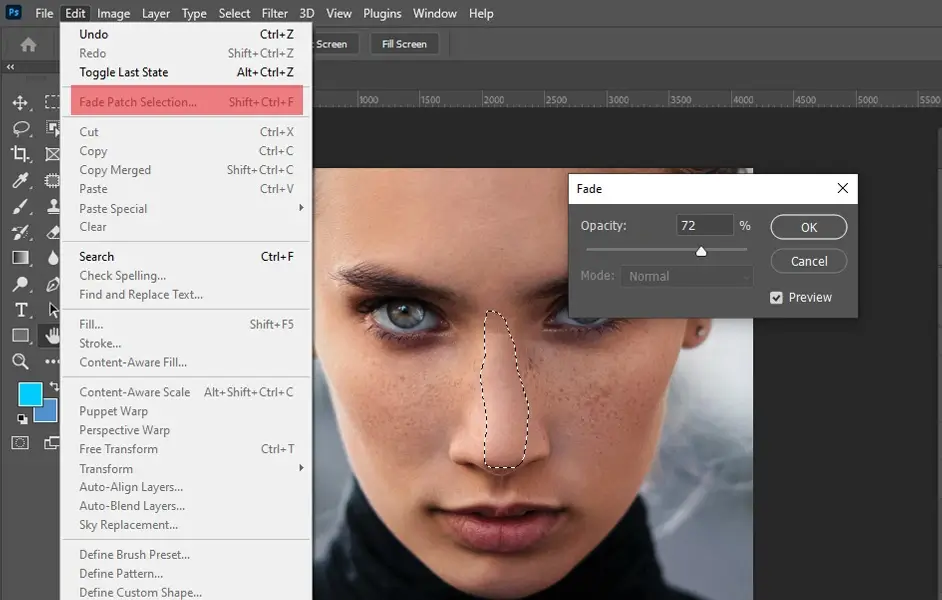
- Reduce the opacity slightly for a shiny illusion instead of a blinding highlight on the subject’s nose, chin, or forehead.
- Roughly select the area surrounding the highlighting area.
-
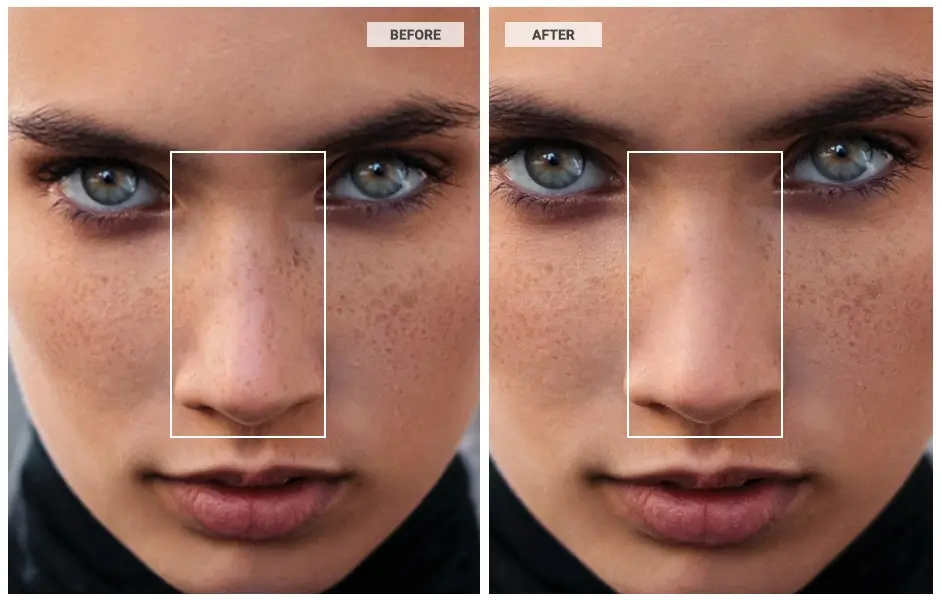
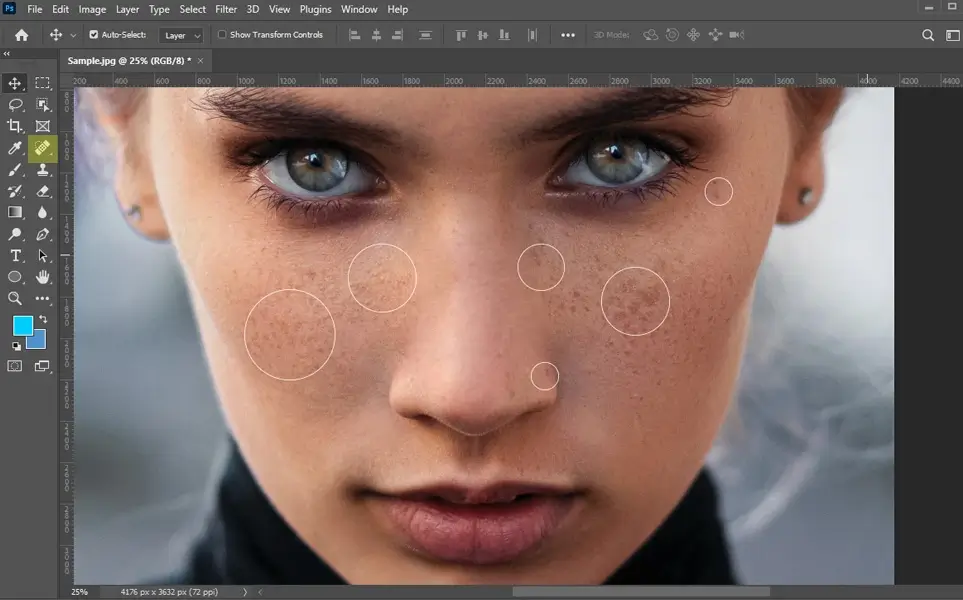
Removal of blemishes from the skin, making it flawless
Photographers wish to make their photos look professional and appealing. However, sometimes the subject’s skin does not appear as flawless as it should be. Fret not. Photoshop has a quick and easy fix for this, frequency separation can be used for skin softening and make it free from any blemishes without making the image appear unreal.
- Erase any kind of spots, specs, blemishes, pimple marks, or other imperfections from the subject’s face, with the “Spot Healing” and “Clone Stamp” tools.
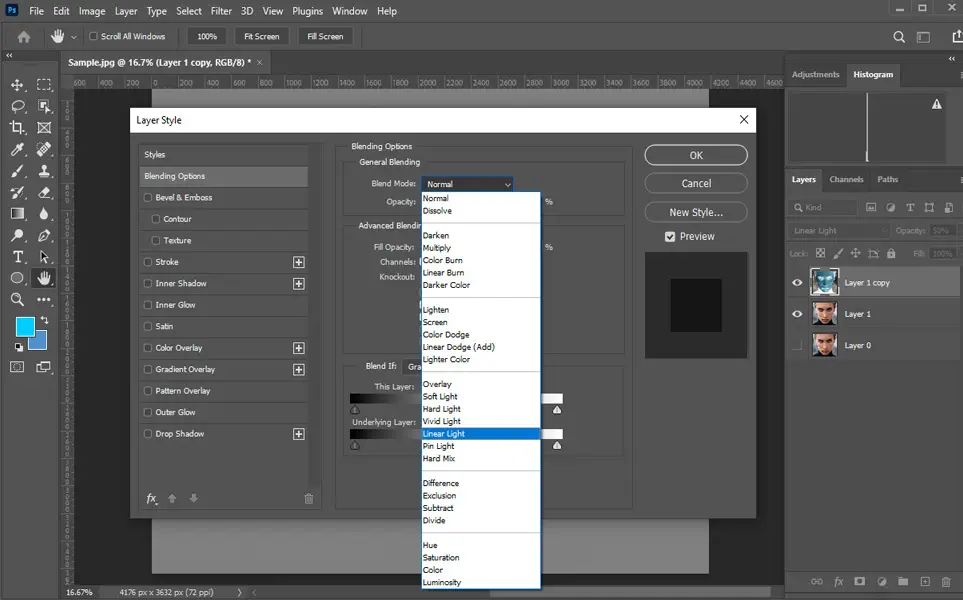
- Replicate this layer and then invert it. Bring the opacity level to 50% and then change the “Blend Mode” to “Linear Light”.
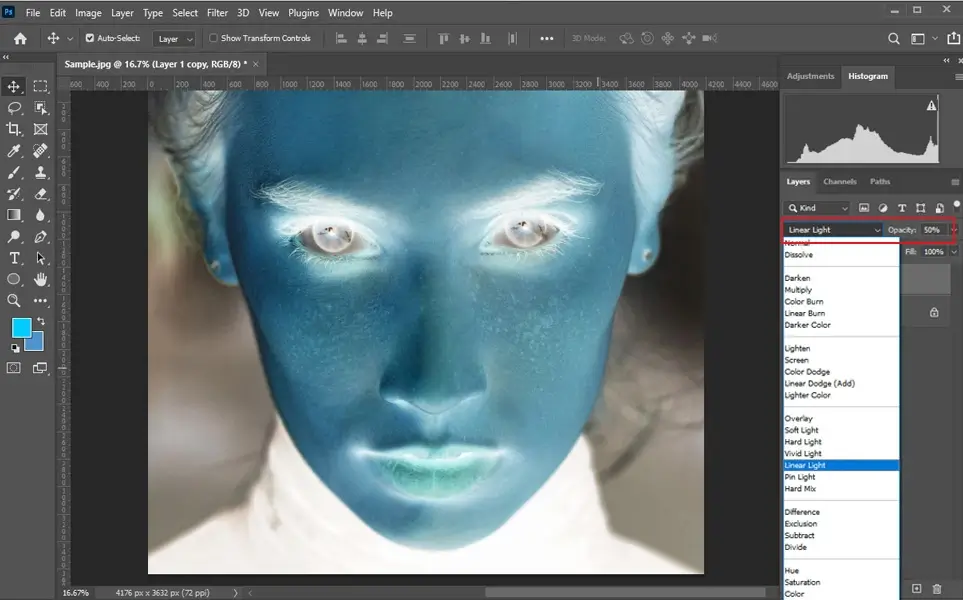
- On this layer, right-click and select “Convert” to “Smart Object”.
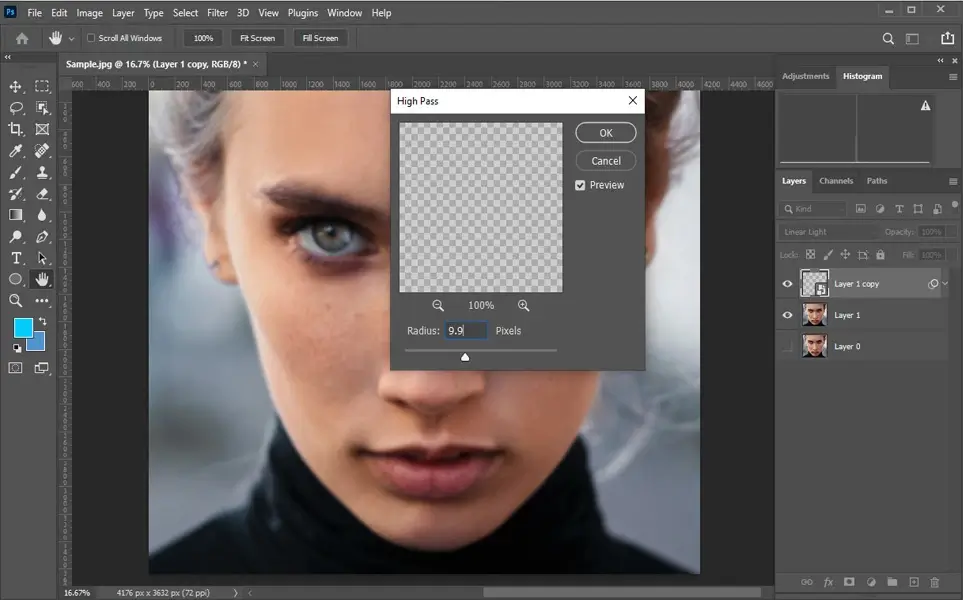
- Next, on the Filter tab section, click on “Other” while selecting the “High Pass” filter to sharpen the image. Set the blurry effect to 9 pixels.
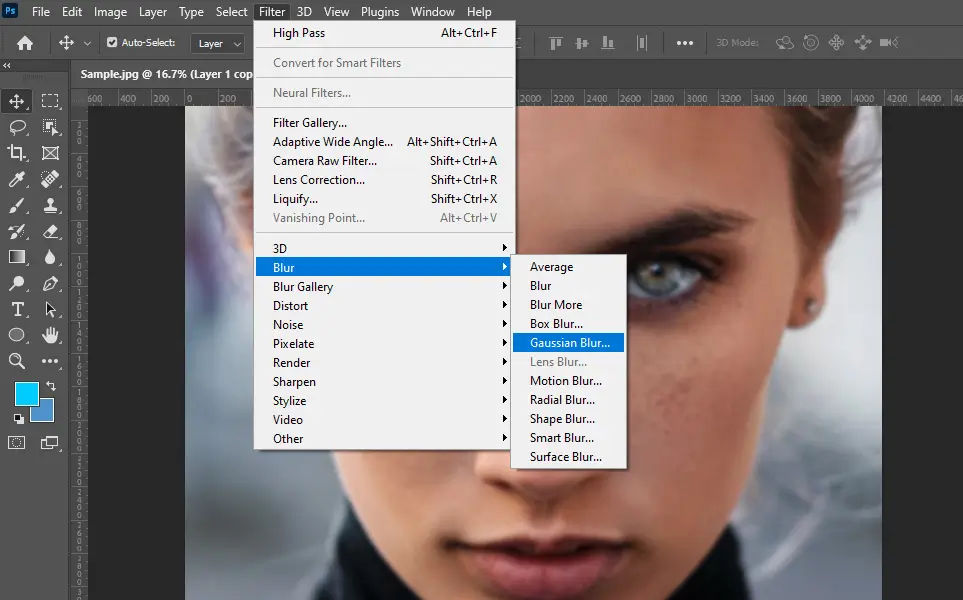
- Next, click on “Filter” and select the “Gaussian Blur” from the “Blur” option. Set the value to 3 pixels (a third of the “High Pass Filter” value). This trick will bring back the natural texture to the image.
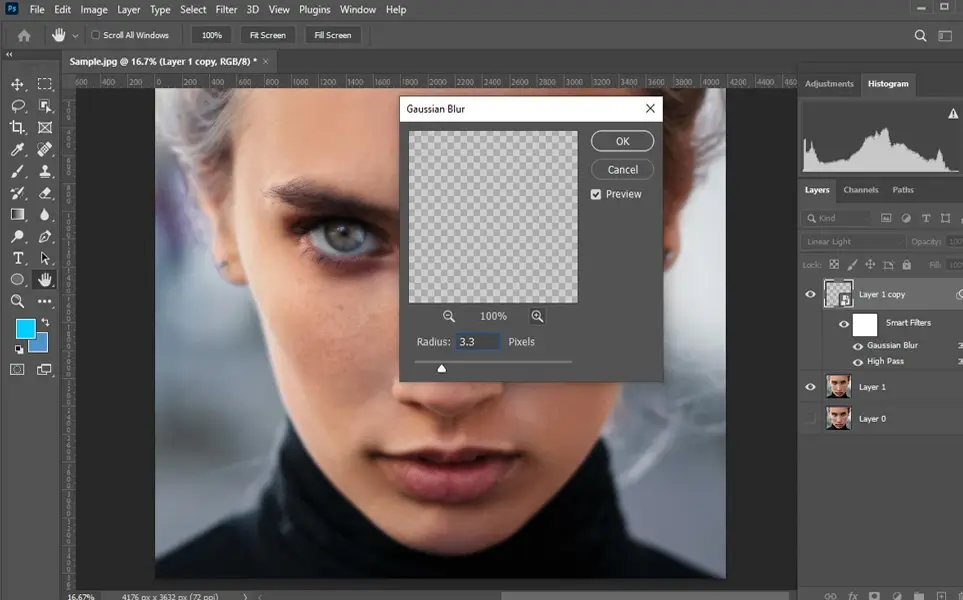
- Once the “Gaussian blur” effect is added, make sure to add a “Layer Mask” while clicking on the “Alt” button; this will hide the effect with a brush tool in white.
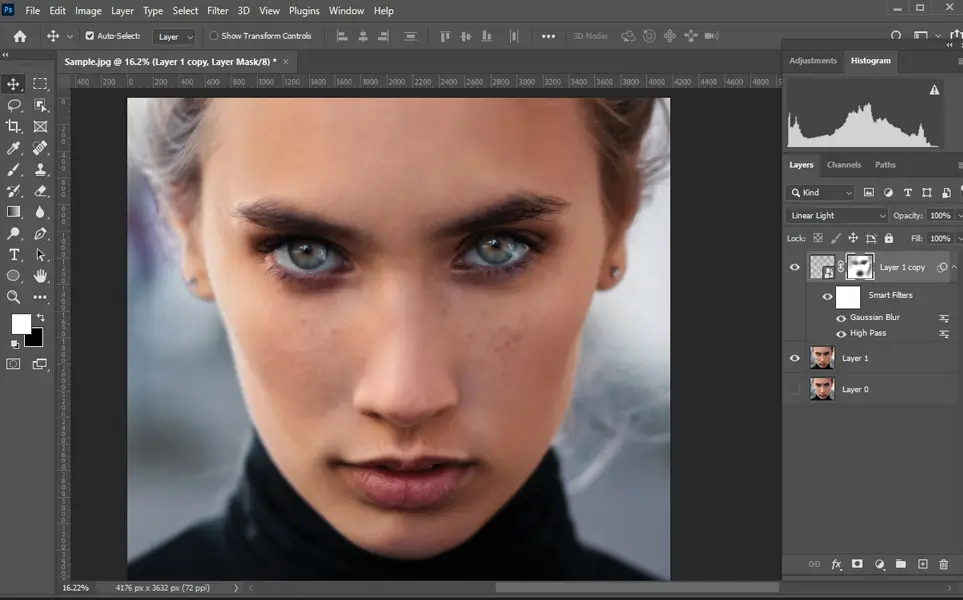
- Finally, reveal the skin with light paint strokes on the image.

- Erase any kind of spots, specs, blemishes, pimple marks, or other imperfections from the subject’s face, with the “Spot Healing” and “Clone Stamp” tools.
-
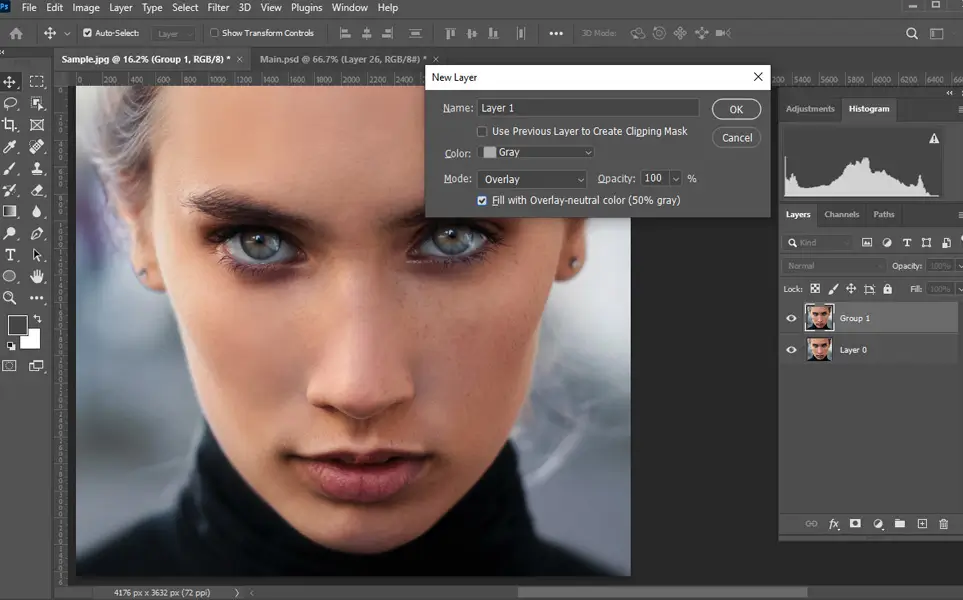
Applying the “Dodge” and “Burn” tools
The “Dodge” and “Burn” tools in Photoshop help professional photo editors fix extreme darkening and lightening issues on an image. The dodge tool brightens an unevenly darkened area, and the burn tool darkens an unnaturally lightened patch. In simple terms, these tools help to achieve a balanced image exposure, creating an ideal and realistic-looking skin texture.
- To make this edit on an image, press and hold the Alt key and create a new layer.
- Name this layer “Dodge and Burn” and set the mode to overlay.
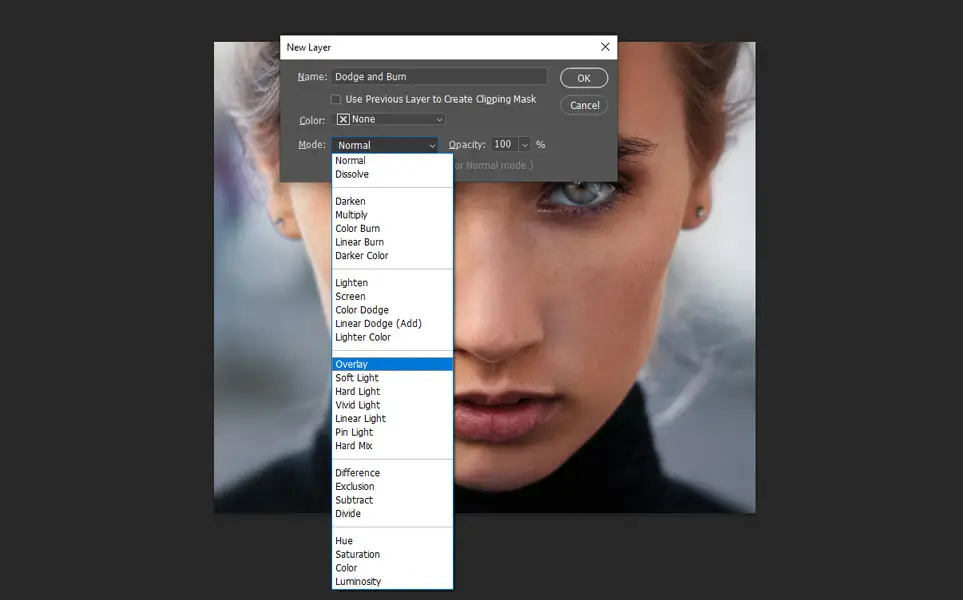
- Check the box to fill the image with a greyish neutral shade and click on OK.
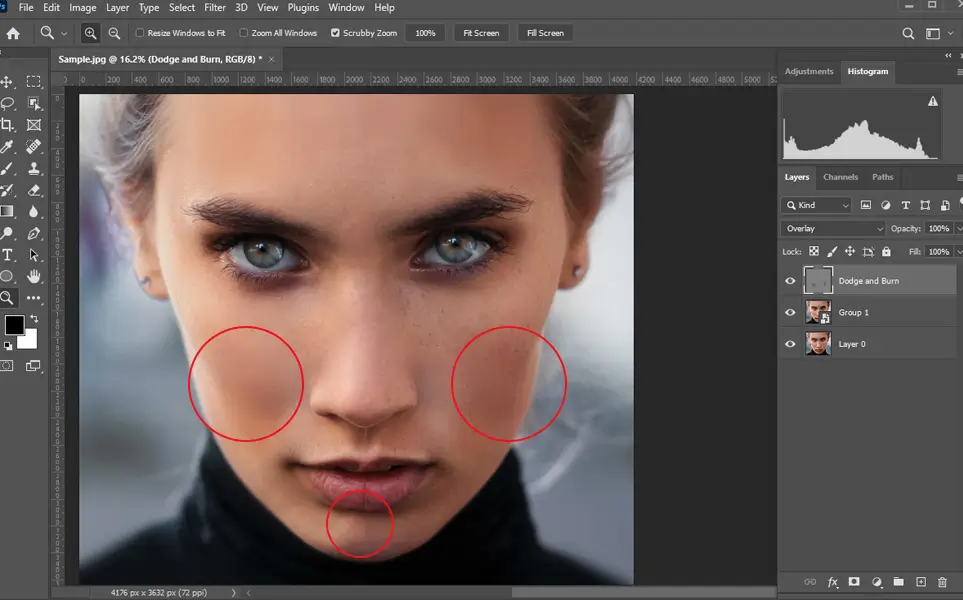
- With the “Brush” tool, paint black or white depending upon the areas you want to fix while setting the opacity level between 10%-20% from the “Options” bar.
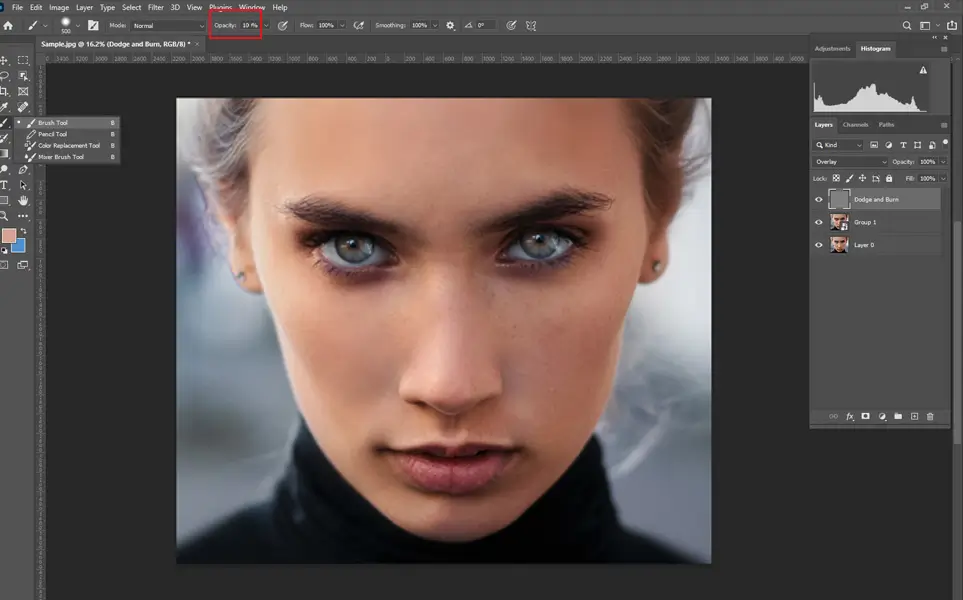
- Press the X key and paint black below the cheekbones, near the jawline, neck, or any other darker places on the image. Apply white shade to the lighter areas of the face like the forehead, between the eyes, the chin, etc.
- Finally, go to the “
 ” menu, select the “Gaussian Blur”, and apply the effect all over the image to smoothen the layer and blend all the brushstrokes. This will give a natural finish to the final result.
- To make this edit on an image, press and hold the Alt key and create a new layer.
-
Sharpening the image by plumping up the skin
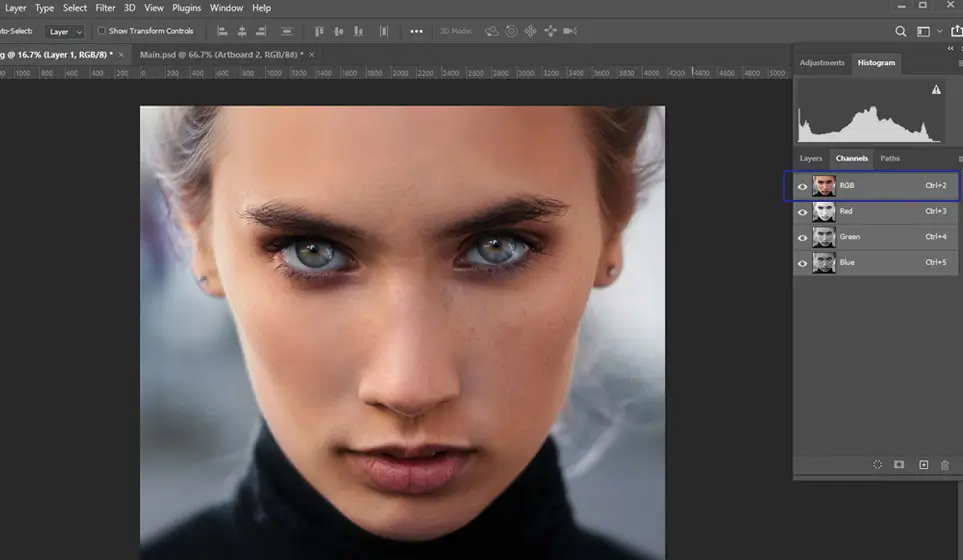
One of the simplest, yet most crucial editing techniques in Photoshop image editors commonly use to achieve a fine headshot retouch. Before moving on to the process, let’s understand what “Color Channels” are in Photoshop.
In Photoshop, an image contains a grid of multicolored pixels; these represent the color palette that can be further broken down into separate layers of color information, or “Color Channels”.
Now, the sharpening process is mainly done through the red color channel as it contains minimal skin texture compared to the other channels. It is a tricky process since when the facial details are sharpened through the red channel, the surrounding skin still remains soft.
- Go to the “Channels” panel and select the “Red channel”. Then, select the “Unsharp Mask” from the “Filter” option. Based on the image resolution, the settings will vary. These settings are great parameters to try: As a pro tip, you may keep the “Amount” value at 100, the “Radius” at 3.0, and the “Threshold” value at 0.

- Select the “RGB” channel to check the image’s sharpness level.
- Go to the “Channels” panel and select the “Red channel”. Then, select the “Unsharp Mask” from the “Filter” option. Based on the image resolution, the settings will vary. These settings are great parameters to try: As a pro tip, you may keep the “Amount” value at 100, the “Radius” at 3.0, and the “Threshold” value at 0.
-
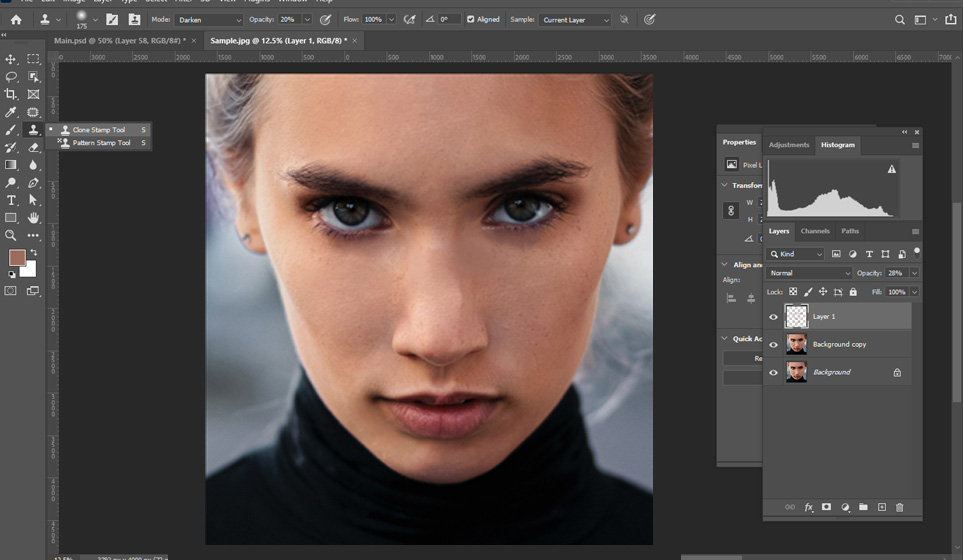
Frizzy hair removal
Fixing or removing the frizzy fly-away hairs can be easily done in Photoshop with the “Clone Stamp” and the “Spot Healing Brush” tools without blurring the borders. However, the process can be tedious and too technical at times, as one needs to be highly accurate and perfect while removing the hair strands from the edges of the forehead, nose area, and upper lips, which are the trickiest parts of the face. Let us break down the process for you in 4 quick steps.
- From the “Menu” bar on the left side, choose the “Clone Stamp” tool to cut off the hair strands from the base. Set the mode to “Normal”, and keep the “Opacity” and the “Flow” levels to 100%.
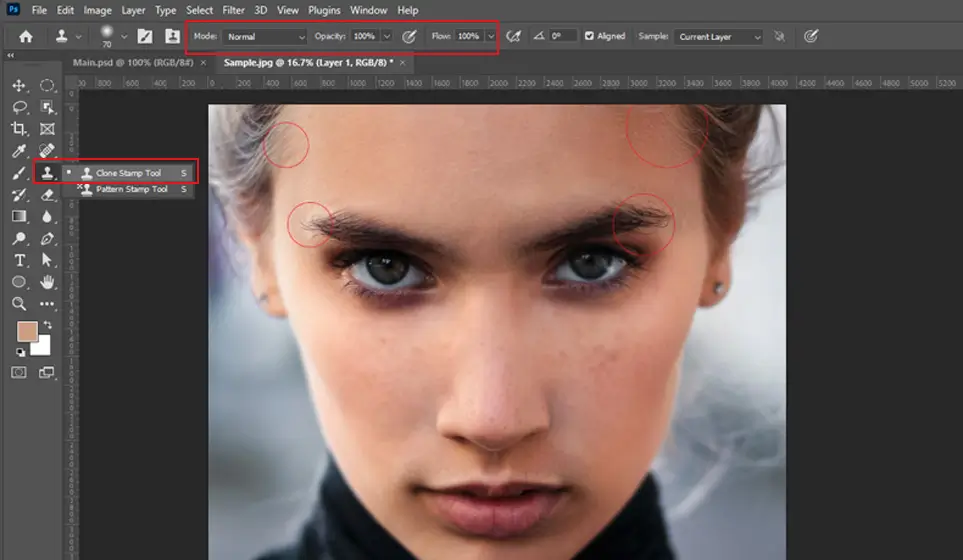
- Apply the “Spot Healing Brush” tool to paint the area to get a sample color.
- Again use the same tool to remove most of the hair strands.
- Zoom in to observe the image closely if you need to add or hide any excess or windblown hair strands.
- From the “Menu” bar on the left side, choose the “Clone Stamp” tool to cut off the hair strands from the base. Set the mode to “Normal”, and keep the “Opacity” and the “Flow” levels to 100%.
-
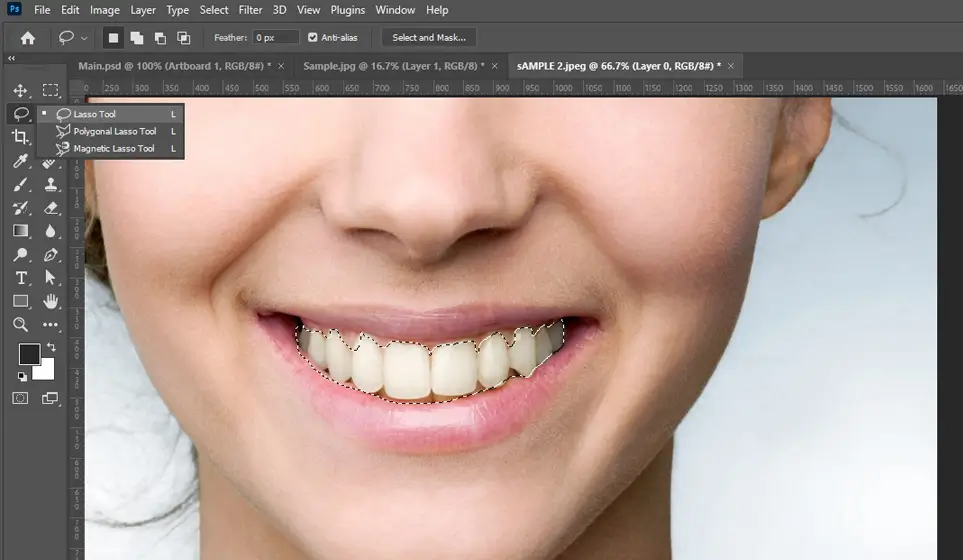
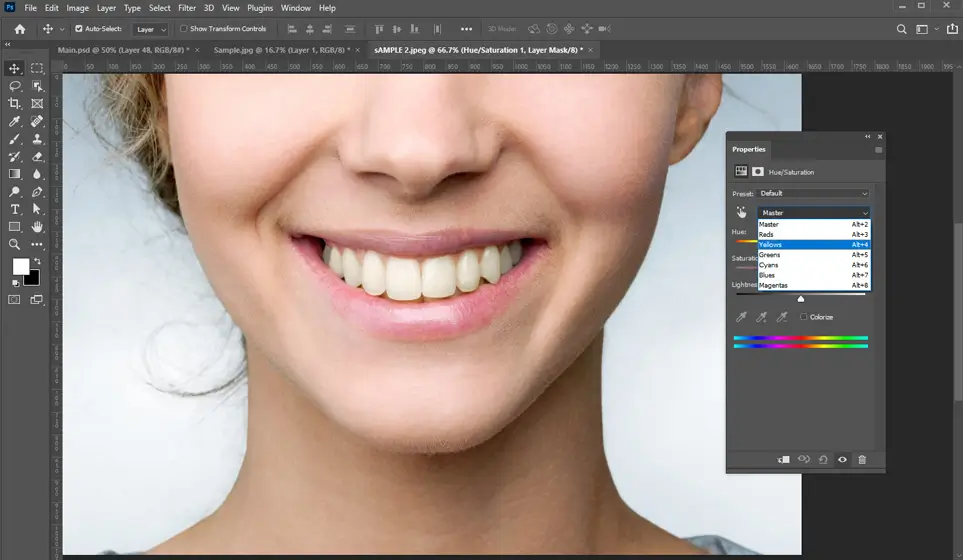
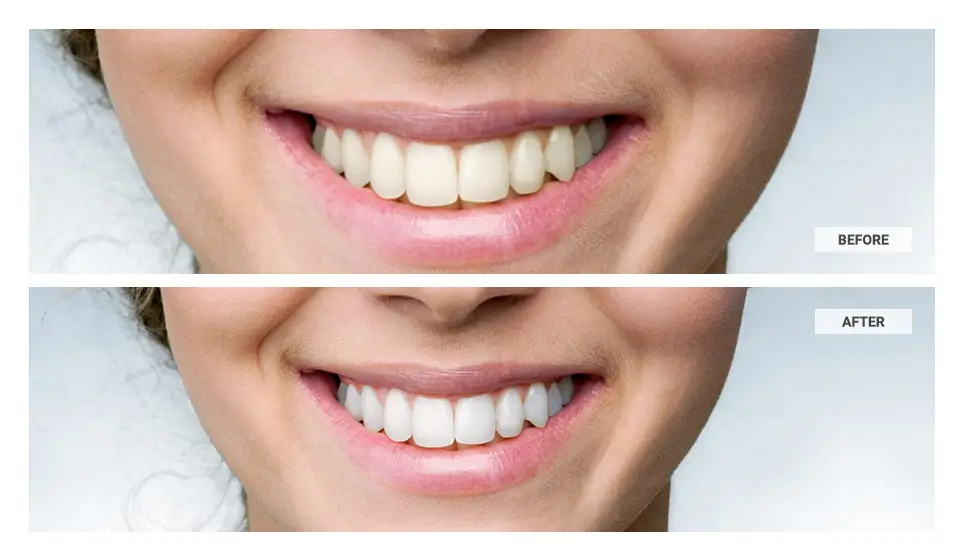
Whitening the teeth
The key to a great headshot is a bright (and white) smile. Hence, commercial ads, magazine covers, and photo shoot models require a shining smile to create a superb positive impression on the target audience. With the “Hue/Saturation” adjustment layer, Photoshop lets the photo editor brighten and whiten the teeth simultaneously.
Expert image retouchers can bring a sparkle to the image using their Photoshop skills by removing a yellowish tinge, any black spots, leftover food particles, or any other specs that spoil the image. Let’s break down the steps for you.
- Select the “Lasso”, one of the handiest Photoshop selection tools, and select around the subject’s teeth. Trace around the area, staying within the edge as much as possible. If you are working on one person’s image, start by applying the edits to that image. If there is more than one person in the image, use separate adjustment layers.
- From the “New Fill/Adjustment Layer” menu in the “Layers Panel”, select “Hue/Saturation” option from the dropdown list.

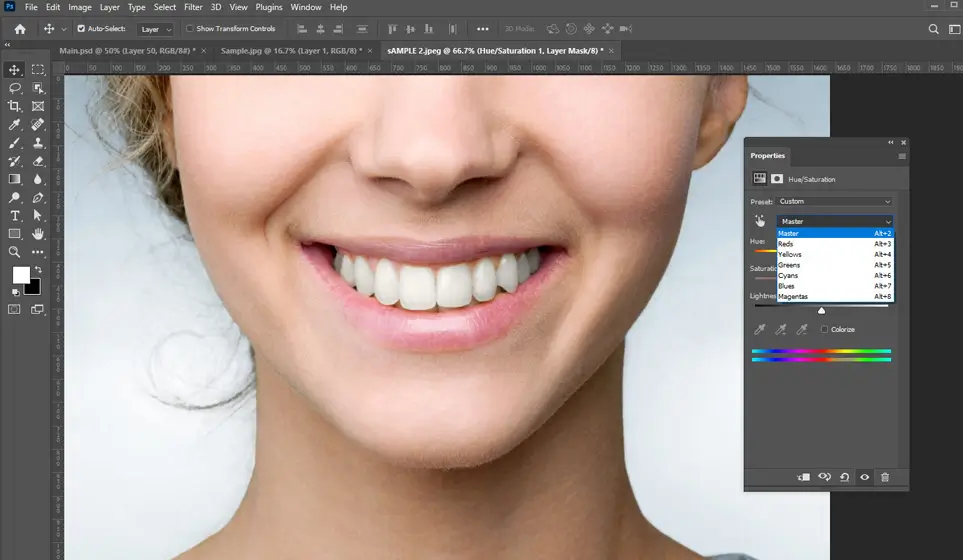
- In this step, be cautious while lowering the saturation, as the “Hue/Saturation” affects all the colors equally. This is because, by default, the “Edit” option is set to “Master”. Hence, to edit only the yellow shades, you have to set the “Edit” option to “Yellows” manually.
- Now lower the yellow saturation by dragging the “Saturation” slider to the left. The more you drag the slider, the more the yellowish tinge gets desaturated. However, if the slider is dragged to the extreme left, the teeth will appear gray and dull. So observe the image while dragging the slider and keep the natural white to make the image appear lifelike. A value of -80 works best.

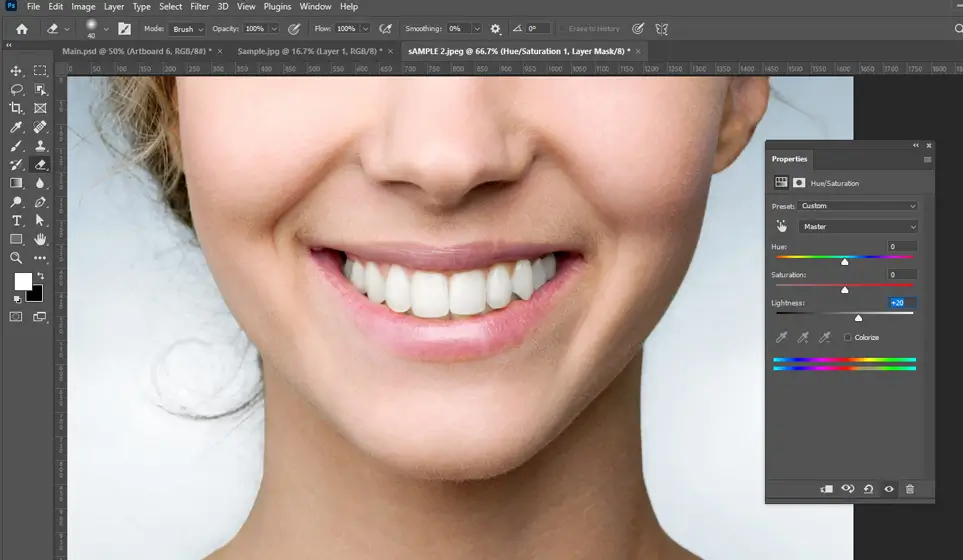
- Once the above step is done, change the “Edit” option back to “Master” to adjust all the other colors. Now, you have to brighten the teeth.
- Simply drag the “Lightness” slider to the right while keeping an eye on the image so you don’t brighten them excessively. A value of +20 works best.
- Select the “Lasso”, one of the handiest Photoshop selection tools, and select around the subject’s teeth. Trace around the area, staying within the edge as much as possible. If you are working on one person’s image, start by applying the edits to that image. If there is more than one person in the image, use separate adjustment layers.
-
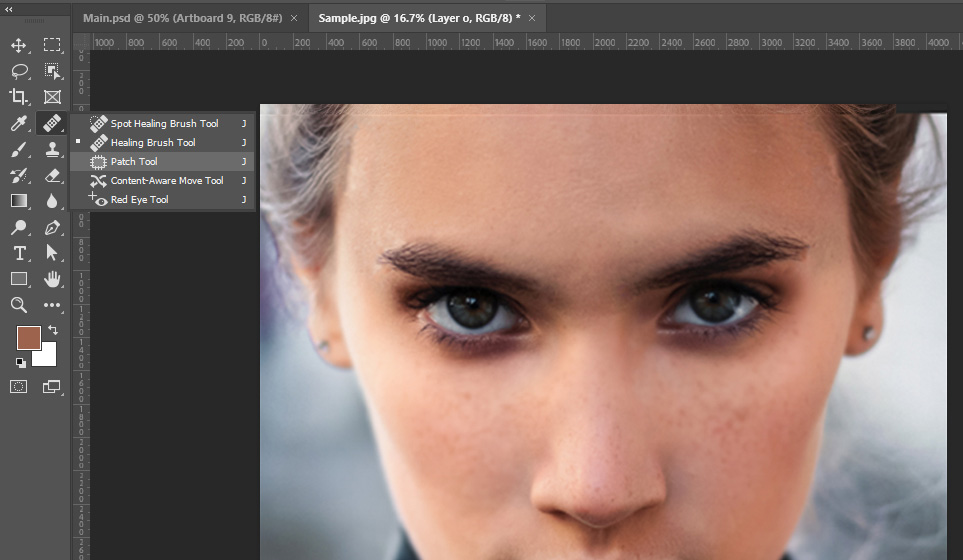
Eye bags removal
Eye bags can ruin a great photo by making the model look tired, sleep-deprived, and old. This issue happens even with the best-looking people and is a major no-no for headshot images. Thus, headshot retouchers must make some detailed technical adjustments in Photoshop or other photo editing software to fix them. Check out the steps for fixing the eye bags in Photoshop.
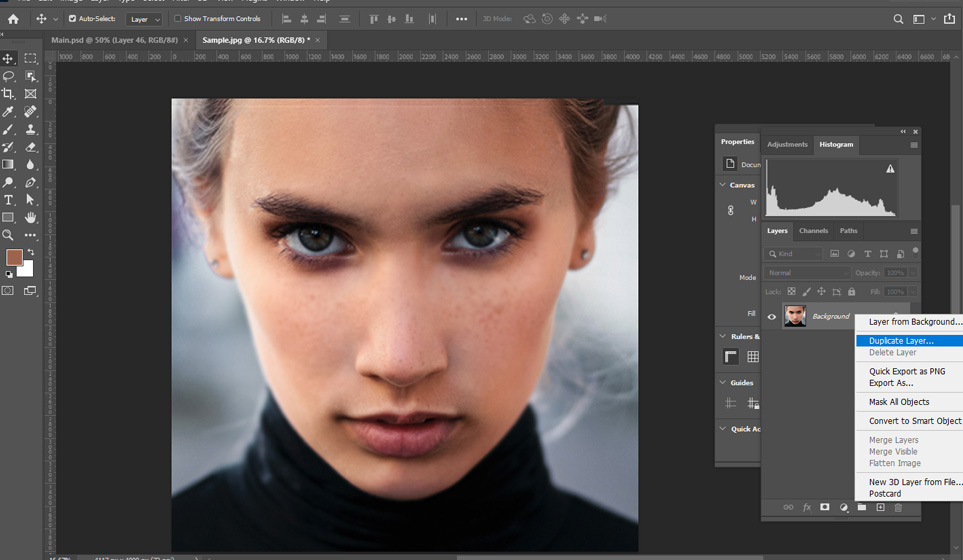
- Press Ctrl/Cmd+J and duplicate the “Background” layer.
- Now select the “Patch” tool on the left-hand side menu.
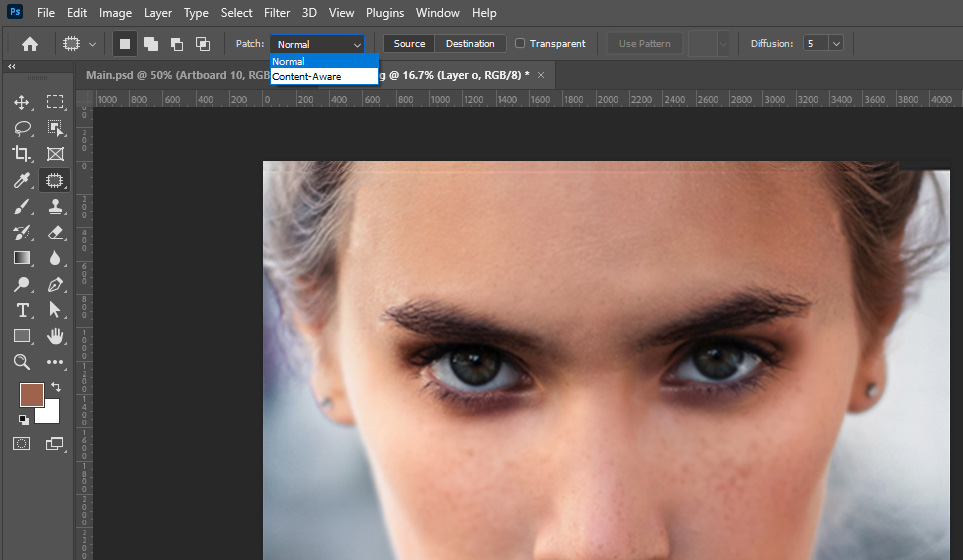
- Keep the tool options to “Normal” instead of “Content-Aware Fill”; this will retain the natural texture of the model.
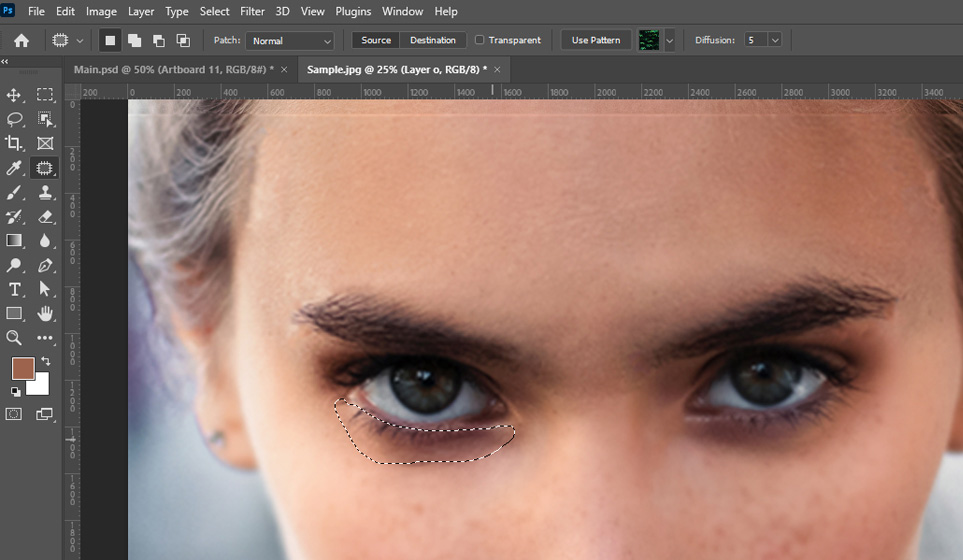
- Make a rough selection using a dark patch and drag it over a clear skin area, for example, the area on the forehead.
- Go to the “Layers Panel”, lower the “Layer Opacity” level by clicking Ctrl/Cmd+D, and keep regulating the opacity level until you get a natural finish.
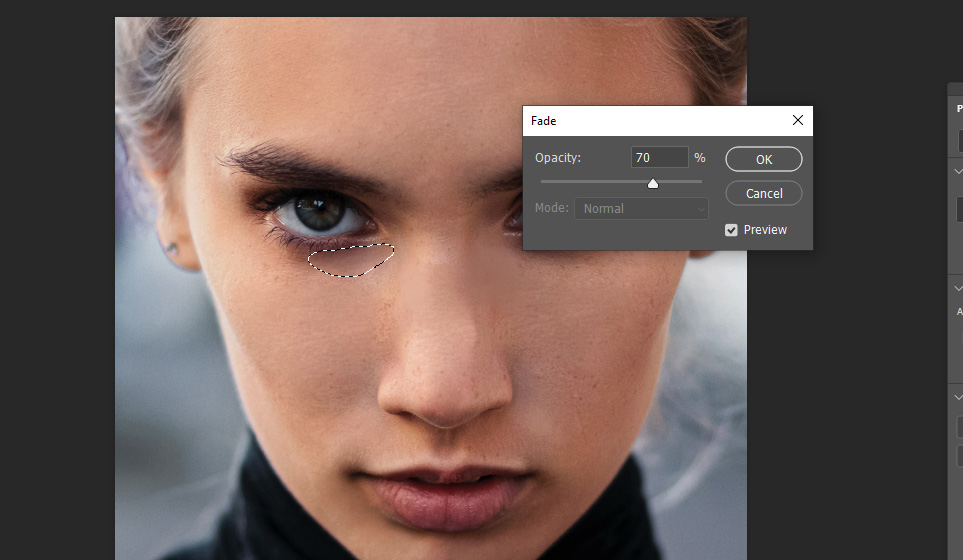
- You may also use the “Clone Stamp” tool to clone the opacity level up to 20% to smoothen the remaining jagged and rough areas.
- Press Ctrl/Cmd+J and duplicate the “Background” layer.
Final words
It’s time to wrap up the tutorial now. Hope you have learned the processes for retouching a headshot in Photoshop to make it look great in front of the target audience. Always remember that every photo, no matter how great it is, requires some kind of retouching. Some can be retouched with basic photo editing techniques, and some require significant work.
Mostly often, professional agencies offering advanced photo retouching services execute such high-end technical edits. You may reach out to such expert teams for any of your photo editing or headshot retouching requirements. Improve your image editing skills with the steps mentioned above, and let us know if they are helpful in the comment sections below.
We would love to know your thoughts and discuss them in our next blog. Happy retouching!