Color grading and color correction are different terms for photo and video editing processes. While they refer to separate editing processes, the terms are often used interchangeably because they are often done back-to-back.
To really understand the meaning and significance of these terms, we have to learn what makes them different from each other.
In this article, we will cover:
- What is color grading?
- What is color correction? and
- What are the differences between the two?
Now, let’s begin!
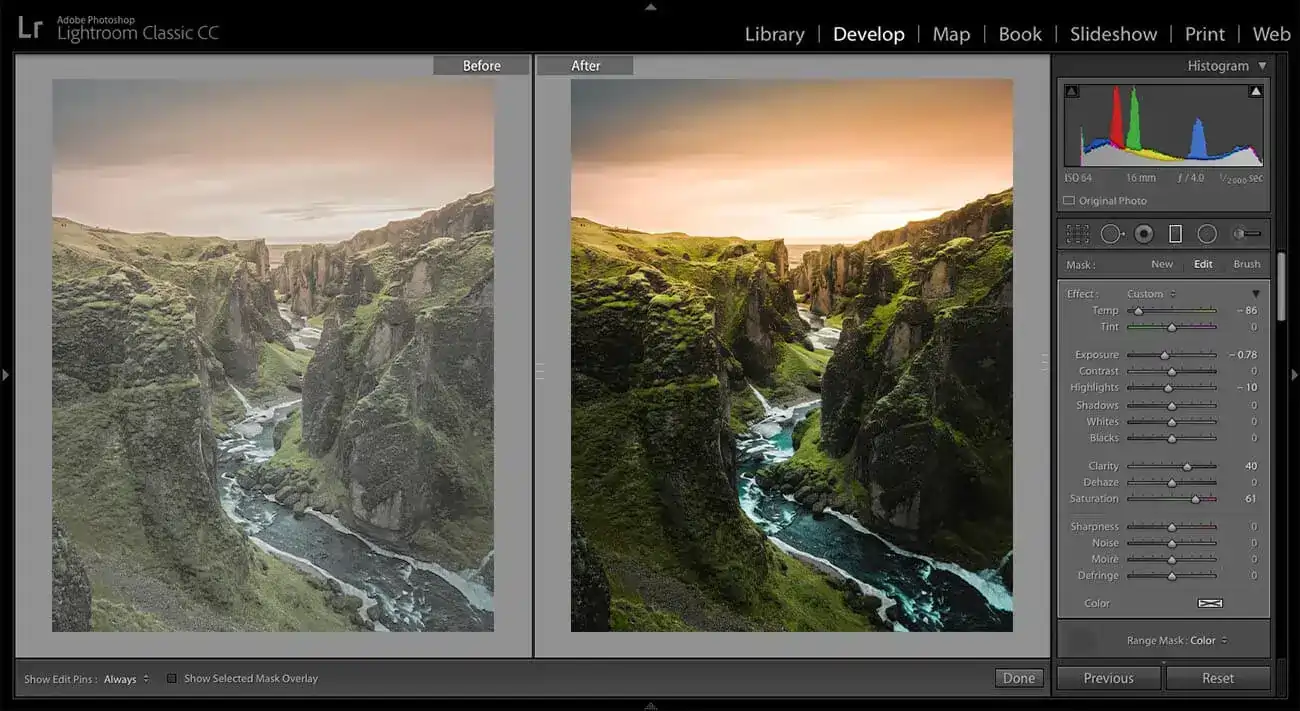
What is color grading?

Color grading is a post-production process where editors alter the appearance of images or films to create a visual effect. It is commonly used in video and filmmaking as a storytelling aid.
Back in the day, color grading was known as color timing because editors adjusted colors and exposure by developing films in a chemical bath. They usually used a stopwatch to time the duration the film spent in the bath during this process. Today, photo and video editors use software to grade colors and achieve the same effects.
Grading colors is about using hues to create and convey a visual tone for your images and footage. For example, giving an image an orange hue to depict warmth or a bluish hue to signify cold. These effects are achieved by tweaking or enhancing contrast, saturation, hue, black levels, white balance, and other attributes.
What is color correction?

Color correction is a technical editing process where color issues are fixed to look as natural as possible to the eye. Editors achieve accurate colors in images and footage by adjusting white and black levels, exposure, contrast, saturation.
In color correction, editors also ensure the footage or images from different angles and cameras match. It ensures a consistent look before applying artistic effects (like grading). They can also correct issues with the lighting in a scene and skin tone to ensure consistency.
Color correction in photography and videography are similar processes as it aims to improve the raw file by balancing, adjusting, and tweaking the colors.
How is color grading different from color correction?
The professionals who do color correction can also do color grading. They even use the same tools and software for both processes, such as Adobe Photoshop, Adobe Premiere Pro, and DaVinci Resolve.
So, what is the difference between the two?
Color grading is the editing process where video footage is given a new look to make it feel more stylistic and dynamic. Color correcting is a process where the footage is edited to correct color imbalances and make it appear natural.
Let’s explore their differences further.

Purpose
The goal or purpose of color correction is to make the colors in a video or photo accurate and natural, match shots from different angles and cameras, and normalize skin tones. The aim is to make the colors in the product appear the way the human eye perceives the real world.
Without correction, neither your raw videos or photos will look like they should.
In grading, the goal is to create a desired visual effect by tweaking and altering color attributes. Cameras don’t have a “genre” setting to capture shots with appropriate color schemes and saturations. So, it is up to the colorists and video editors, who must use a predetermined palette to color scenes to convey the intended mood and tone.
Grading is more commonly used in video editing and filmmaking, although there are growing instances of its use in photo editing.
Approach of the editor
Color correction is a technical approach where the editor is only concerned about the accuracy in exposure, color temperature, and white balance. The editor must ignore personal preferences and focus only on correcting color issues.
On the other hand, grading is a creative approach where the team needs to creatively use colors to denote mood, tone, emotions, etc., in a scene. Color schemes are decided based on the story they want to convey to the audience.
For example, giving the shots a red hue to denote emotions like love, passion, excitement, and desire or enhancing scenes containing violence, blood, danger, anger, fire, war, heat, and rage.
Position in the coloring process
Correction and grading are two sides of the same coin. The former is the first step in the coloring process, and the latter is the final step. You cannot grade a shot before correction, as doing so would give you inconsistent results, and your efforts will be wasted.
Outcome of the process
The correction process results in a neutral base ready for artistic effects like color grades.
On the other hand, the grading process results in a stylistic picture or video that captivates viewers and tells them an untold story.
Final thoughts
Many people use color correction and color grading interchangeably, but they are different. They are both post-production processes. Correction is a technical process where colors are corrected to look natural, while grading is an artistic process where colors are graded to achieve a stylistic look.
We hope this article helped you get a better understanding of color grading.
FAQs
Christa Elrod 


Christa Elrod serves as a senior graphic designer at ProGlobalBusinessSolutions. She is a creative designer with robust skills in typography, UI/UX designs, printing designs, video post-production, and 3D designs. Possessing years of experience across diverse industries, Christa loves to educate fellow designers with her experience and domain knowledge.