Nowadays, the majority of users on social media apply filters to their images before posting them to their accounts. Well, that’s color grading in its most basic form.
Although it is used in the photo editing business, color grading has primarily been a video editing technique developed in the early days of cinema. So, in this article, we will give you a basic understanding of this technique in the context of video editing by explaining the following:
- What is color grading?
- How is it different from color correction?
- Why is it important for cinematography?
- How do you grade videos?
Let’s get learning, shall we?!
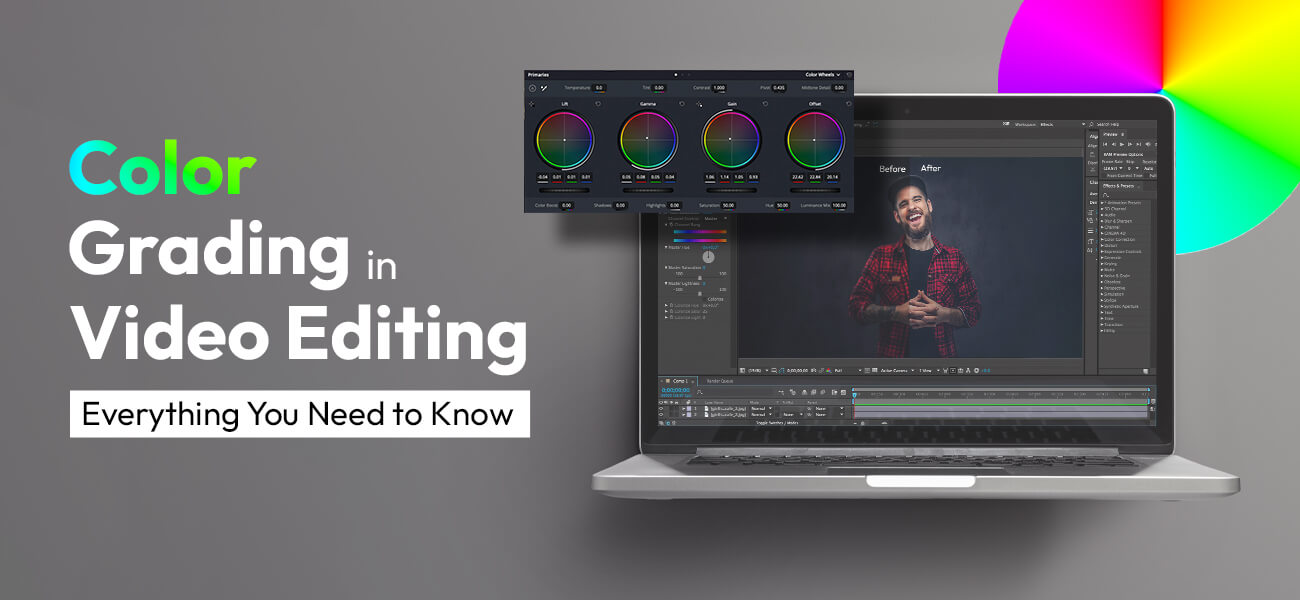
What is color grading in video editing?
Video editors adjust footage using the post-production technique known as “color grading” to produce various visual effects, establish a mood or tone, or match the production team’s chosen color palette. It is a vital part of content creation, video, and filmmaking.
It is a creative process where footage is given a particular aesthetic appeal by changing the colors or altering attributes like saturation, contrast, detail, white balance, and hue.
Color grading vs color correction
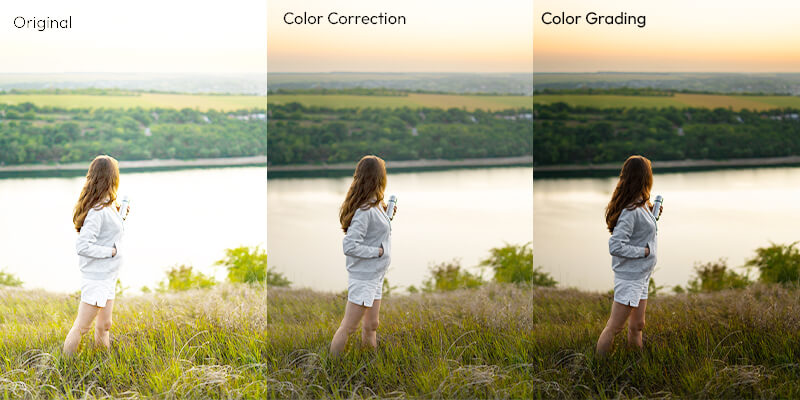
They are both important post-production processes that deal with altering colors in footage. The main differences between color grading and color correction are the purpose for which they are done and their nature.
By nature, correction is a technical process where a video editor or colorist corrects issues in color. These issues arise due to camera settings, lighting inconsistencies, or weather conditions. The goal is to correct issues in the hues so that the visuals look natural and pleasing to the eye. That is why this is the first step in the video editing process.
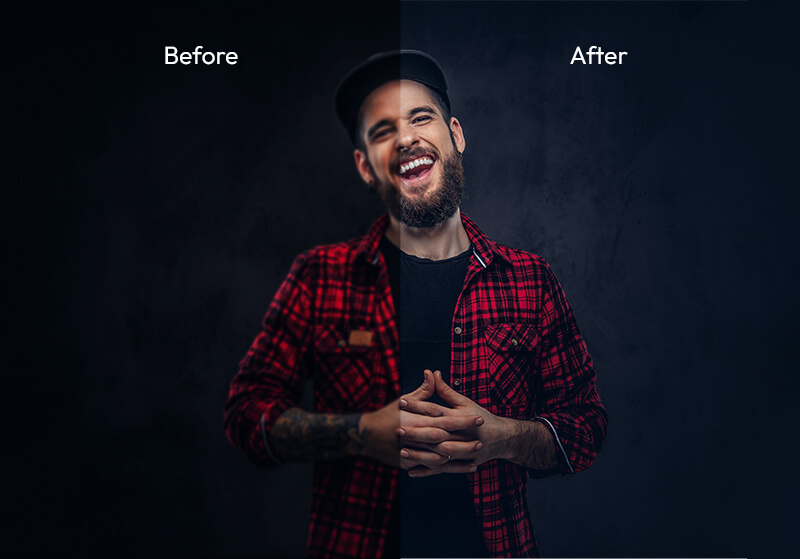
Color grading, on the other hand, is a creative process that follows the correction process. It gives footage a stylistic look, sets a mood and tone, denotes character and location traits, and creates suspense or tension. The goal is to convey a visual tone or mood to support or enhance the narrative. So, it is usually the last step in the video post-production process.
What is the need for color grade?
The fact that colors can affect your mood and emotions is not new. For decades, everyone from restaurant owners to filmmakers has been using the power of color to influence people for different purposes.
Let’s examine how color grades help filmmakers connect with and influence their audience.
Color grading in video and cinema enhances storytelling by influencing the viewers’ moods and emotions with colors. All filmmakers, whether good or bad, are visual artists at the end of the day. They create art by manipulating hues to evoke emotions, draw focus to details, show changes in character traits, and more.
If they want to convey a change in seasons, they set different color palettes for each season. The cold and melancholy of winter can be conveyed through blue hues. The warmth and happiness of summer can be expressed through orange hues. Colors can also help build tension or bring harmony to a scene.
Many Hollywood directors have used color as a storytelling aid. They have used it to suggest mood, set the tone, and depict changes in time, location, and character traits. Some examples are Stanley Kubrick, Alfred Hitchcock, M Night Shyamalan, and Greta Gerwig.
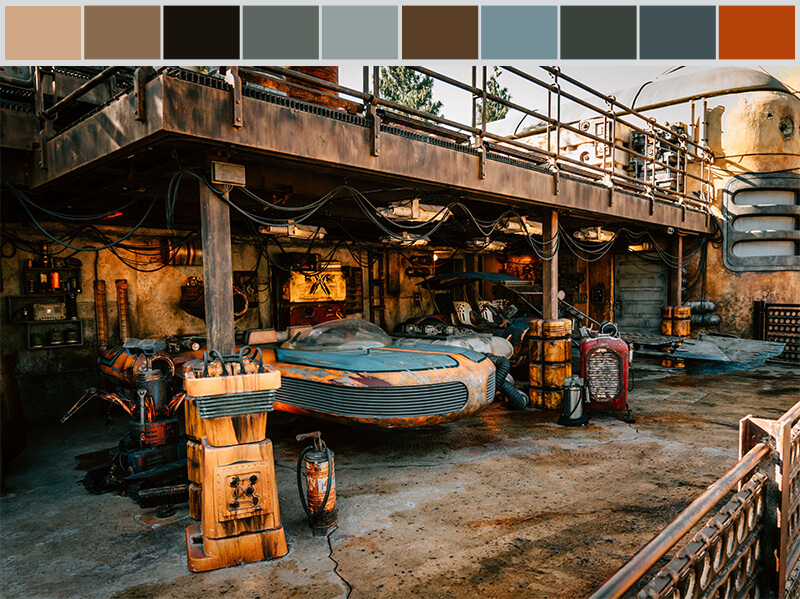
Filmmakers determine a palette as part of their production design, and grading helps them match this vision.
What is a LUT in color grading?
You may have come across the term “LUT” when researching color grading. Short for “lookup table,” LUTs are the quickest way to grade your footage after correction.
So, what does LUT mean?
A lookup table is a broad term that refers to a predetermined set of mathematical formulas that completely transform your footage’s existing colors into the desired ones. A number represents each color, and when applying LUTs, these formulas change the original hues into completely new ones.
In simple words, LUTs can completely change the hues in your footage by altering some of their properties. They automatically adjust gamma, contrast, saturation, luminance, and hue, essentially changing the original colors into new ones.
LUTs can target single or multiple hues, making grading faster. However, only those who have a solid understanding of grading should use it. In filmmaking, it is used to make digital footage look like old film stock.
Now, let’s look at how editors grade videos.
How to color grade your footage?
Color grading is a creative process that can differ from professional to professional. However, we will show you the general procedure for grading footage so you can understand the process.
Step #1: Choose your scopes
Colorists and video editors use scopes when coloring footage, as monitors are not configured to represent colors accurately. Additionally, even your eyes can become unreliable after a while. That is why you must choose scopes in your editing software before you start the coloring process.
Scopes are visual aids that help you see the distribution, range, and relationship of the colors in videos. The most common scopes used are:
- Waveform: a graph that provides information about the highlights and lowlights in your picture or clip. It helps you control the exposure levels or luminance in the frames.
- RGB parade: a waveform broken down into three graphs (red, green, and blue). It helps you check if your frame is over or underexposed and ensure that the RGB balance is correct. With this graph, you can easily tell if a color is overcast when one of the three colors is higher than the others.
- Vectorscope: a circular graph where the hues marked on it are in the same arrangement as a color wheel. The graph of a properly exposed and saturated frame will appear in the center of this scope. The more the graph moves away from the center, the more saturation in your frame increases. This scope also has a useful tool to indicate skin tone. This indicator appears as a line moving from the center towards the orange colors. Ideally, the skin colors should appear along this line. If the colors appear too much on either side of this indicator, your skin tones will appear too pink or orange.
Step #2: Choose your reference clip
Before you start editing a scene, choose a clip you can use as a reference for the rest of the project. The clip should be the most balanced of all the shots (before correction) so that it helps simplify the work.
Step #3: Color correction
We already went over this earlier in this article, but let’s have a refresher, shall we?
Before you grade your footage, you must first color-correct it for the best results. This step aims to make your footage look as natural as possible and match shots between angles and cameras.
As tough as it might be, you must ignore your creative preferences and focus on making the color representations accurate. You do this by:
- Correcting the white balance
- Equalizing the exposure
- Reducing the highlights
- Increasing the midtones
- Match the skin tones, and
- Apply noise reduction.
Color correction helps you make details hidden in shadows and highlights clearer and creates a neutral base ready to be worked on in the next steps.
Step #4: Matching all clips to your reference shot
After the correction process, you can match the rest of the scene with your reference shot. You can do this by saving the corrections you have made as a preset and applying them to the rest of the clips.
Step #5: Start creating your “look”
You can start grading your clips once you have completed the correction process. As you did in the correction process, first grade your reference clip.
Begin by deciding what mood you want to create and how to adjust contrast and color balance to achieve this effect.
After you have settled on a look, make the final adjustments and fine-tune it to get the best results.
Step #6: Apply the grade across the rest of the scene
Now, you can apply the grade to the rest of the clips in the scene.
Step #7: Tweak the grade to get the final grade
Once you have applied the look to your scene, make the final tweaks to any remaining attributes to ensure the grade looks equally good on all the shots.
Things to keep in mind when giving your videos a cinematic grade
Color grading gives movies that “cinematic” look and makes them look and feel like big-budget productions. While there are no specific rules for giving your videos a cinematic grade, you can follow these useful tips to get the best results:
- Keep things subtle when you make changes to the colors. Drastic changes in the hue will make the grade look distracting and feel unnatural. It can take the viewer out of a potentially immersive experience.
- Make the skin tones look natural to avoid making the actors look unnatural or sickly. The human eye can easily notice when the skin tone is off, so keep an eye on the vectorscope to keep it in check.
- Color strongly influences emotions, so choose the hues based on the mood you want to set.
- The film director, director of photography, and colorist all create a color palette for each film project. Ensure that the final grade matches the palette.
To summarize
Color grading is a post-production process that requires creativity, an understanding of color theory, and skill. Each colorist’s style will be different, as people tend to approach creative projects in unique ways. Even when they have to refer to color palettes, their individual skills influence the results.
We hope this article has given you an in-depth understanding of color grading, its importance, and the steps involved in this process. You can now fully appreciate the amount of work that goes into filmmaking and content creation for people’s entertainment.
If you want to improve your video production quality, pick up this skill or outsource the color grading work to video editing companies for the best results.
Stay curious. Cheers!