In the video post-production process, color grading has a very important role to play in the creation of beautiful and stylistic videos. Now, there are many different ways to grade colors in a video, and the one gaining a lot of popularity is LUT. But what is this LUT, and how does one use it?
Here we’ll let you get a peek into our world of video editing so that you can understand all about LUT, why it’s used, how you can use it too, and some tips on what mistakes you should avoid.
So, shall we begin?
What is a LUT?
LUT is a short form for lookup table and is something like a color filter used to change the colors in a video. When you apply it to your videos, it uses a predetermined set of formulas to change the colors into the desired set of colors.
If you want an accurate mental picture of what an LUT is, you can think of it as a spreadsheet that accounts for each and every color an image can possibly have. Then, next to each color, there will be a list of all the colors they are supposed to look like.
Every digital photo or image is made up of a collection of pixels. And in turn, each of these pixels is made up of colors. So, when you apply a lookup table to the video, the colors in each frame are converted into the predetermined color.
So, why are LUTs used in video editing?
The reason is simply that they’re an easy way for video editors and filmmakers to tinker with the tone, contrast, and color of a video. With LUTs in hand, colorists and video editors like us don’t have to create a color space from scratch. It’s basically a color-grading shortcut.
How do you apply LUTs?
Before we start with the process, there’s something you must know. Lookup tables are effective only when applied to video footage that is shot in flat log or Cine-like color profiles.
You’re now ready to learn the steps.
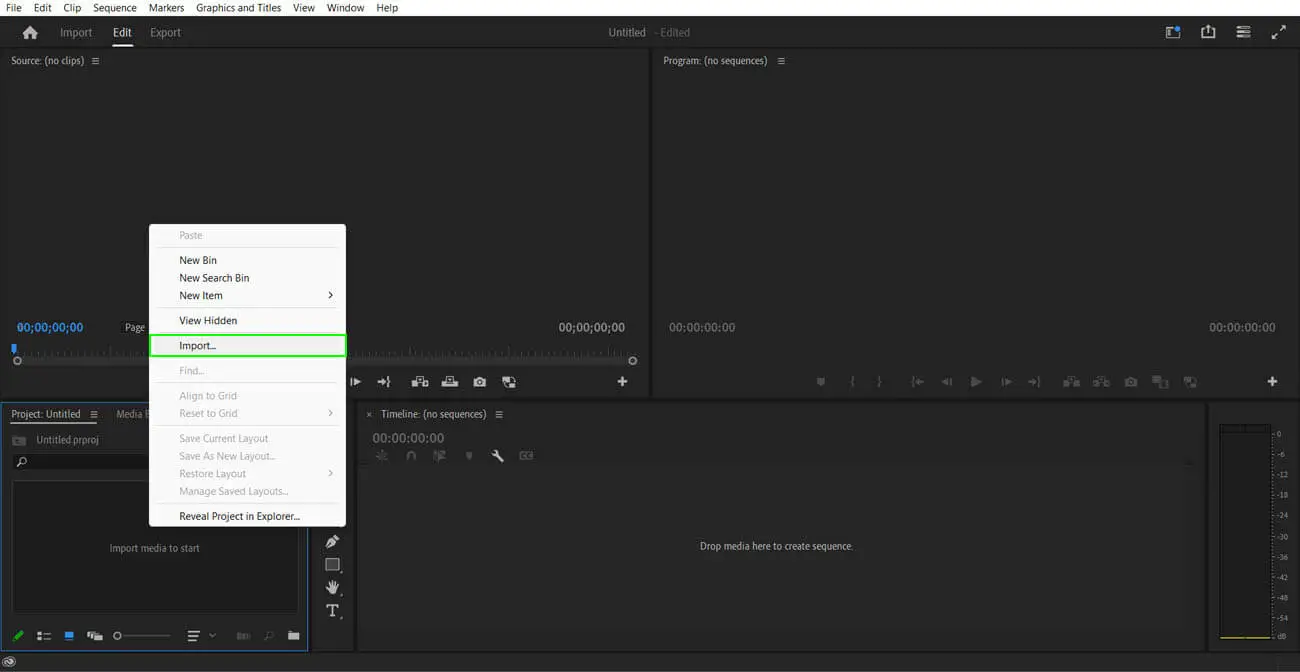
Step 1: Import the video into the video editing software
Once we’ve shot the video, we import the raw footage into the video editing software of our choice. While we prefer to work with Adobe Premiere Pro, you can use any software, like Final Cut, AVID, or DaVinci Resolve. The choice is all yours.
Step 2: Color correction
Now that our footage is in the software, the first thing we do is color-correct the clips. Color correction is a very important technical step in the video editing process and always comes before color grading.

Yes, that’s absolutely correct. Color correction and color grading are two different processes. Like I just mentioned, color correction comes first, as this is where we correct any color issues. If there are problems with the colors in your video, you won’t be able to control the grading process accurately.
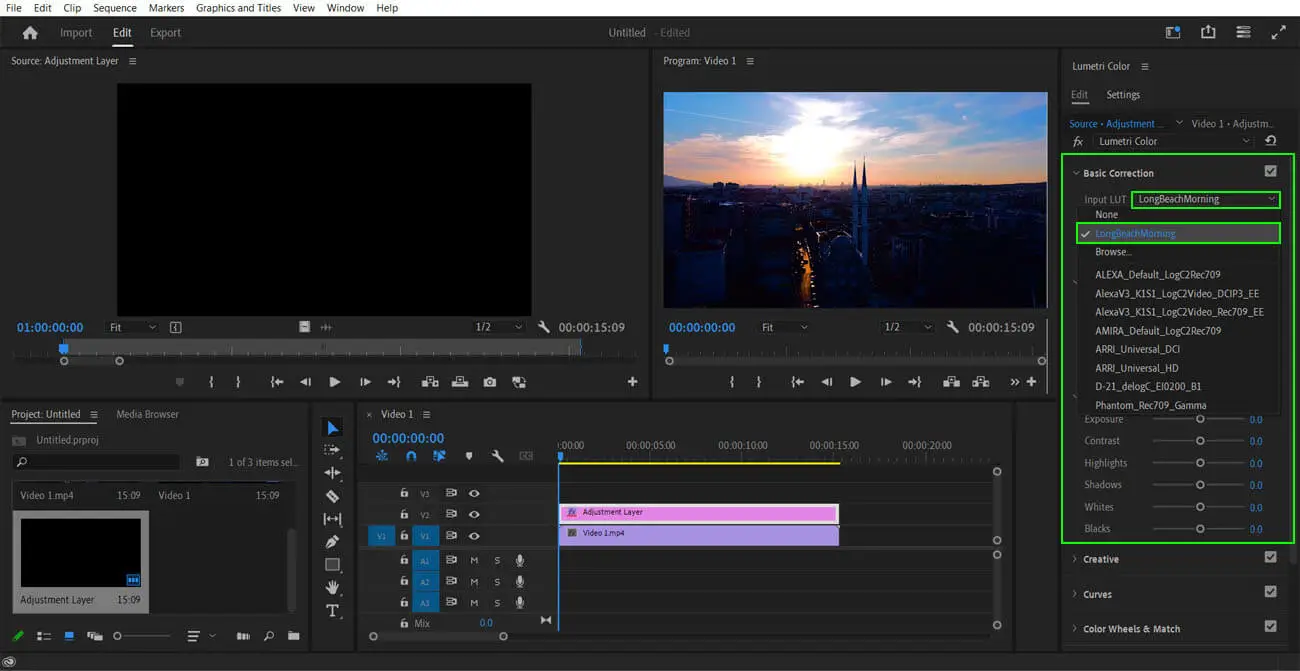
Step 3: Loading/importing the LUT
Now, all the LUTs in the world don’t come preloaded with video editing software. At times, we may have to download them from the internet or create them on our own. To load or import a lookup table, we look for a place in our video editor that has this option. To identify the LUT files, look for the files that end with .cube or.3dl.

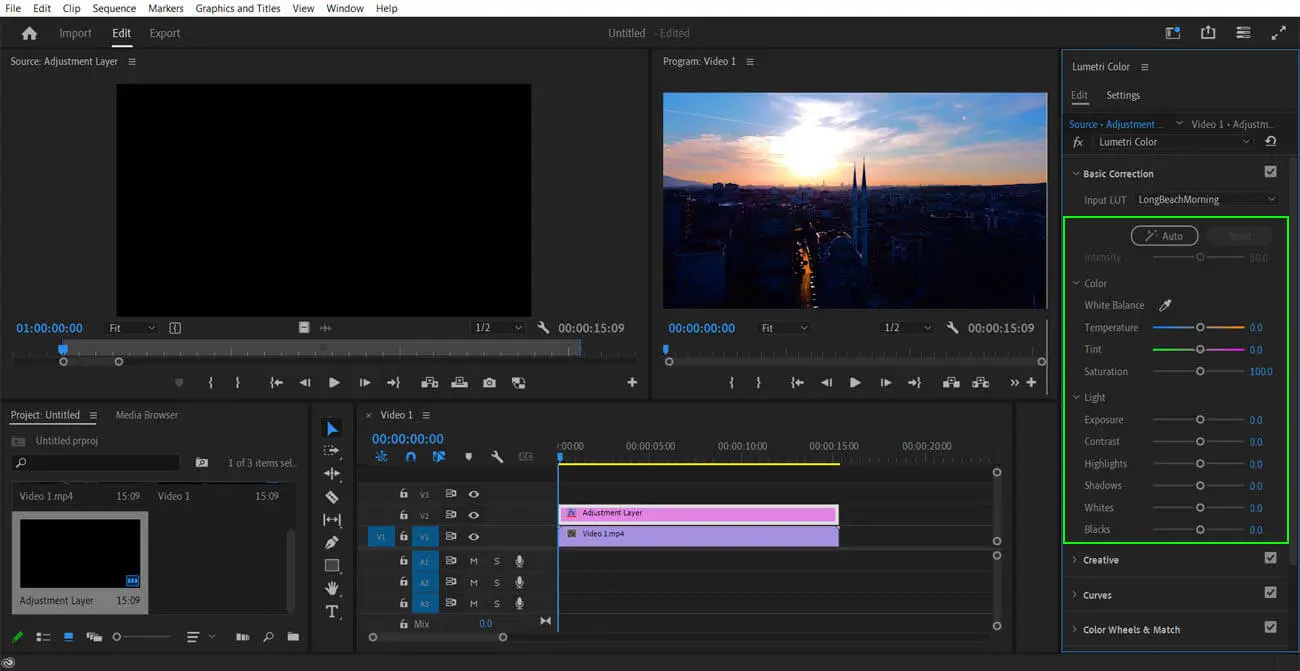
In Premiere Pro, the LUT packs can be loaded from the Lumetri Color panel. Also, Premiere Pro mostly supports LUT packs in the cube format.
- Open the Lumetri Color panel > go to the Creative tab > go to the Look drop-down menu > click on Browse to go to the location of the LUT file.
- Select the LUT file and click on Open to import the file into the video editor.
Step 4: Apply the LUT
After we import the LUT packs, we start experimenting with the different lookup tables to see which one suits our project. Choose the LUT that supports your story the best. Remember that, while there’s no wrong way to apply an LUT, you must keep the color theory in mind and refer to the film’s color palette.
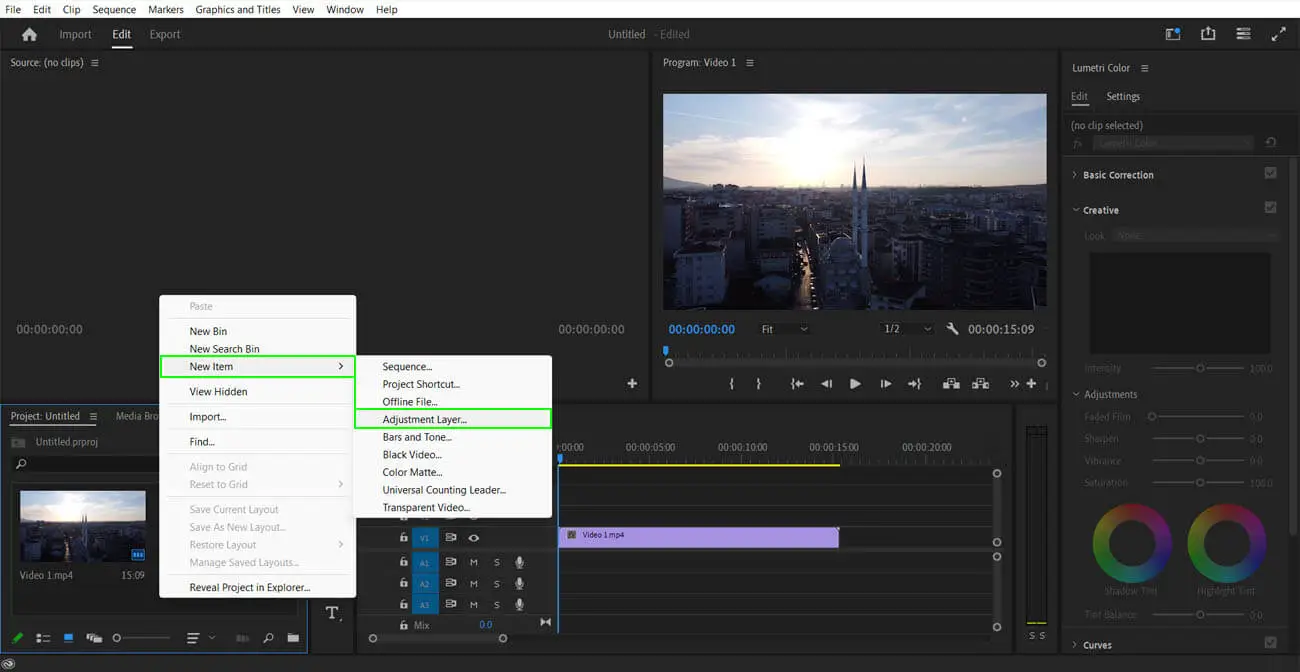
Step 5: Fine tuning
Some video editing software, like Premiere Pro, allows you to adjust the intensity of your chosen LUTs. We have to adjust the LUTs to control their overall effect on the video footage.
For the best results, add your LUT as an adjustment layer so that it’s easier to control and remove.
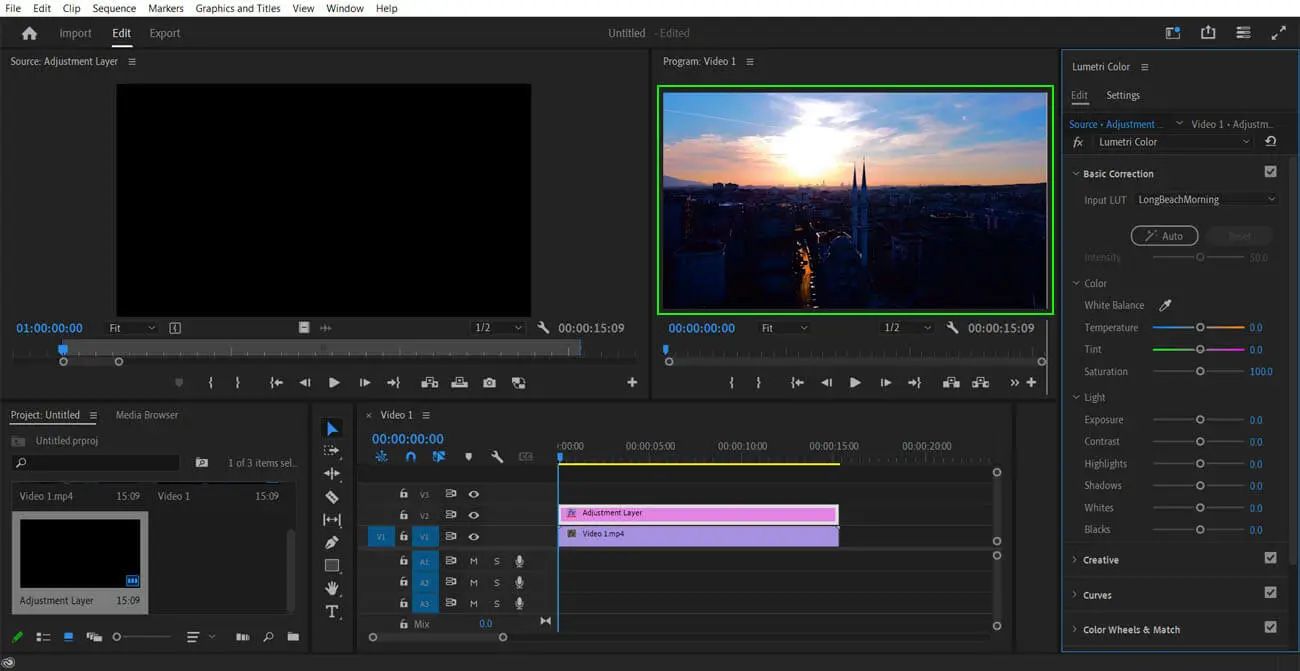
Step 6: Preview your color grading
After applying the LUT, we preview the video to see if there are any adjustments to be made. Nowadays, most video editing software comes with real-time previews, so you can see the results of your changes immediately.
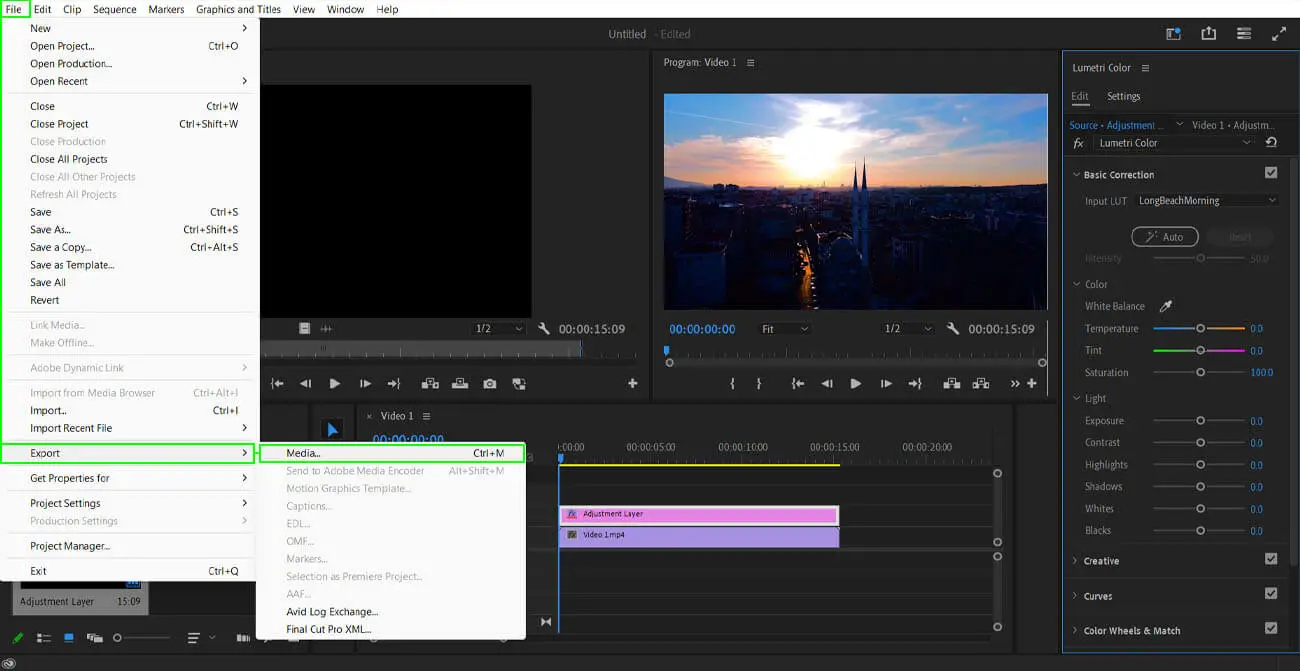
Step 7: Export/render
If you’re satisfied with the overall look of your video project, you can save it and export/render the video file into a suitable file format, like.mp4,.mov, or .wmv.
You must note that the steps I’ve just mentioned here will vary slightly depending on the video editor you use.
Common LUT errors to avoid
Using LUTs to color correct instead of color grading
Lookup tables are meant to be used only for improving the aesthetic of videos. They’re not supposed to be used for color correction. In any case, LUTs won’t give you a good result if you don’t color-correct your footage, unless you’re extremely skilled at tweaking LUTs.
Forgetting to adjust the output of your LUT
Your task doesn’t end when you apply an LUT. You have to adjust the LUT’s intensity so that the colors aren’t too strong or unnatural-looking. Application of the lookup table is a simple enough task, but it has to be adjusted so the final video looks good.
Using the wrong LUT for the log profile
I’ve mentioned before: shoot your footage in a log profile if you plan on using LUTs for color grading. However, remember that all LUTs don’t suit all log profiles. Some LUTs are built particularly for certain log profiles. Check the description of the LUT package to see if it suits your log profile before downloading it.
Not calibrating your monitor
I’m sure you would’ve noticed, at some point in your life, that the same image looks different on different monitors and in different environments. This happens when the monitor’s calibrations differ from each other. Monitors that haven’t been calibrated display colors inaccurately. Also, if you’re working with a team of people who use different monitors, calibrating them will help keep the final video consistent.
Pros and cons of using LUTs
The pros
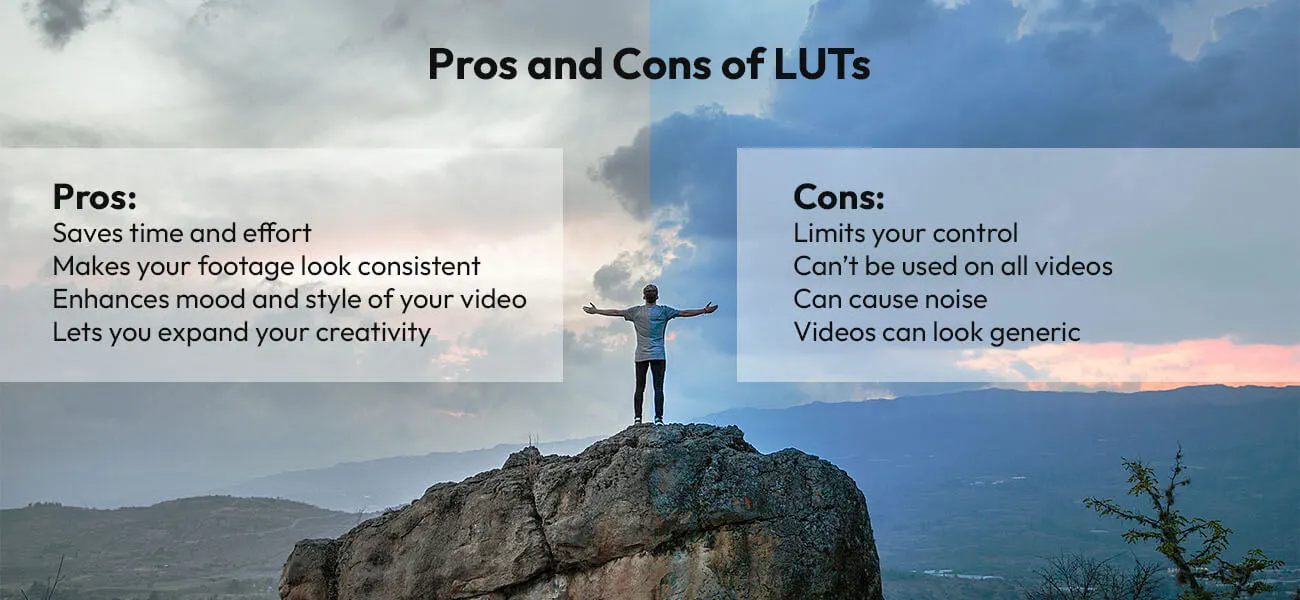
- As LUTs are basically color-grading shortcuts, using them will save you a lot of time and effort. You don’t have to grade the video colors from scratch.
- When you shoot videos with different cameras and in different lighting conditions, LUTs can help you make the look of your overall video consistent.
- As they are a color grading tool, they can help you enhance the mood, tone, and storytelling of your video project.
- LUTs are basically mathematical formulas that change one color into another. So, with different LUTs, you can accomplish styles that are beyond even your artistic imagination.
The cons
- When you use LUTs, they can limit the range of your creative control and flexibility over the output.
- LUTs can’t be used for all types of clips and projects. Some LUTs are not suitable for particular log profiles. You need to find one that is built for that specific log profile.
- Sometimes, LUTs can result in unwanted noise and impurities when applied without proper adjustments.
- When using LUTs, you also run the risk of making your videos look generic or overproduced. It can happen when you don’t use the right LUT or when you don’t adjust them properly.
Time for the wrap-up
LUTs, or lookup tables, at the end of the day, play a very vital role in the color grading process. Many video producers and filmmakers swear by it, as they feel like a huge burden has been taken off their shoulders.
Despite their advantages, LUTs are not the solution for all video clips and film projects. Sometimes, you’ve got no other option but to grade the colors manually from scratch. But when LUTs are the best option, make sure that your video is shot in a log profile and that you have a colorist on hand to help you create a good-looking video.