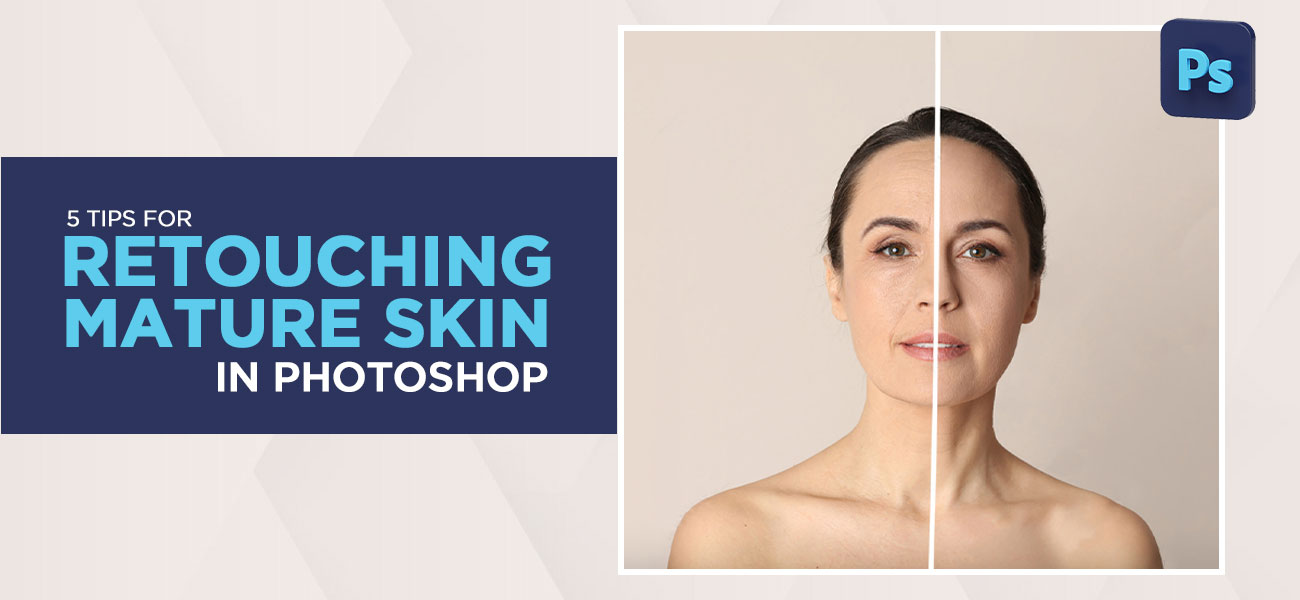
Adobe’ Photoshop has gone a long way in delivering splendid photographs with its high-end retouching capabilities. Retouching mature skin requires some expertise and it is enlightened through an instructive description of image retouching in Photoshop tutorial below.
Skin retouching Photoshop tutorial
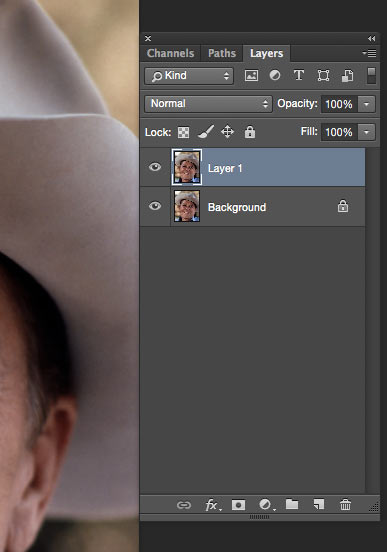
Step 1 – Layer Duplication
The first step is to duplicate the given image layer by pressing Ctrl/Cmd+J. Once it is duplicated you can work without threatening the stock image. Photoshop retouching skin techniques basically require a duplicated layer to perform transformations.
Step 2 – Editing process
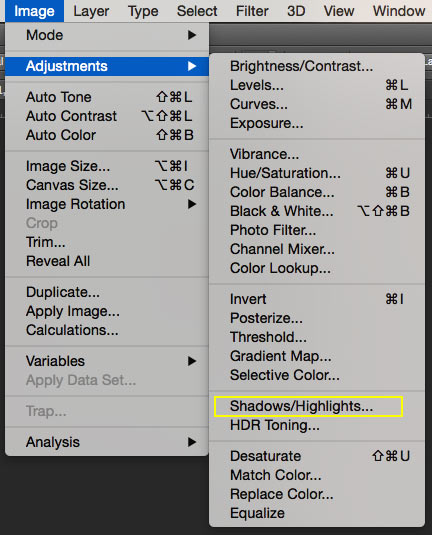
Access the Highlights sub menu by going to Image> Adjustments>Shadows/Highlights. Random values can be seen by default. It is wise to reset all the values back to 0 so that you will get a good background to work. The highlights tab is one of the nifty features that are available during image retouching in photoshop.
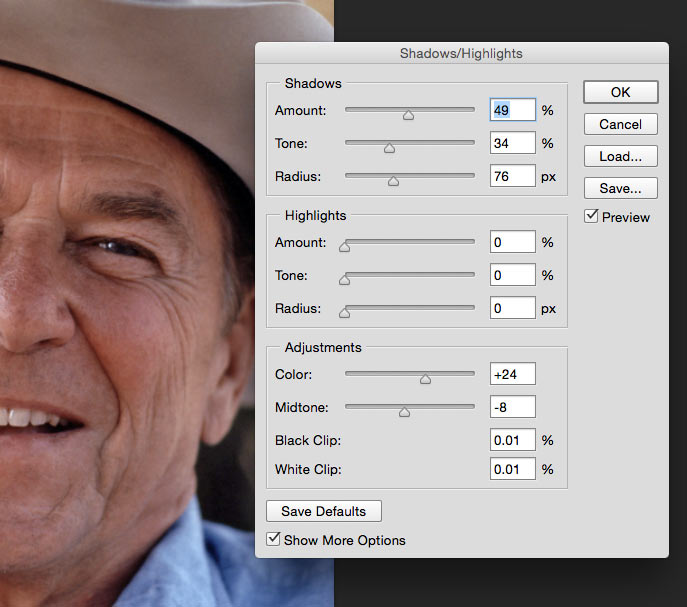
Step 3 – Manipulating the shadows
Once the shadows/highlight values are resetted the next step is to play with these settings. The sliders will help you to decide upon the completeness of the image. Play with them until you are satisfied with the work output. If it is unnatural, or feels fabricated then try moving them the other way. Color adjustments will help to bring back some of the lost colors thereby adding to the youth look.
Step 4 – Pores and wrinkle adjustment
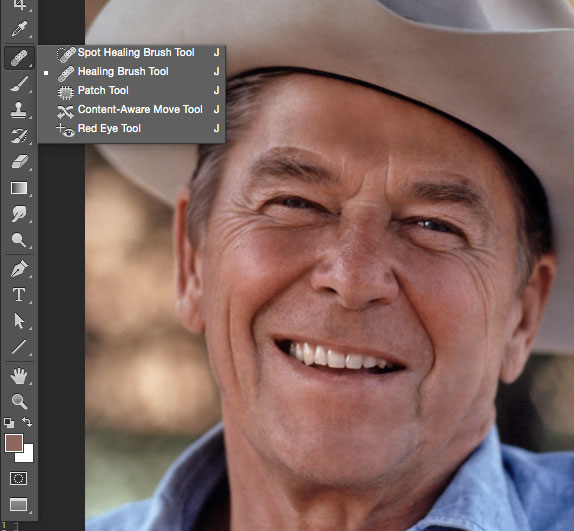
No, you cannot completely transform the image into teenagers but the limits can be pushed further. The Spot Healing brush is a lifesaver in this case. It can be found as a sub tool of the Healing Brush Tool. You should make sure that Content –Aware is chosen at the top. Paint over any wrinkles or blemishes. The tool will replace wrinkled areas with similar color from near areas. Reducing the opacity of the adjustment layer will also help to an extent.
Step 5 – Light Adjustment
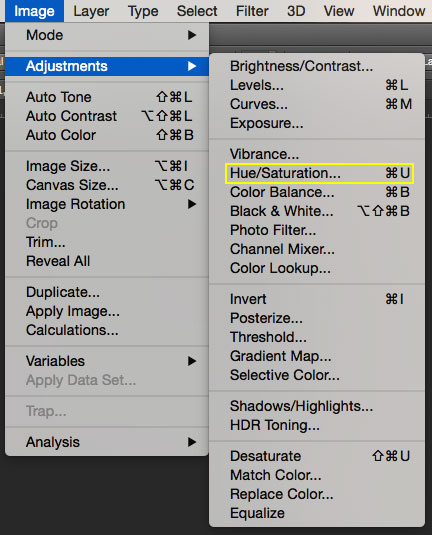
Create a Hue/Saturation layer to bring some of the lost colors back. This tip is widely deployed by photo retouching services and it greatly helps those who have a pale image that needs to be altered. Those who prefer natural looks stay away from this tip.
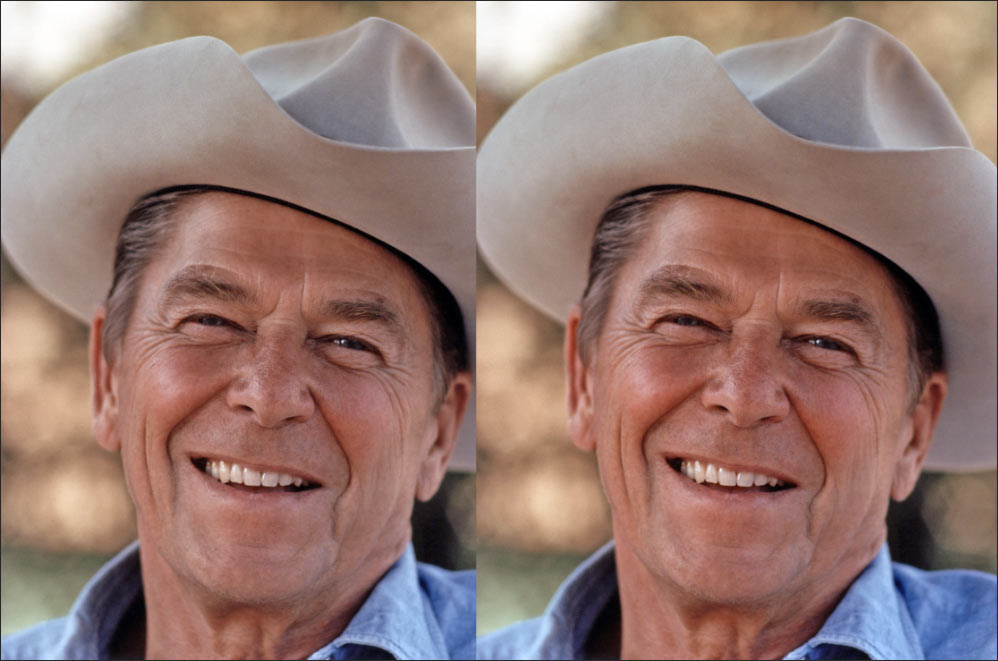
Face retouching – Before And After Editing Portrait
To Conclude
Retouching does make a difference when it comes to photographs that have mature skin. Some of the best photo retouchers in the industry apply these tips within the blink of an eye. Companies that provide professional photo editing services also prefer these tips.
Christa Elrod 


Christa Elrod serves as a senior graphic designer at ProGlobalBusinessSolutions. She is a creative designer with robust skills in typography, UI/UX designs, printing designs, video post-production, and 3D designs. Possessing years of experience across diverse industries, Christa loves to educate fellow designers with her experience and domain knowledge.