If you are a beginner in retouching baby photos and has no clue on how to soften skin, lighten skin and smoothing skin in Photoshop this step by step tutorial will be useful for you. Read ahead and Photoshop the baby pictures in a professional manner.
There are various software and apps available online to edit baby photos, either through a computer or mobile phone. But in this article, we used one of the popular software programs, Photoshop, to edit baby photos and guide you through the step-by-step process.
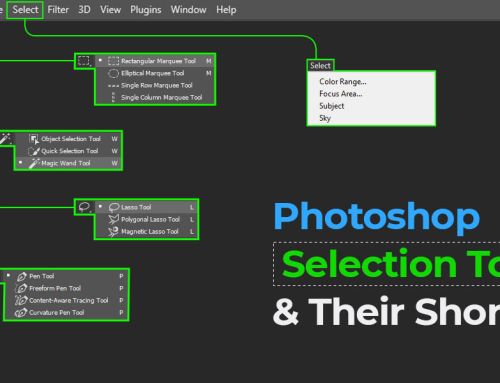
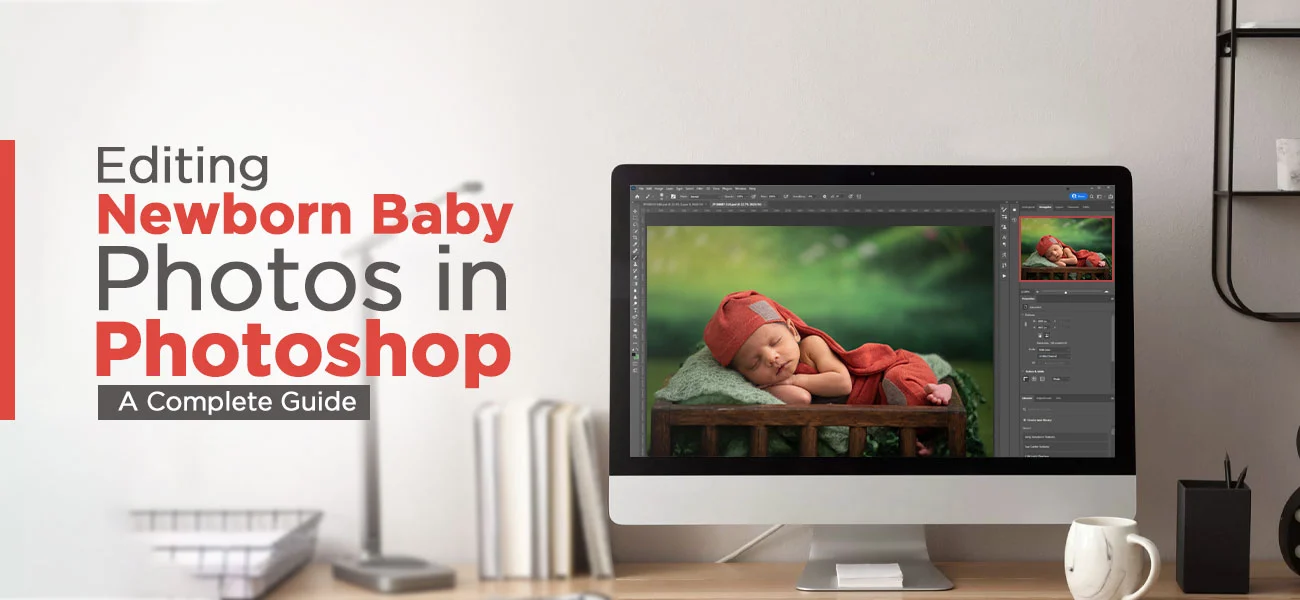
Editing Photos of Newborn Babies using Photoshop
Adobe Photoshop is a powerful software tool that offers the creative expansion to pull off mesmerizing image editing techniques in a relatively shorter turnaround time. With just a few careful and sophisticated steps in Photoshop, we can add a glamorous and alluring feel to the photos that serve as a treat for the eyes.
The challenge of touching up photos of infants lies in the fact that the images innately carry a degree of beauty that has to be further enhanced by giving flight to the editor’s imagination. The exact details of the cute expressions and postures of babies have to be preserved during the edits. However, those eyesore aspects of the images that project details about babies’ body parts in a glaring manner that are not readily apparent to the eyes in real life have to be rendered visually appealing.
The defects become apparent once you zoom the images. Since the images have been captured in high resolution, whenever they are magnified, the blemishes become more intense. The defects are usually in the form of yellowish spots, skin flaking off, feet with purplish or bluish tinge, red soreness on skin etc. These splotches can be eliminated to a large extent during shooting.
The photographer has to be careful with the amount of exposure, ambient and atmospheric lighting, and white balance during the capturing of images. This would make the process of editing quickly by the experts offering various Photoshop services.
Starting with The Editing
To start with the process of editing skin in Photoshop, select the preferred version and open the desired image within in. Next, click on ‘Curves’ layer command nested within ‘New Adjustment Layer’ under ‘Layer’ menu. A dialog box would open up once the Curves layer is activated. Here, you have to work on the mid tones of the picture for brightening up the image.
Position your cursor along the middle of the line and pull it up. Keep your attention glued on to the image to see the effects on the skin when you manipulate the line. Don’t go overboard with skin brightening and lightening as the natural tone of the babies’ skin would be abnormally compromised. Use your discretion for the optimum effect.
The unwanted effects of applying the curves layer can be eliminated from the background by choosing layer mask from the layer’s palette and then any soft, black brush. Run the brush on the background carefully to obliterate any effect that does not complement the natural hue of the image. Make it a point to darken the background to make the subject appear prominently. The image has to be subsequently flattened.
Useful Article: Change Background Color in Photoshop in Simple 2 Ways
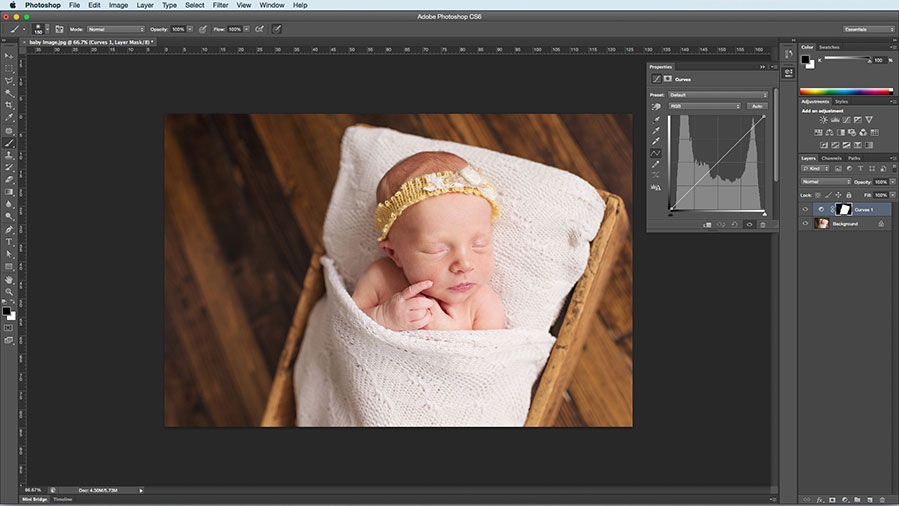
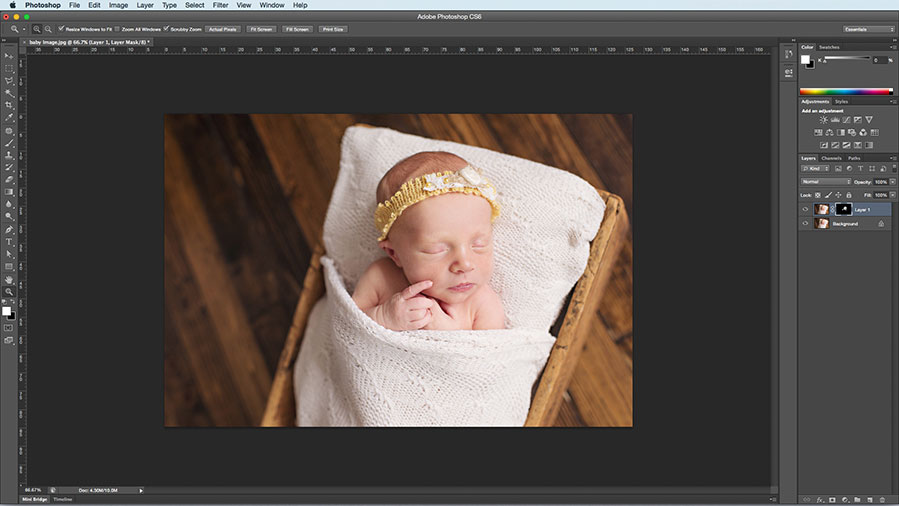
Opening infant photography in Photoshop
Removing The Blemishes
In order to remove the blotches and spots, you need to apply the clone stamp tool. Set the opacity level to 40% for eliminating the redness, flakiness, splotches and other spots. This is what most of the outsourcing newborn photography editing companies do.
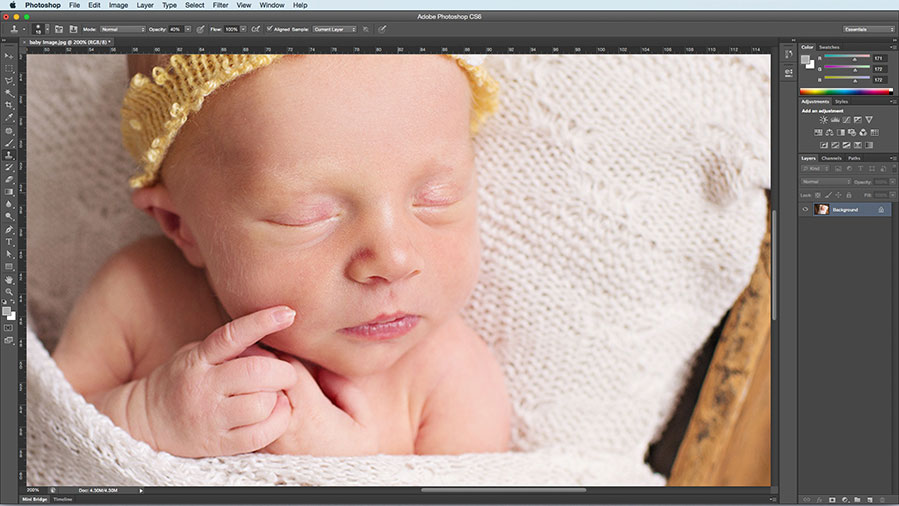
Using Clone Stamp Tool

After using the clone stamp tool
Reducing The Redness Of Babies’ Complexion
You must have observed that the skin of the infant is usually red. When the image is clicked in high resolution, this hue becomes more intense and thus the same needs to be reduced sufficiently for a soothing look. Navigate to ‘Hue/Saturation’ command under ‘New Adjustment Layer’ nestled within ‘Layer’ menu. Clicking the command would result in an addition of a Hue/Saturation layer.
The reduction in redness of skin can be accomplished by clicking on the pull-down arrow and then adequately reducing the saturation of red hue. Next, you can also reduce the concentration of purple or magenta color on the skin by reducing the saturation under ‘magentas’. Once this aspect of Photoshoping babies photo is done, you need to get the image flattened.
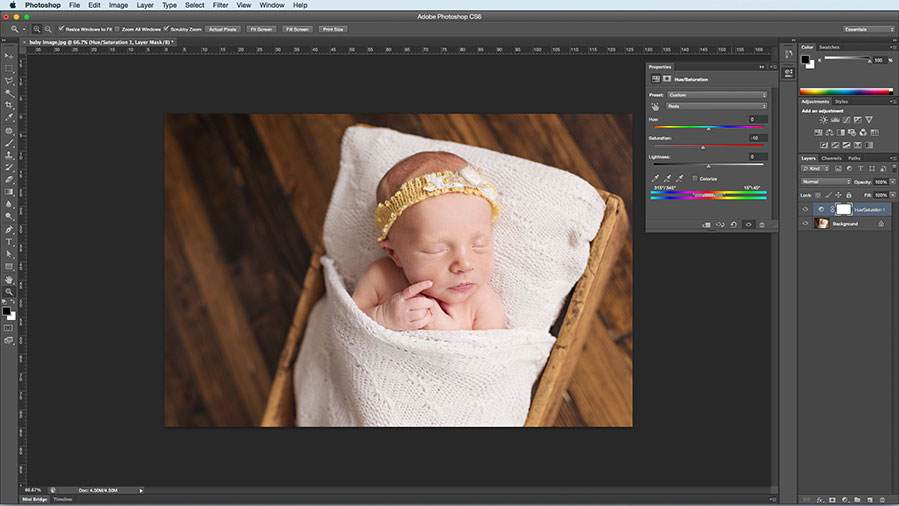
Adding Hue/Saturation Layer
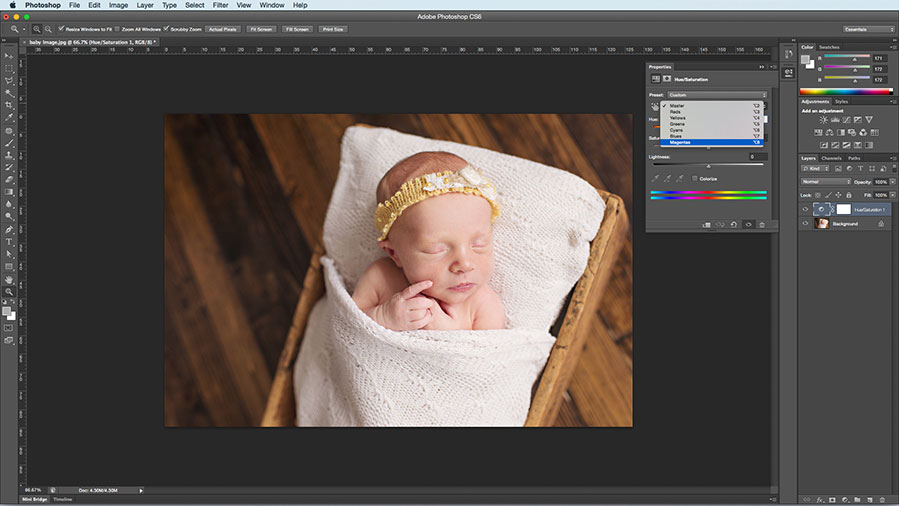
Reducing the saturation level
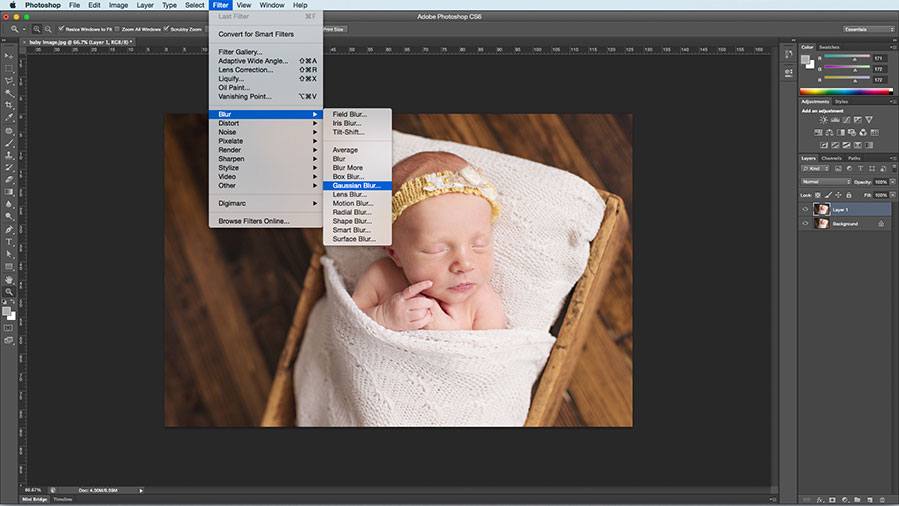
Rendering The Skin Smoother, Glistening, And Soft
You would now require a duplicate layer. On this layer, an addition of gaussian blur layer would facilitate providing the smooth feeling to the skin. You can add this by navigating to ‘Gaussian Blur’ command under ‘Blur’ in ‘Filter’ menu. In the dialog box that appears, the radius has to be set to 8.0. The layer has to be inverted now for painting on the blur effect. Next, navigate to the ‘White Layer Mask’ box within the blur layer found within layers palette.
You can get the layer inverted over here by pressing Ctrl + I on the keyboard. The color of the layer mask box would be changed to black to indicate inversion. Now, you need to select a white brush of small diameter and with the opacity of 100% for the painting of blurring effect over the skin. When moving the brush over the subject, ensure that you are not touching the lips, nose, and eyes of the infant.
The blur’s opacity level can be reduced by decreasing the layer’s opacity. After you are done with this effect, you would observe that the skin of the newborn baby has been rendered naturally soft, lustrous and attractive which is free of any blemish.

Duplicate The Layer
Adding Gaussian blur layer to smoothen skin
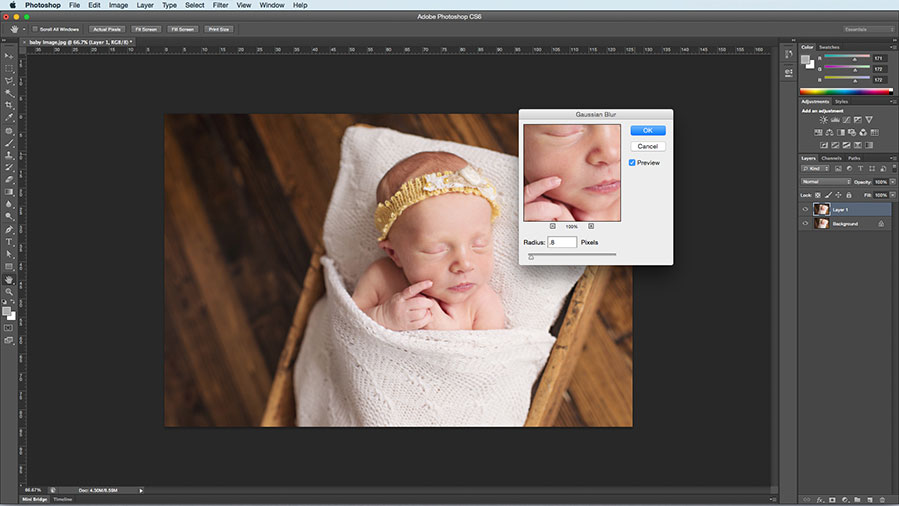
Adjusting Radius Percentage
Invert the layer and brush on the required area

Blemishes Removed Image
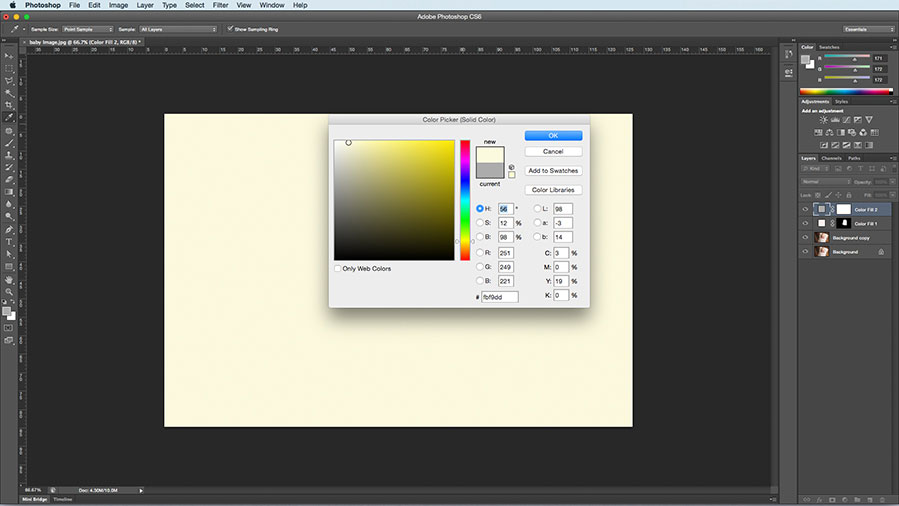
Adding Creamy Glow To Newborn’s Skin
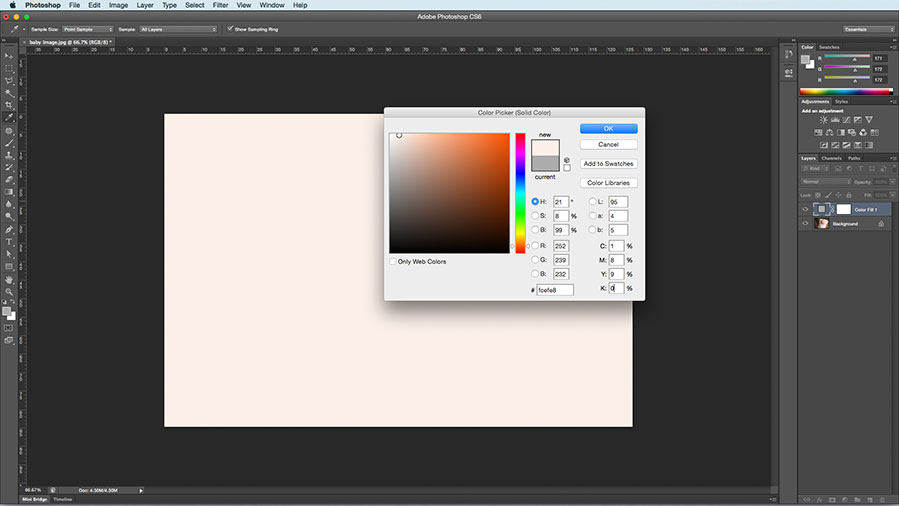
In Photoshop, you can render the skin of the newborn creamier to make it more appealing to the eyes. For achieving creamy newborn skin, you have to navigate to the icon of ‘half white/half black adjustments layer’ situated at the lower part of the layers palette and from over there select ‘Color Fill’ option. The fill color has to be peachy pink.
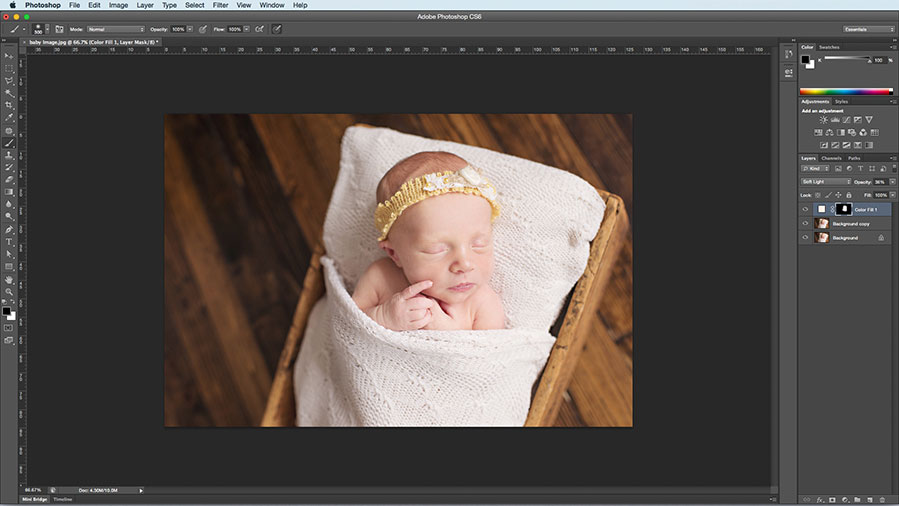
The layer’s blending mode needs to be ‘Soft Light’. Now, you have to bring down the layer’s opacity to almost 36%. After this, select a soft black brush with opacity set at 100% by clicking on the layer mask. The effect has to be erased from picture’s background. You may continue repeating the color fill layer step with soft yellow color until the desired creaminess is achieved.
Half white/half black adjustments layer
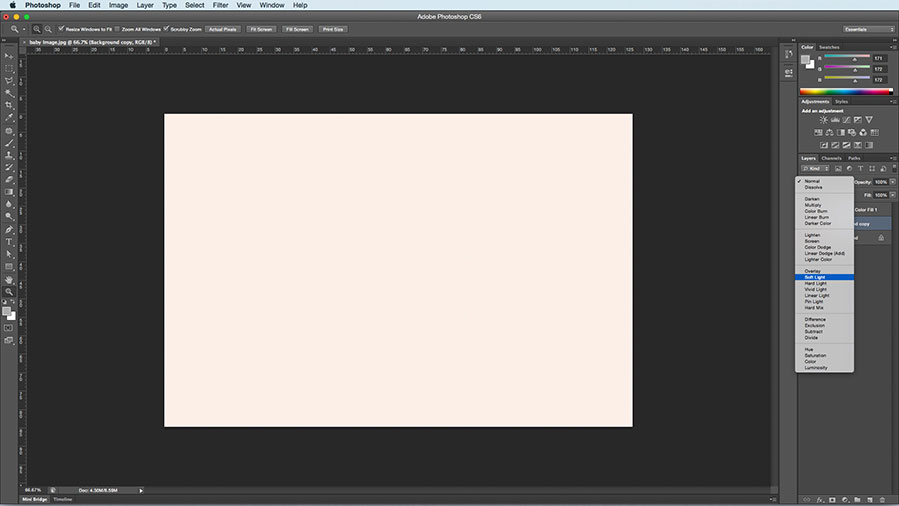
Soft Light Layer
Layer Opacity Option
Color fill layer option

Final Output Of Soft Light Blending Mode
Final Output
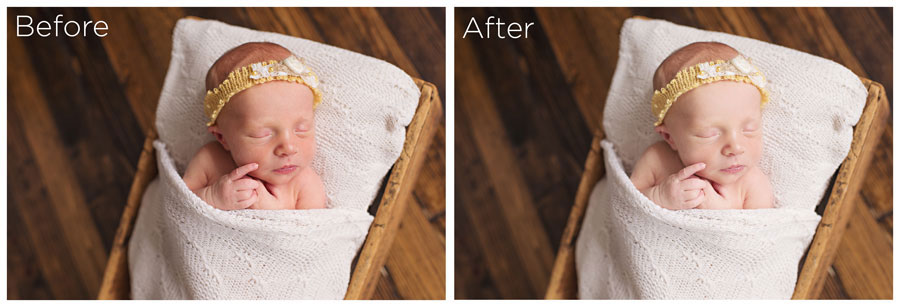
Creamy newborn skin applied
To conclude
Performing a baby photoshoot is challenging compared to other types of photoshoots. With the proper use of Photoshop techniques, the final output of the newborn photos can have an extraordinary look. In case you lack experience in this type of editing, outsourcing is the safer option you can choose.
PGBS has become a name to consider within the domain of digital photo editing services. As a mainstream outsourcing photo editing company, we have catered to various challenging requirements of clients with self-confidence and expertise. Our seasoned creative artists and photo editing experts command insightful knowledge of all contemporary photo editing software and their cutting-edge features.
Learn how we can help you out if you want to newborn photo editing assistance.
Christa Elrod 


Christa Elrod serves as a senior graphic designer at ProGlobalBusinessSolutions. She is a creative designer with robust skills in typography, UI/UX designs, printing designs, video post-production, and 3D designs. Possessing years of experience across diverse industries, Christa loves to educate fellow designers with her experience and domain knowledge.