If you send someone a 10-minute video in which nothing important happens in the first minute and last five minutes, how will they react? They will grumble and complain to you about wasting their time.
So, how can you avoid such a scenario? That’s simple! Just trim your video and shorten it to only the essential parts. You may have already come across this option when sending videos over WhatsApp or posting them on social media.
Trimming is a basic part of video editing that anyone can do, along with cutting and cropping.
To help you understand more about this technique, this article will cover:
- What is trimming?
- What is its purpose?
- What is the difference between trimming, cropping, and cutting?
- If it reduces video quality and
- How to trim a video?
Let’s begin!
What is video trimming? – Definition
Trimming is a vital part of the editing process, where video editors remove some of the parts or frames from a clip. It is one of the many different ways to edit footage.
Also referred to as trimming the top or tail, this process is done to reduce the total length of the clip and keep the essential content.
What is the purpose of video trimming?
When you take a video, there will be a gap between the clip’s start and the interesting portion. Even if this gap is only for two or three seconds, it is enough to make the viewer lose interest.
That is why trimming is so important. It helps ensure your viewers aren’t bored waiting for something to happen. The first few seconds of your footage have the vital task of grabbing viewers’ attention and convincing them to continue watching. With trimming, you can remove unnecessary parts from the start of your clip and begin your videos with exciting bits.
Besides making your footage more concise and compelling, trimming also helps you keep your videos at a length that won’t turn viewers off.
What is the difference between trimming, cropping, and cutting?
Trimming, cropping, and cutting are all video editing techniques that involve the deletion of parts of clips. While trimming and cutting both remove portions of clips, cropping removes parts of frames and doesn’t shorten the footage.
Trimming
Trimming is where editors cut some of the beginning or end of a clip to ensure that it starts or ends at the right moment. It helps keep the audience engaged from the very start of the video. It is also done to shorten the length of a clip and make it concise and interesting.
Cutting
Here, editors make ‘cuts’ in a clip, remove the middle section, and join the remaining segments. Unlike trimming, cutting is done anywhere between the start and end of a clip. It helps editors polish a video by removing or cutting away meaningless parts, bloopers, and errors, from the footage.
Cutting footage can also help remove scenes or dialogue that are irrelevant to the story or cause pacing issues. Cutting can also refer to cutting long clips into smaller pieces to make work easier.
Cropping
Cropping is similar to image cropping, where you cut out parts of a frame you don’t like. For example, removing filming equipment or an extra from the background
Cropping is also done to change a video’s dimensions to fit a specific area and choose what part of the frame the viewers must see.
Does trimming reduce video quality?
Resolution, bit rate, and frame rate are some of the essential factors affecting frame rate. Trimming often affects the final quality because the video codec changes the resolution, bit rate, or frame rate.
You can trim a video without losing quality or minimize quality loss if your video editing software allows you to keep the original encoding settings.
Basic steps on how to trim a video
The exact steps to trim a video differ from software to software, but here are the general steps to go about trimming. You can even trim a video without dedicated video editing software. As an example, we will show you how to trim your videos with just the Photos app on Windows 10.
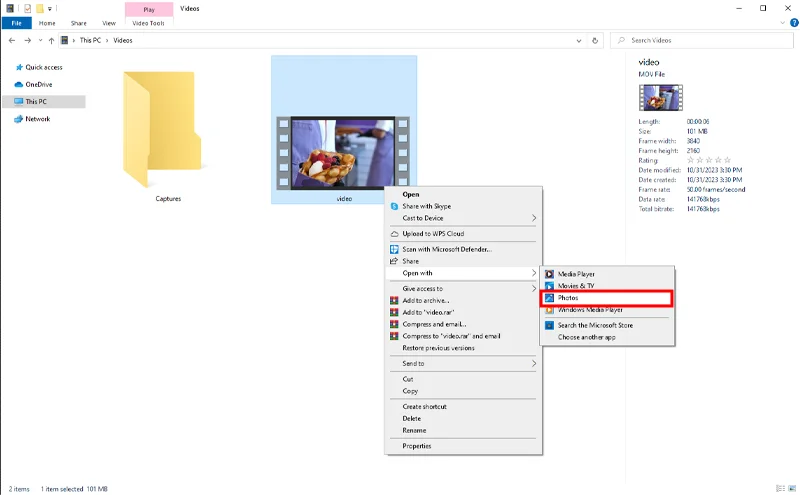
Step 1: Open the Photos app and import the video
Find the Photos app on your Windows 10 desktop and double-click to open it. Import your clip into the app and place it on your timeline.
Alternatively, you can right-click on the video you want to edit, go to “Open with,” and click “Photos.” Doing this will automatically open the video in the app.
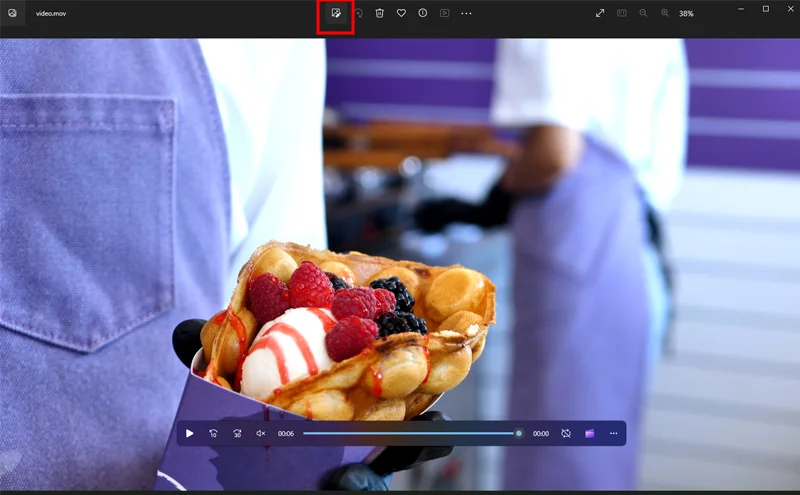
Step 2: Select trim
Once your video is open in the app, go to the navigation bar at the top of the screen and locate the editing icon. When you hover your mouse over the icon, you will find that it says, “Video trim.” Click on the icon, and a trimming editor will open on your screen.
Step 3: Select the portion to keep
In the editor, you will find that the entire video timeline is selected with handles on both ends. Once you have decided what parts you want to trim off, click and drag the handles to where you want to start or end the clip.
Every software program has its own way of choosing the portions. In some software, you can use points to mark or select the start and end of the parts to be trimmed.
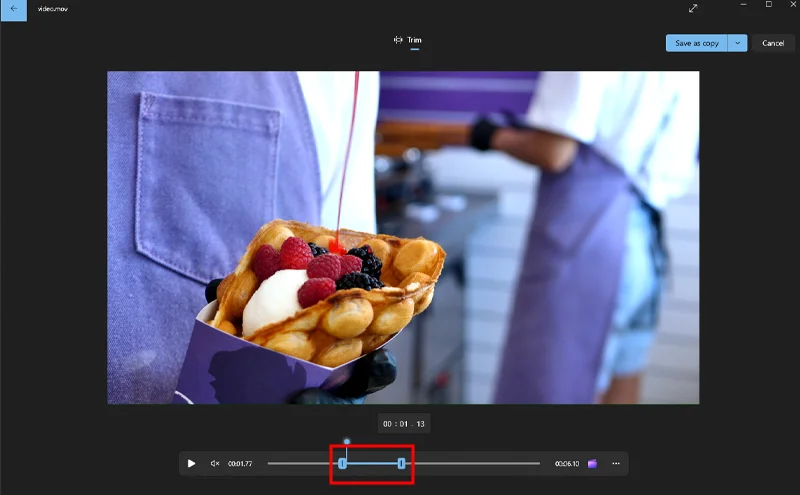
Step 4: Trim your video
Once you have selected the video segments you want to keep, click on “Save a copy” on top to save the trimmed video separately. Only the section between the handles will be saved as a new file with “– Trim” added to the name. You can rename this file later or before you save it.
You can also click on the dropdown next to “Save a copy” and click on “Save” to replace the original with the trimmed video.

Wrapping up!
We hope this article has helped you understand more about trimming and how it differs from cutting and cropping. If you have been sharing videos without making this basic edit, try it and see the difference. If you think your videos need more than just a trim, contact video editing companies to see if they can help you.
Stay tuned to this page to learn about video editing terms, fundamentals, and processes. Cheers!