Video editing is not a simple task, but it gets tougher when you don’t understand the technical jargon others are using around you.
If you are new to video editing, knowing some commonly used video editing terms and phrases will make the video editing workflow easier for you to learn.
In this article, we list several technical terms used by video editors, directors, and others in the business. If you feel like you have heard some of these before, it’s because they have become part of our everyday speech and are used even in a non-video editing context.
Are you curious to know how many of these terms you already know?
Grab a paper and pen and keep count.
Let’s begin with an understanding of video editing!
What is video editing?
Video editing is the process of manipulating, arranging, and combining camera footage, audio, sound, visual effects, etc., to produce a coherent final video product.
Common terms and phrases used in video editing
-
Aspect Ratio
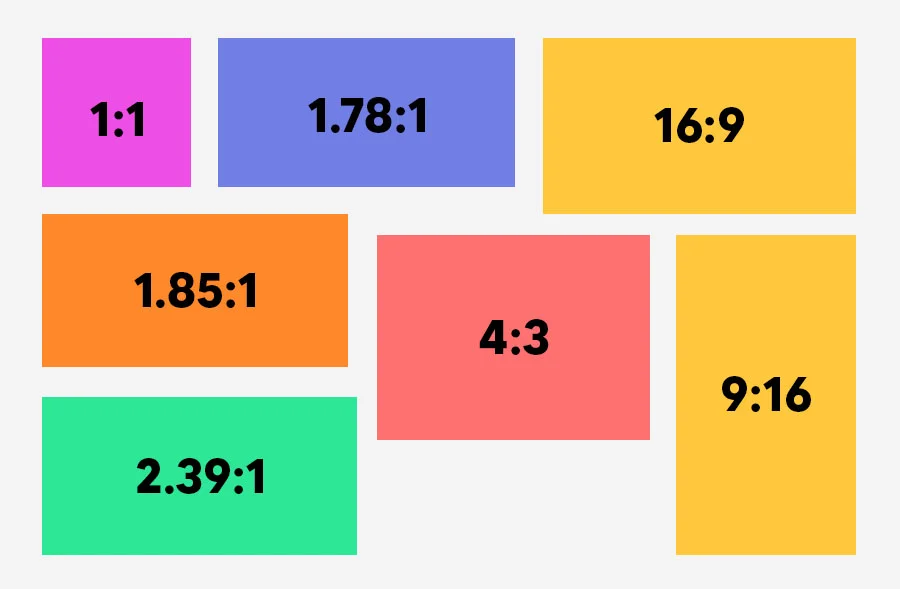
The aspect ratio refers to the ratio between the width and height of a video. It tells you how wide a video is compared to its height.Some common aspect ratios are 1.85:1 and 2.39:1 for cinematography and 4:3 and 16:9 for television.
For online videos, the most common aspect ratios are:
16:9 (widescreen) or 1.78:1: YouTube and other streaming services like Netflix and Prime Video.
9:16 (vertical): Instagram Reels and TikTok.
1:1 (square): Instagram, Facebook, and other social media platforms.
The aspect ratio is important because it determines how a video is composed and its size. It greatly influences the viewing experience of your audience. If the aspect ratio does not match the screen size (smartphone, tablet, TV, etc.), you will end up with black bars on the top, bottom, or left and right of the video.
-
A-roll
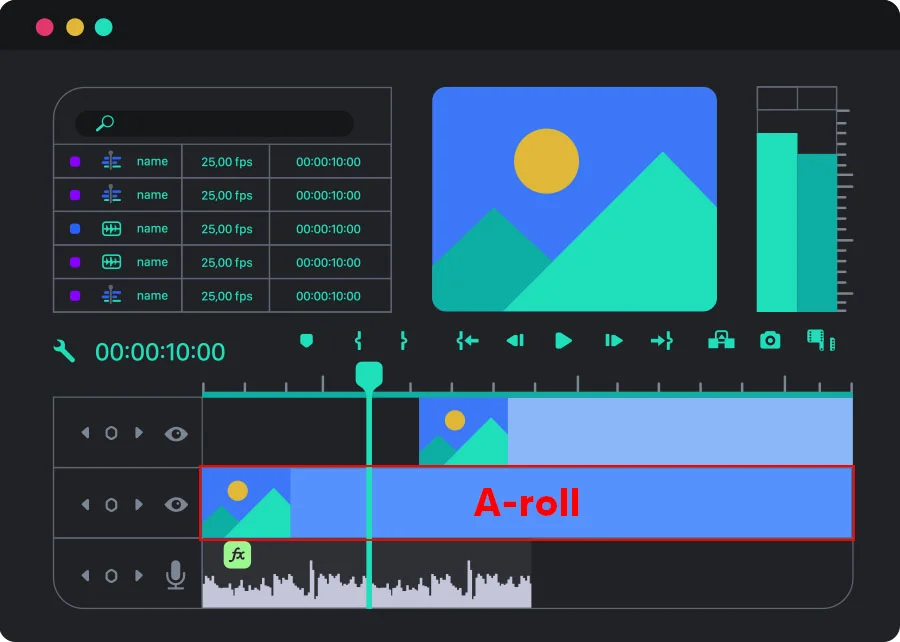
This term refers to all the footage containing aspects important to the main plot, like key storylines, main characters, dialogue scenes, interviews, etc. If your story gets affected when certain footage is removed, then that footage is your A-roll. Some other terms for A-roll are primary shots, primary footage, hero footage, or main footage. -
B-roll
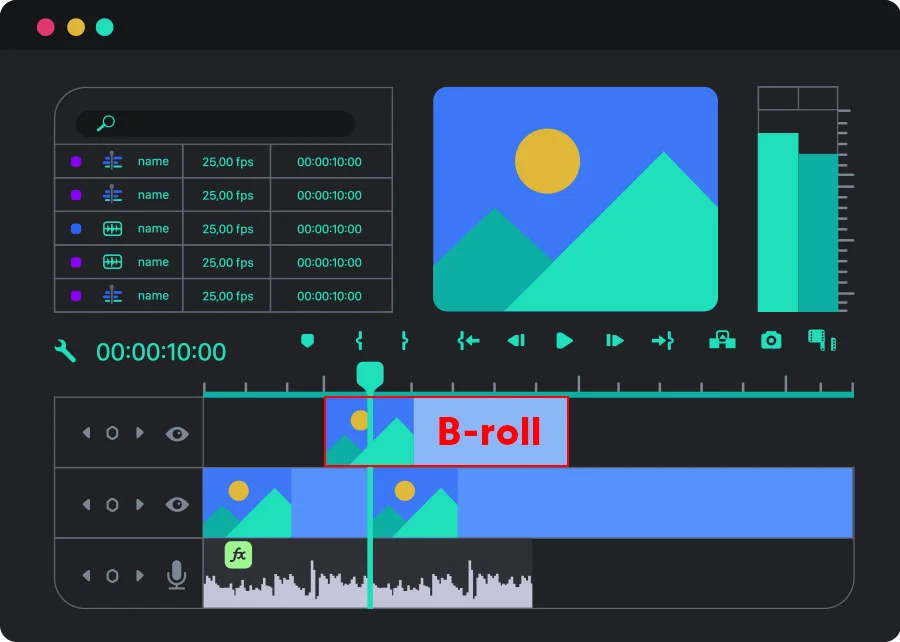
B-roll refers to the secondary footage, extra footage, supporting footage, or stock footage added to a video. It’s basically any footage that isn’t an A-roll and is used to provide context and add visual appeal to the story.B-rolls are commonly used as cutaway footage in interviews. Here, footage of the speaker(s) is the A-roll, and the B-roll is the footage played when the camera cuts away from the speaker, but their narration or monologue continues. B-rolls are usually accompanied by voiceovers and music. Their role, in this example, is to support what the speaker is saying or help the audience understand the topic.
-
Bitrate
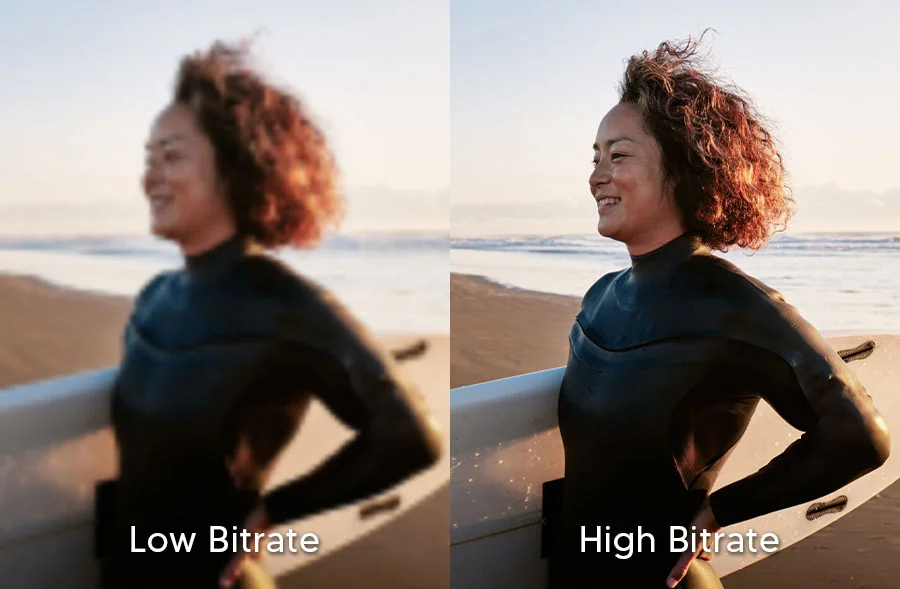
It refers to the amount of video data that can be transferred or processed within a specific period of time (one second). Simply put, it is the amount of data available in one second of a video. Bitrate is usually measured in megabytes per second (Mbps) or kilobytes per second (Kbps).A higher bitrate means the video has more information, a higher quality, and a higher resolution. However, it results in a bigger file that needs more storage and is difficult to work with.
-
Color correction
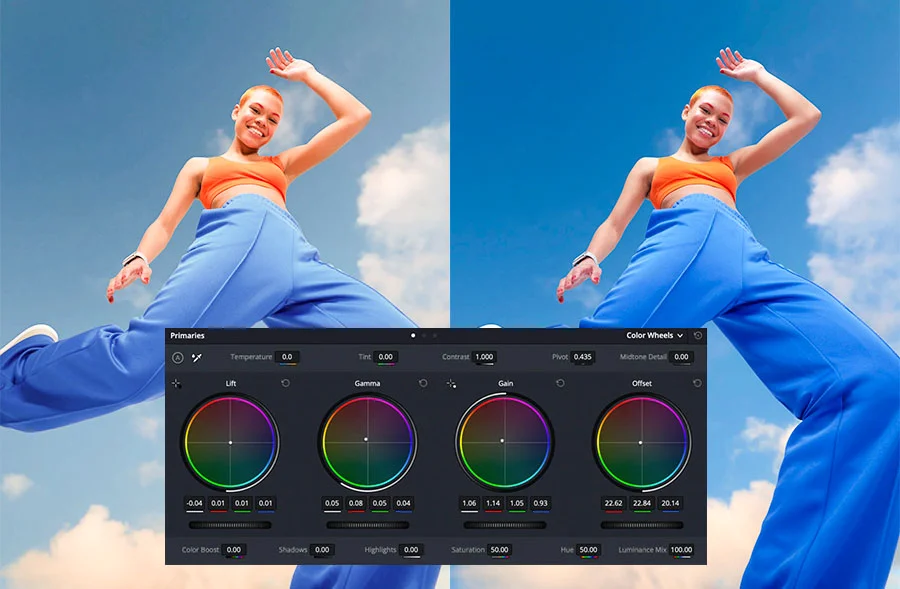
Color correction is a technical process where a video’s tone and color issues are fixed to make it look as natural as possible. This step of the video editing process also helps unify your footage so that it looks uniform. -
Color grading
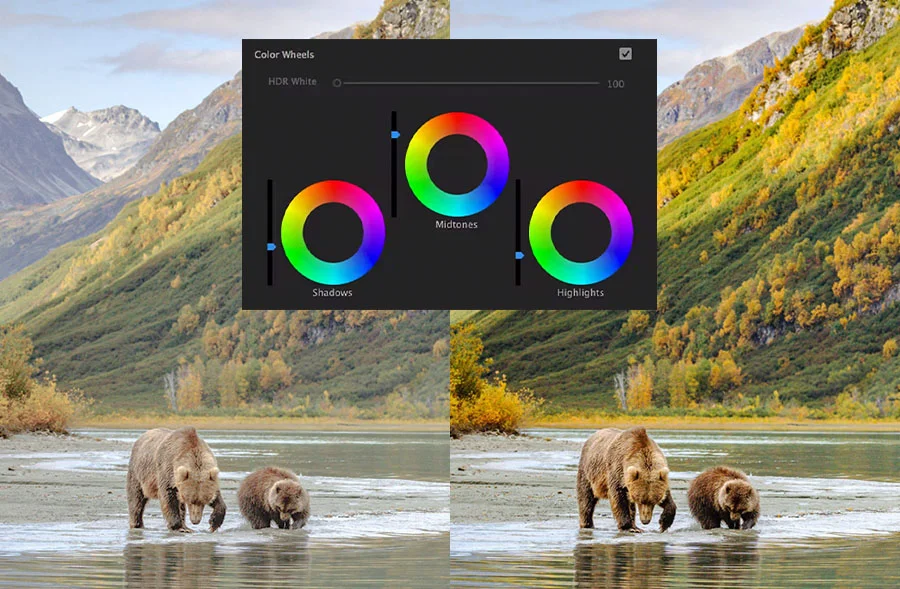
Color grading is a video editing process where the colors and tones in a video are adjusted to add visual effects, set the mood, emphasize character traits, etc. While color grading and correction may seem similar, they are different processes. Color grading is a creative process where videos are made more stylistic to support the story.Color grading is done by adjusting the footage’s color, contrast, white balance, and exposure.
-
Color Temperature
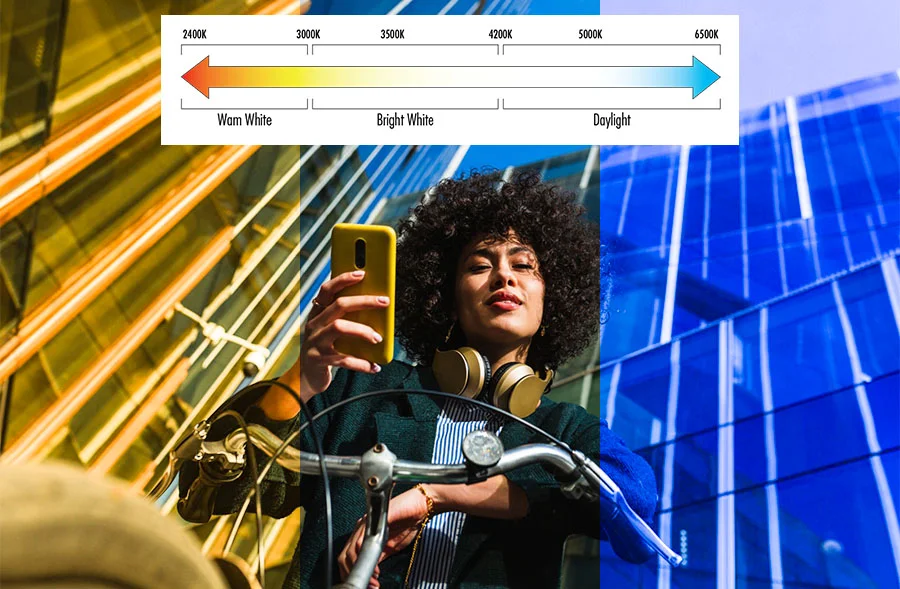
Color temperature refers to the characteristics of the visible light in a video. Simply put, it refers to the “warmness” or “coolness” of the hue in the footage. The scale ranges from cool to warm and is expressed in Kelvin.Warm colors make a video appear more red or orange, and cool colors make it appear more blueish.
-
Compositing
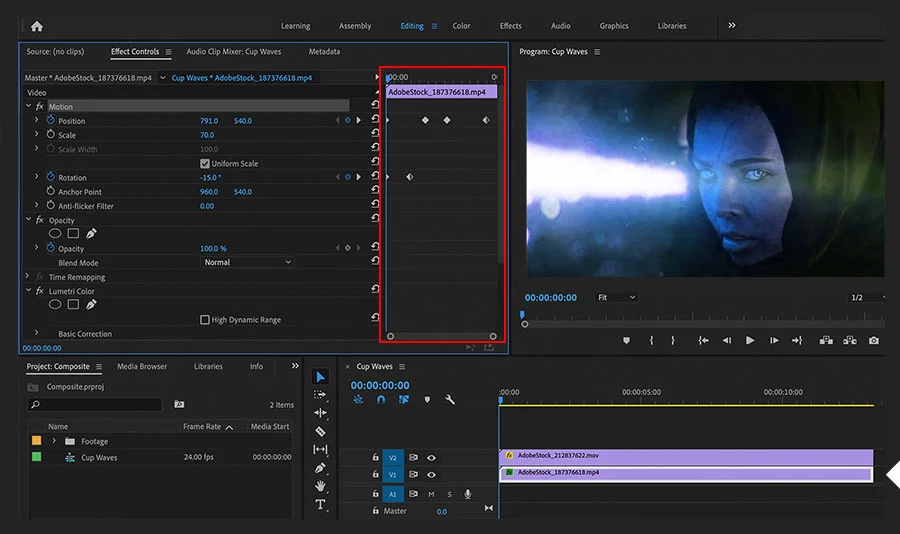
It is one of the video editing techniques where multiple visual elements or images are combined to make a single believable picture. The visual elements include animations, graphics, special effects (SFX), and background plates.Video compositing is often done to make all elements appear as part of the same scene.
-
Cut-in (Insert Shot)
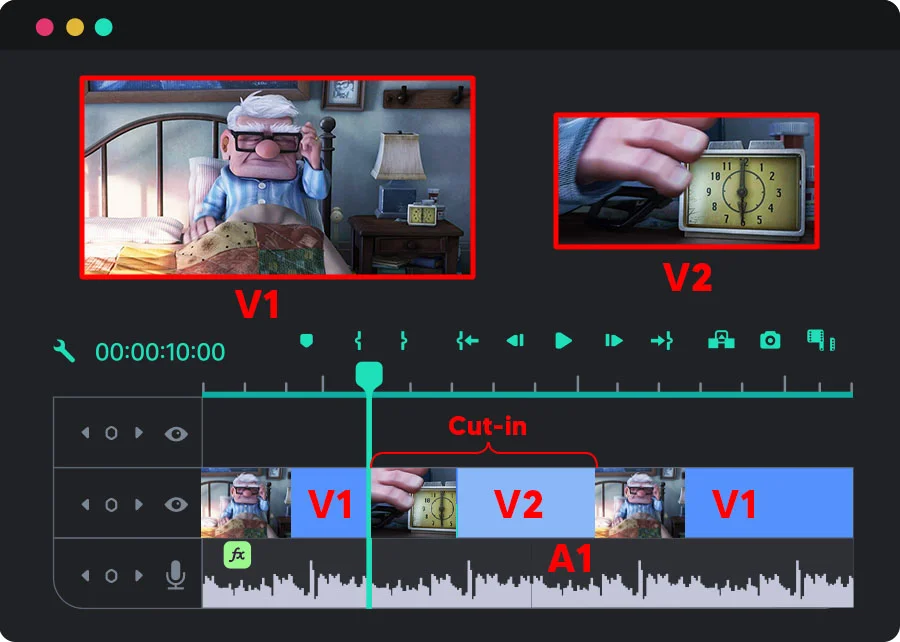
A cut-in, or insert shot, is where a wide shot of a scene is cut to move to a zoomed-in shot of the same scene. It is done to focus on a specific detail or element in a scene you want the audience to notice. For example, a scene where a woman is reading on a beach is cut in with a shot of the book in her hands. -
Motion Graphics
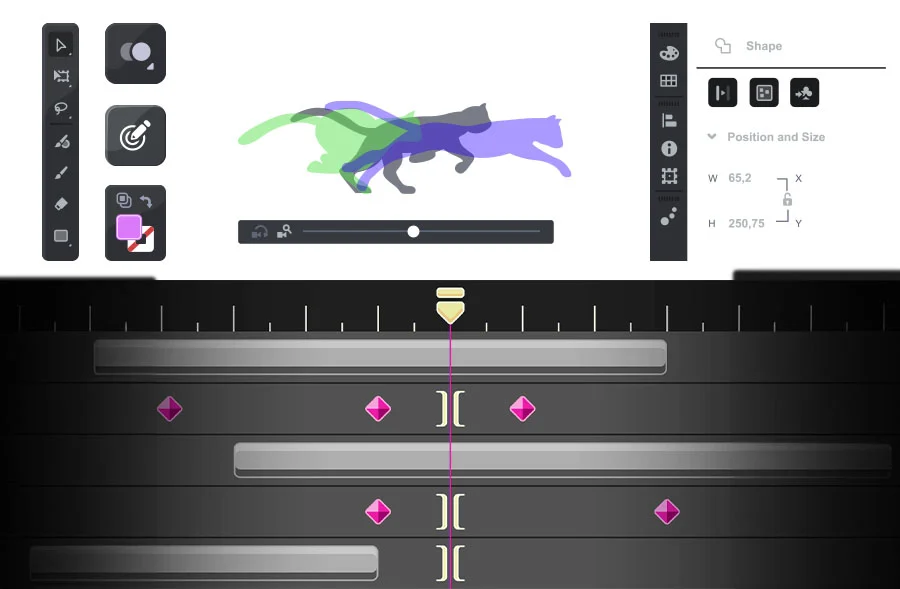
Motion graphics are images or text animated to create the illusion that they are moving. A good example of motion graphics is the text that appears during a news segment. It could be the news highlights that scroll across the bottom of your screen or the “Breaking News” flashing title.Another example would be the names of locations and people that appear on screen during a movie. These help tell a story or convey information to the viewers.
-
Frame Rate
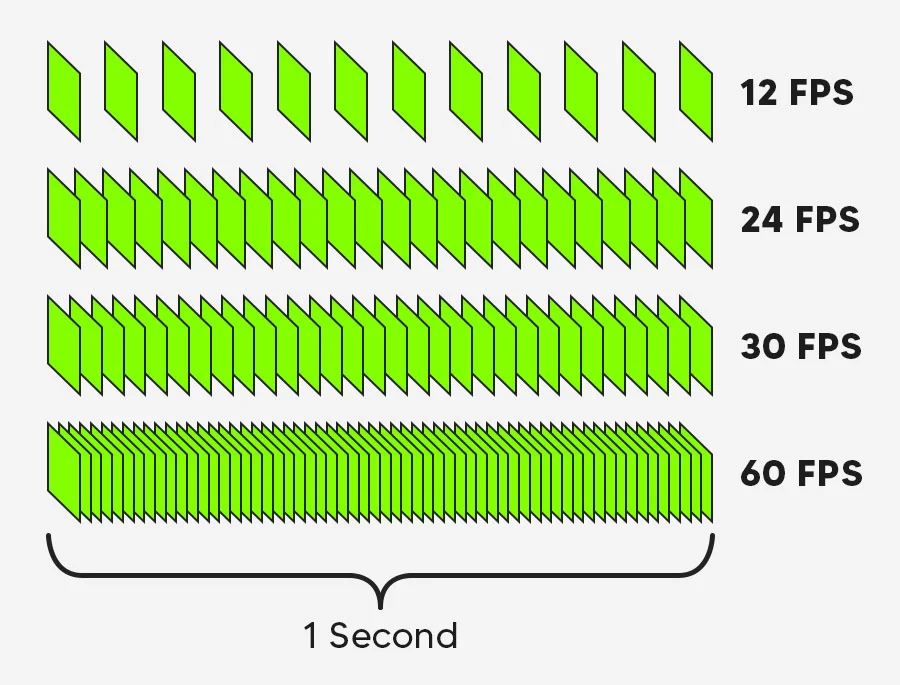
Essentially, video footage is a sequence of still images shown so fast that we see the elements moving. The frame rate tells us how many still images are contained within each second of a clip, hence the unit FPS, or frames per second.The standard frame rate for a video is around 24 FPS, which means there are 24 still images in one second. Higher numbers, like 30 fps or 60 fps, mean more details are captured, making for a higher-quality video. Numbers lower than 24 fps will make it look as if there is a weird lag in the footage.
-
Transition
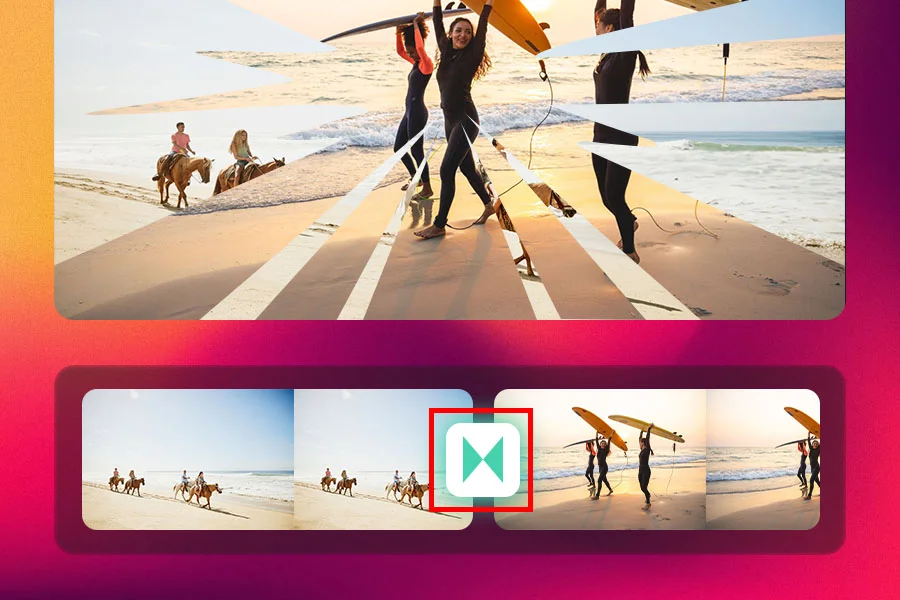
A transition is a video editing technique where an editor connects one scene, shot, or clip with another. Usually, a special effect is used to connect the two, known as a transition effect, for a seamless switch. All editing software comes with their own set of transition effects you can use for your video projects. -
J-Cut
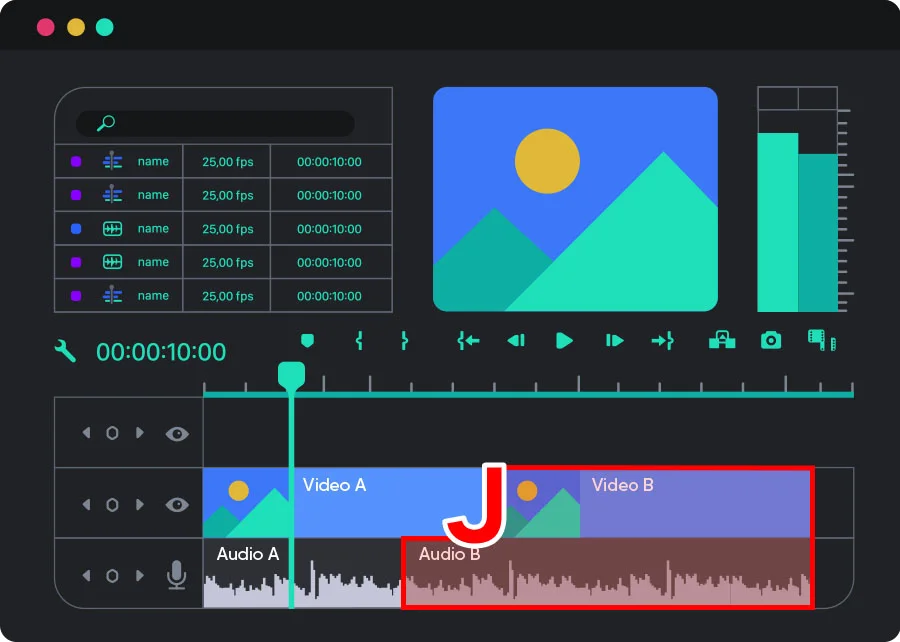
J-cut refers to the split editing or transitioning technique where the audio of the next scene starts playing before the scene actually changes. Here, the next scene’s audio track overlaps the previous scene’s video (as seen below). The name of this technique is derived from the shape the tracks make on the editing timeline.The viewer will hear the audio of the second scene before the actual scene cuts in. This transition is particularly helpful in making dialogue-heavy scenes feel more natural. The effect is similar to when you are in a group discussion, and you hear someone speak and turn to look at them.
J-cuts also help create intrigue in opening shots and transitions.
A J cut is when the audio of the next scene starts playing before the video has visually changed. It is used as a transition when you are video editing.
-
L-Cut
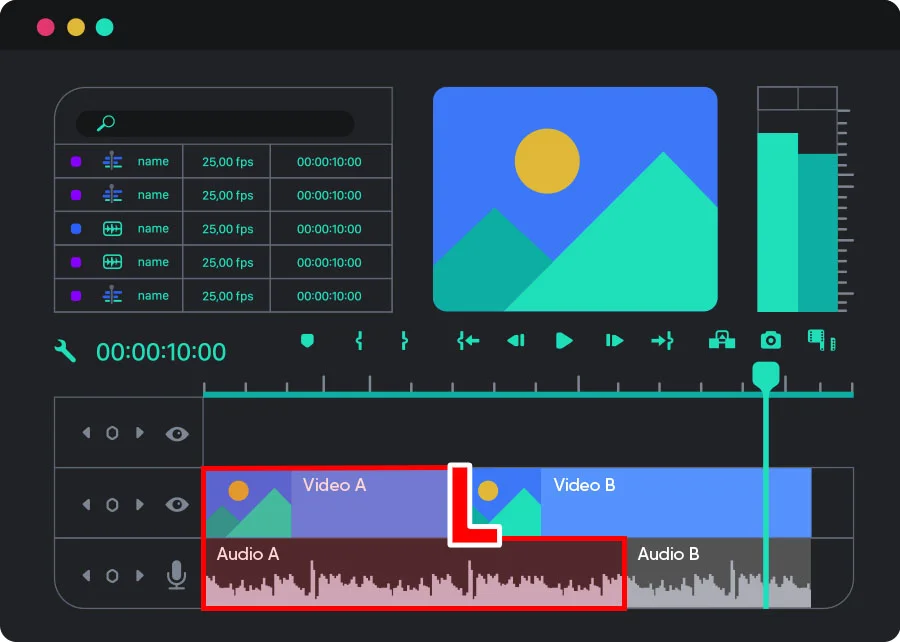
An L-cut is a film editing transition where the audio from the previous scene overlaps with the visuals from the next shot. It is the opposite of a J-cut, where the following scene’s audio plays before the current clip ends (cuts to the video of the next shot).You can see an L-cut in videos where a character speaks, and the video changes to show what they are talking about. A completely different scene that is still related to the topic is shown as the audio from the previous shot continues.
-
Jump Cut
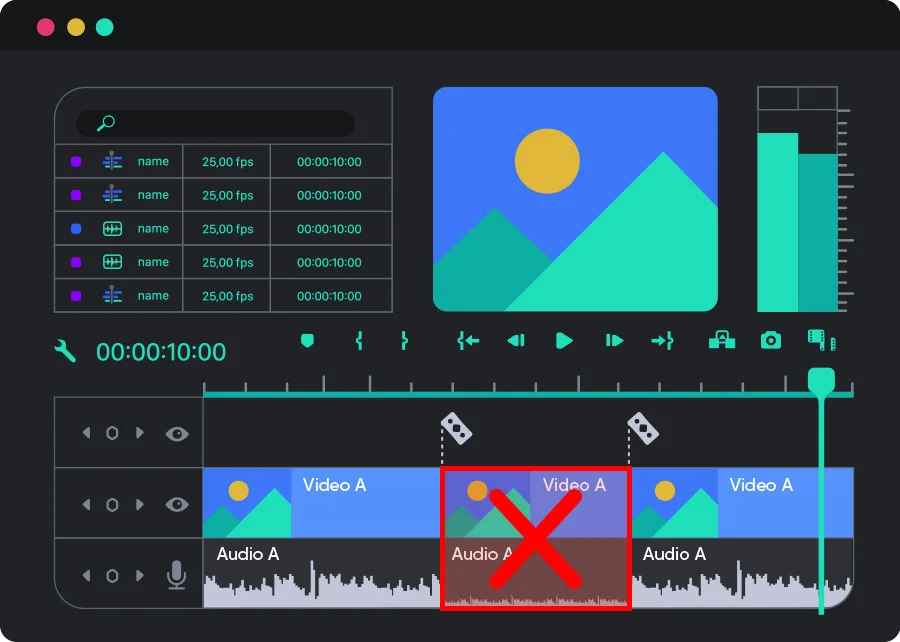
A jump cut is an abrupt transition where one sequence quickly cuts to the next sequence, making the action appear to jump forward in time. It looks like one continuous shot has been split into two or more parts.For example, cutting out the pauses in a video essay to make it look like the speaker is quickly moving to the next topic or when a character is speaking, and another character appears next to them from out of thin air.
-
Keying
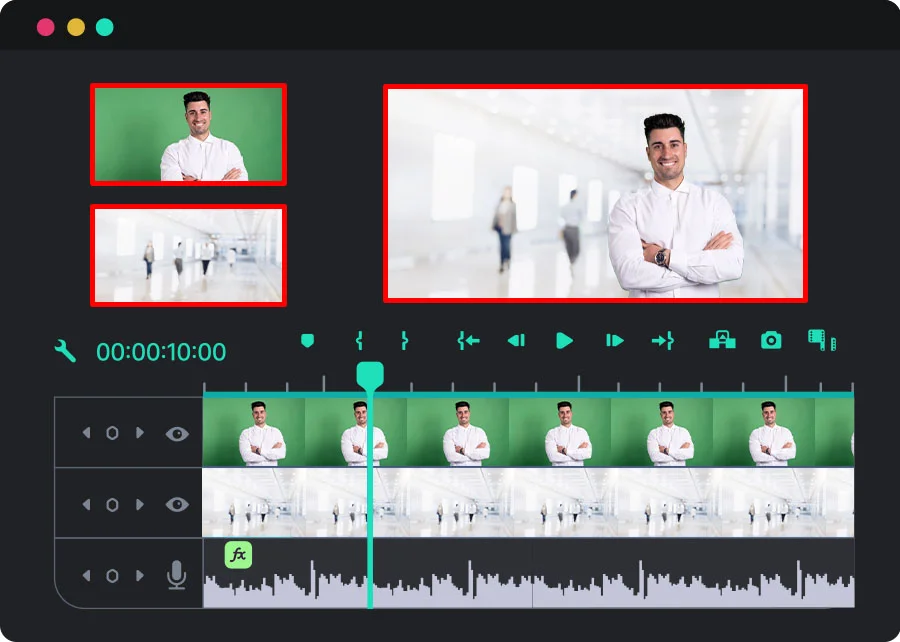
It is a video compositing technique where video editors remove a part of a video by making it transparent. You can also use keying to replace a part of the video.Keying is done when you want to remove something from a video. You can separate this part from the rest of the video using color, brightness, or mask. This task is easier when you use green screens when filming.
-
Resolution
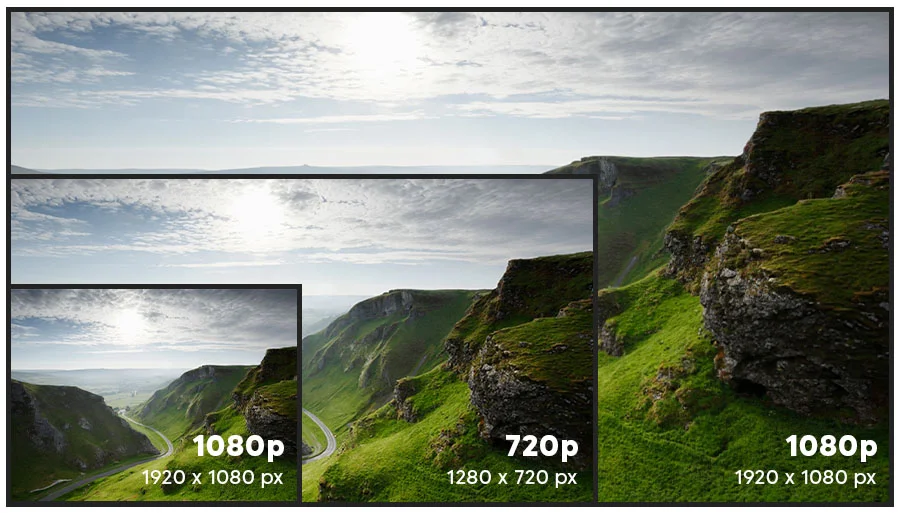
Resolution refers to the number of pixels in each video frame. It is measured in width and height and is represented as width x height.Some common video resolutions are 640×480 (standard definition), 1280×720 (high definition), and 1920×1080 (high definition). These videos are also referred to by just the vertical dimension: 480p, 720p, and 1080p, respectively.
If a frame has more pixels, it means there is more detail. High-resolution videos won’t easily blur when you zoom in. It also means that the video is of high quality.
-
Shot List
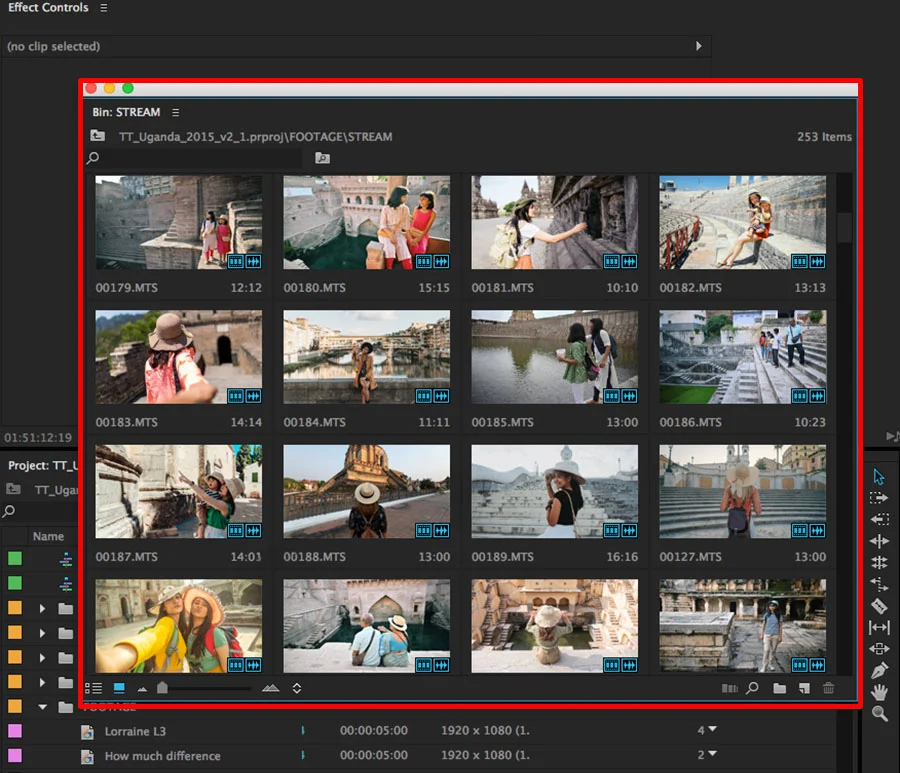
A shot list is a checklist of all the shots that must be included in the video or film. It often contains minute details that give the video a sense of direction and make editing more efficient. -
Storyboard
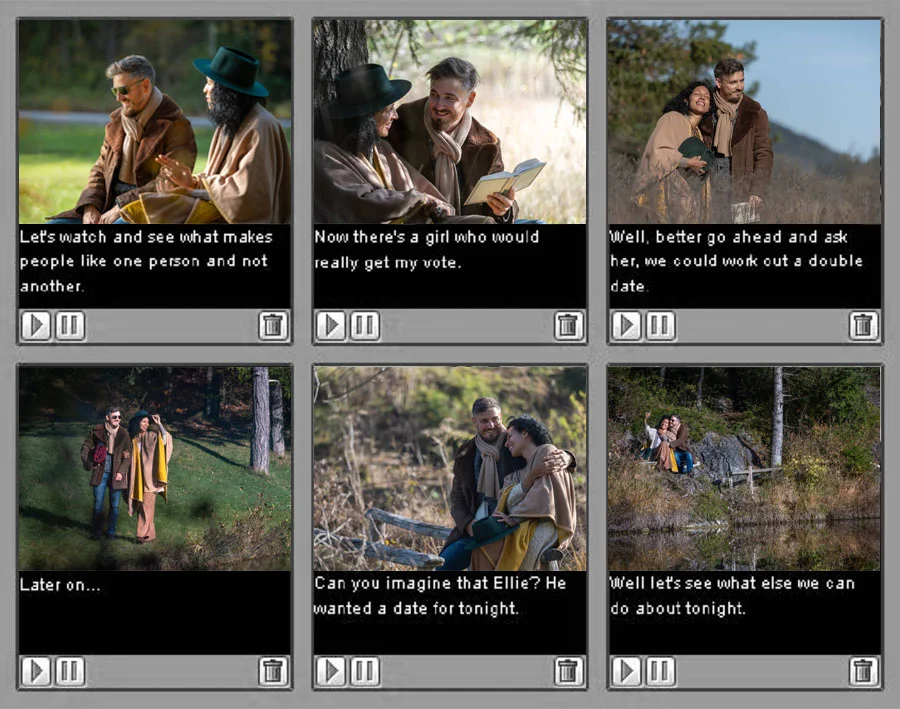
A storyboard is a movie blueprint that helps you visualize what needs to be shot or animated. It is a shot-by-shot graphical representation of how your movie or video will unfold. It is a visual organization of ideas and helps plan a project from start to finish.Storyboards are made up of multiple squares, with pictures representing each shot. Each picture is accompanied by notes about what is happening and what is being said in the scene.
-
The Rule of Thirds
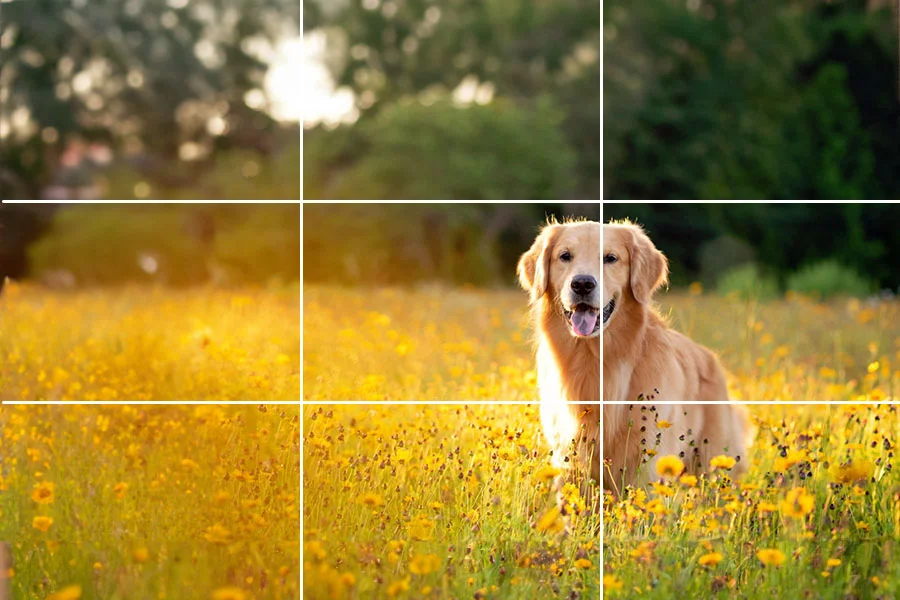
This rule provides a reliable guideline for framing your shots. It is the process of using two horizontal and two vertical lines to divide a frame image into thirds. The resulting grid has nine segments and four intersection points, and resembles a tic-tac-toe board.In theory, you can create a more natural-looking frame by positioning the most important elements at these intersections. By using the rule of thirds, you can:
- Compose a frame in a way that is most pleasing to the eye
- Use negative spaces creatively, and
- Create an interaction between your subject and the background.
-
White Balance
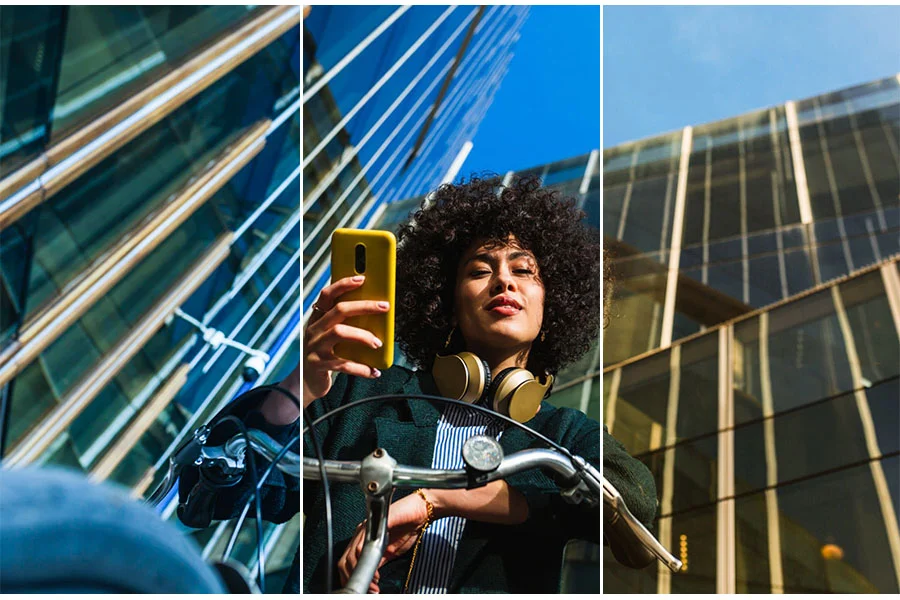
It refers to the color temperature at which the whites still appear white in the video. It means that the whites in your video don’t have hints of other colors like yellow, blue, green, or red.This tool helps you remove unrealistic hues that are cast over your footage. Although the term is “white balance”, making this adjustment will also affect all the other colors in your shot.
-
Non-Linear Editing
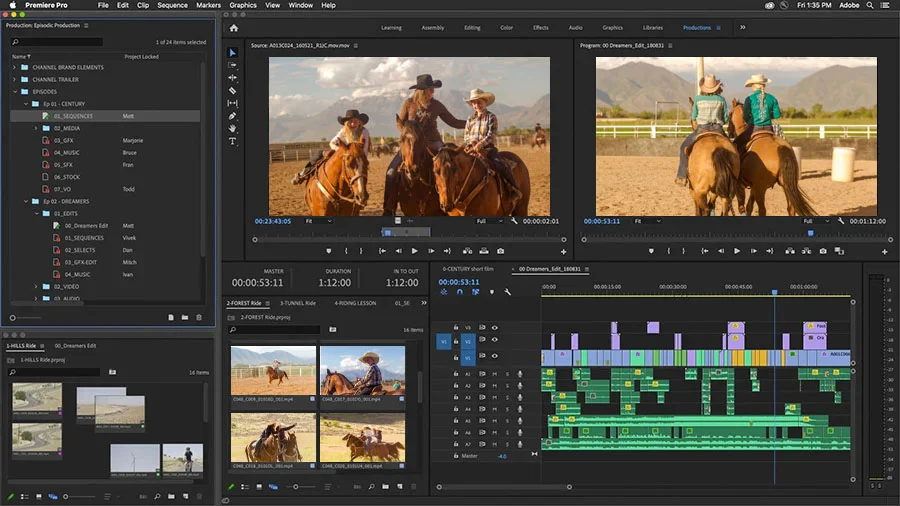
It is an editing process where a video editor doesn’t edit footage according to the timeline or order. They import all the video files into video editing software, pick clips at random, and work on them.Editors can make the desired changes and undo them if they are not happy with the outcome without worrying about the original files. They can place any video clip anywhere on their project timeline and work on it in whichever order they desire.
-
Masking
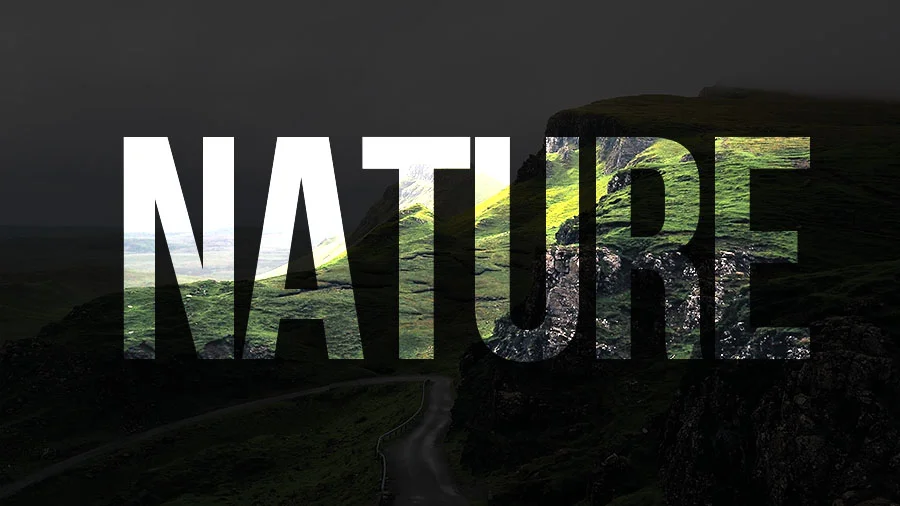
It is a tool that allows editors to independently edit different sections of a single shot. You can use this tool to target effects at a particular area, clip, or section of a video.With this tool, you can also cut out things, place or blur some areas, and merge two or more clips into one.
-
Layering
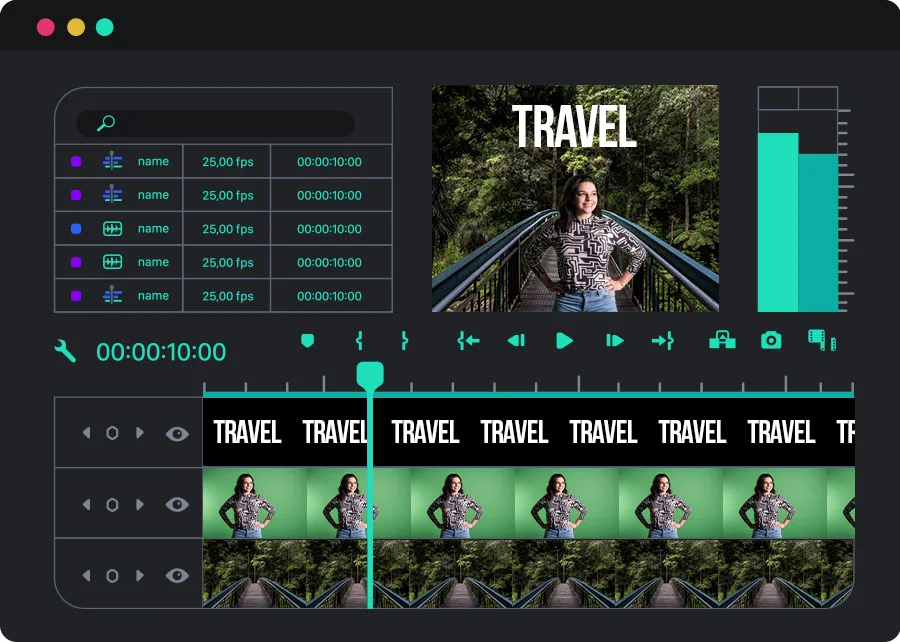
Layering is a technique where you place images, graphics, and videos as layers on top of each other to make it look like a single shot. For example, placing a layer of falling snow or sparkles on your footage, or placing a black bar over a person’s face or eyes to protect their identity.The technique is called “layering” because the shots look like a stack of layers on the software’s video editing timeline. You can also use this technique to separate different layers in a video so you can easily edit different elements in the video.
-
Rendering
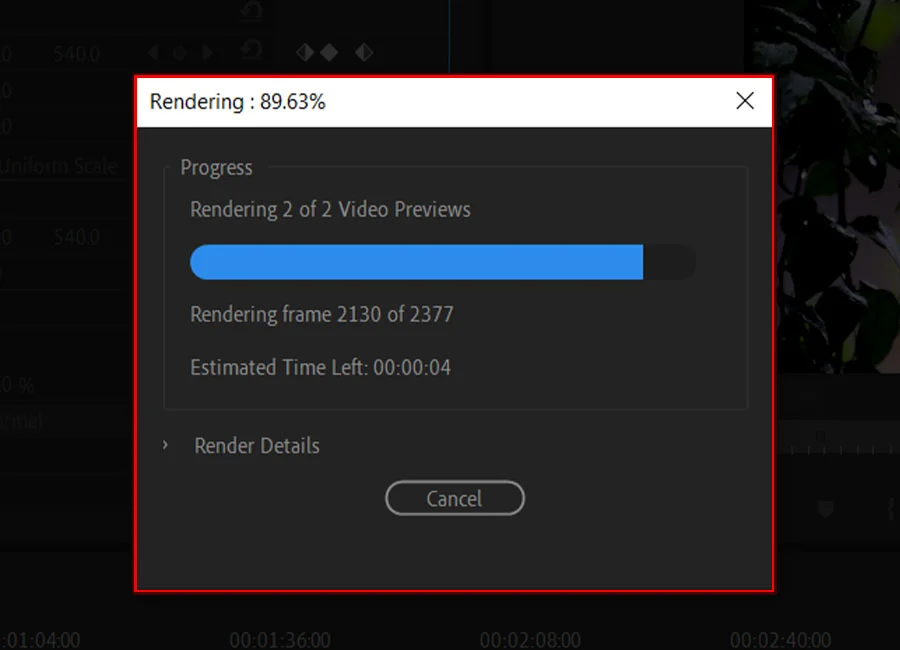
It is the process of turning your video editing project file into the final video file. This means that all the media files (audio, video, and images) in your project timeline are merged into one video file that can be played on different devices or uploaded to various platforms.Others can view rendered videos with their media players without lag or video editing software.
-
Rough Cut
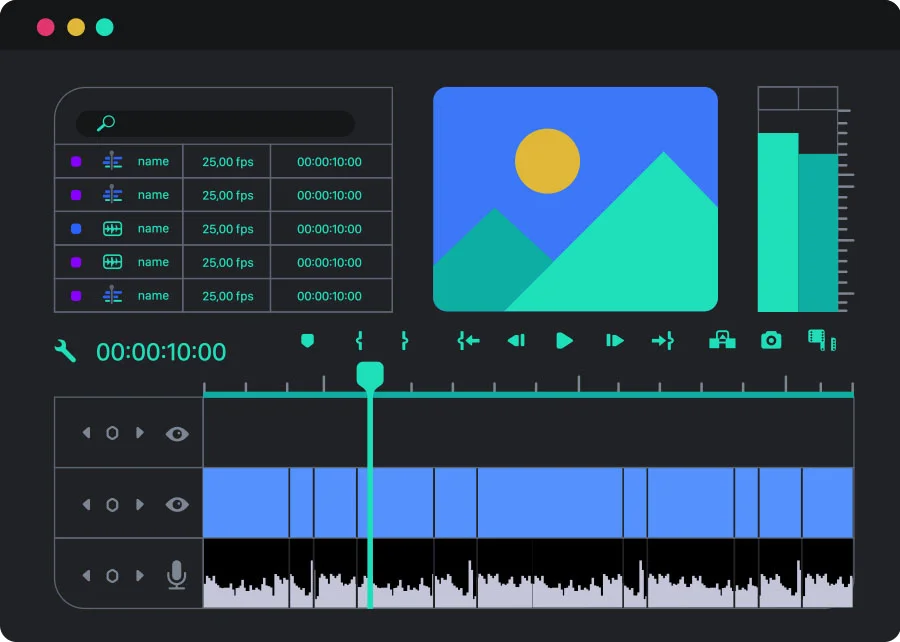
A rough cut is like a first draft and contains all the important moments from your video footage in the proper order to tell the story. It gives the team a sense of the production’s flow, feel, and shape and gives an insight into the pacing and continuity of the scenes. The purpose of the rough cut is to allow for revisions, deletions, and testing of new ideas.Once the rough cut is approved, sound effects, special effects, titles, motion graphics, and score are added to create the final cut- the final product of the video editing process.
-
Stitching
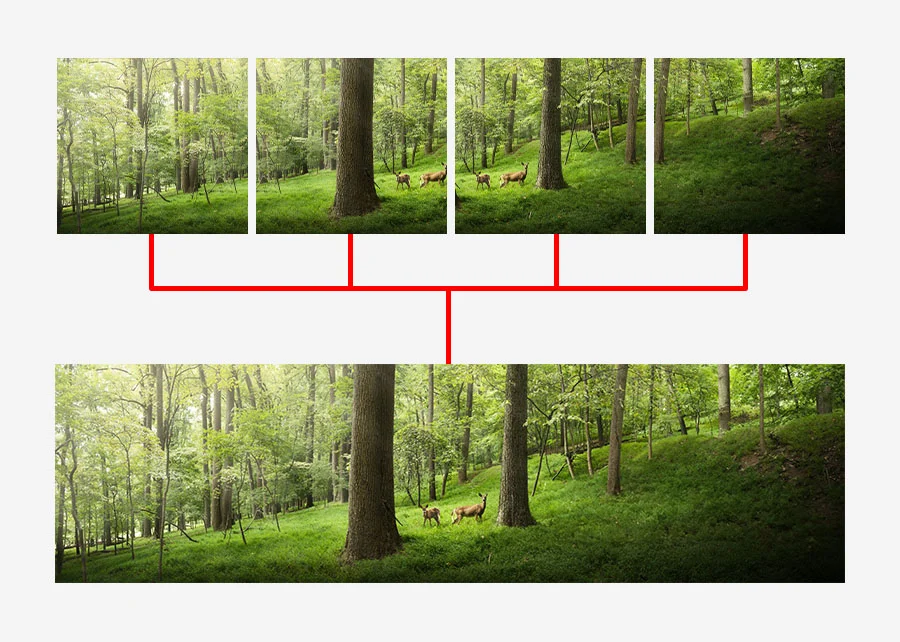
This is a process where many clips are seamlessly stitched together to make one panorama video. It is a useful technique for making 360-degree videos. -
Timelapse
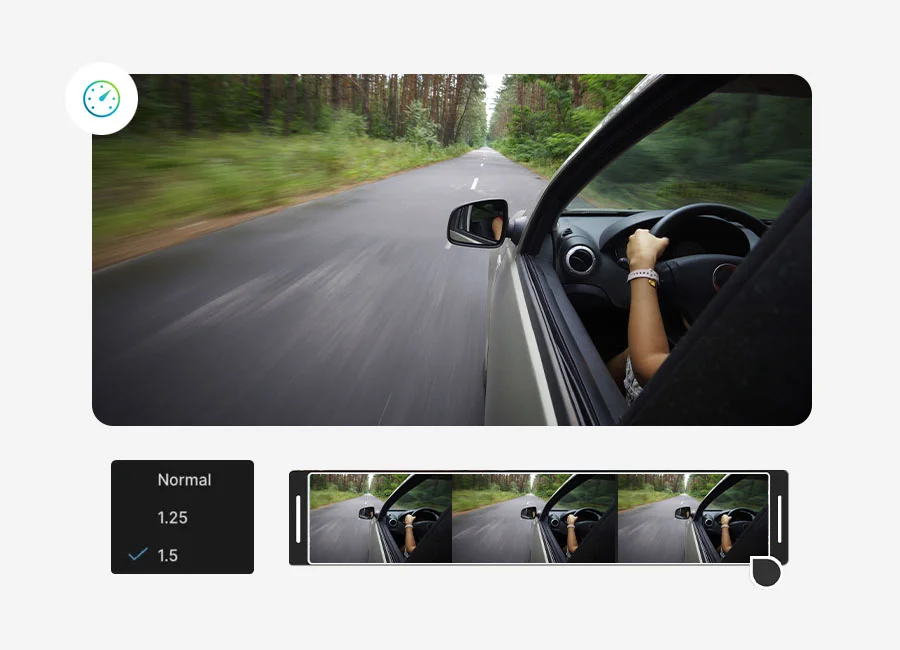
A time-lapse is a video editing technique where footage covering a long period of time is converted into a seconds- or minutes-long video. For example, a video of a blooming flower or a video of the rising sun. These phenomena usually take a long time, but they can be shown in just a few seconds.When done well, it gives the appearance that time is moving really fast. This technique lets you visualize slow processes or add a stylish effect to your videos.
-
Voiceover
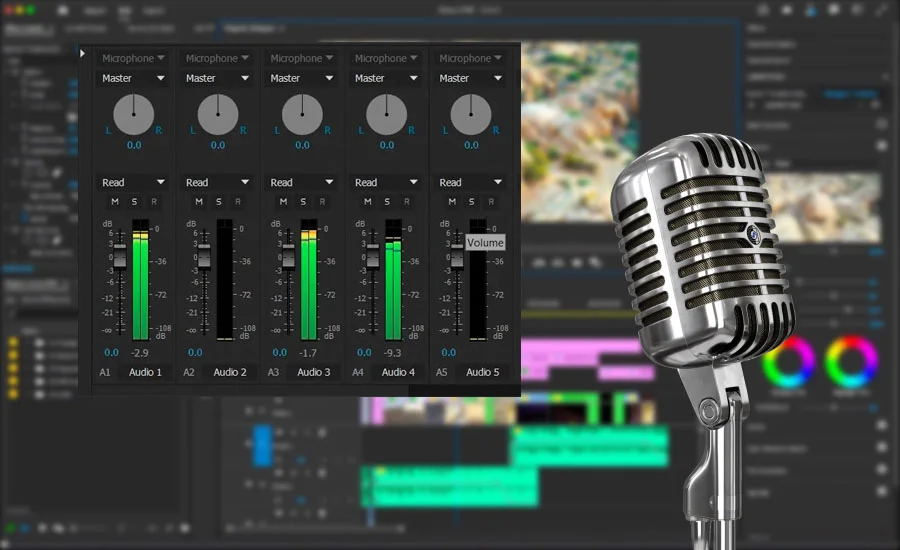
A voiceover is an audio track that you “layer” over relevant clips. An example of a voiceover is a narration of a scene where the audience is being told what has happened or what is going through the character’s mind.It is a way to give the audience an outside perspective on the scene or a summary of past events. Voiceovers are always recorded separately and added to the video in post-production.
-
Foley
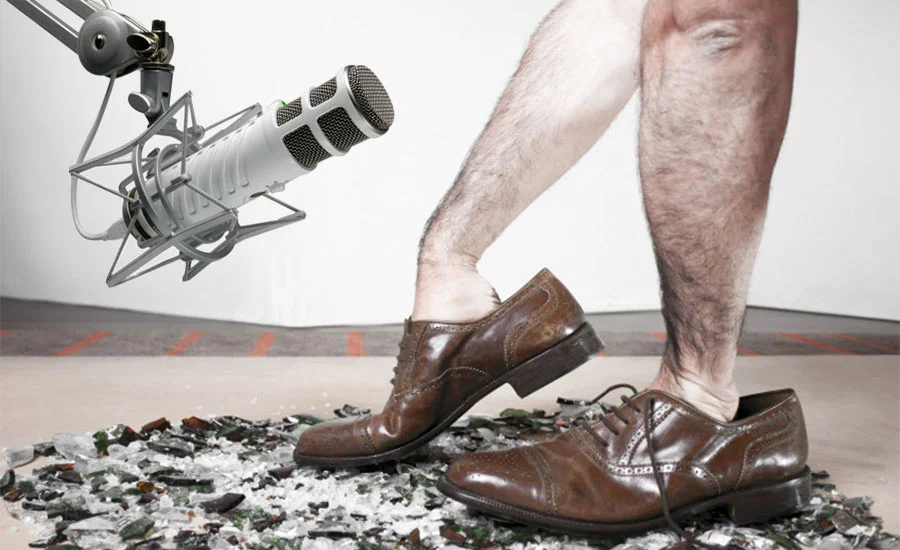
It is the reproduction or creation of sounds for a video or film. Most sounds that you hear in a video or movie are not the original sounds made during filming. These sounds are recreated in a sound studio using different instruments and materials like vegetables, balloons, etc. -
Lip Sync and Audio synchronization
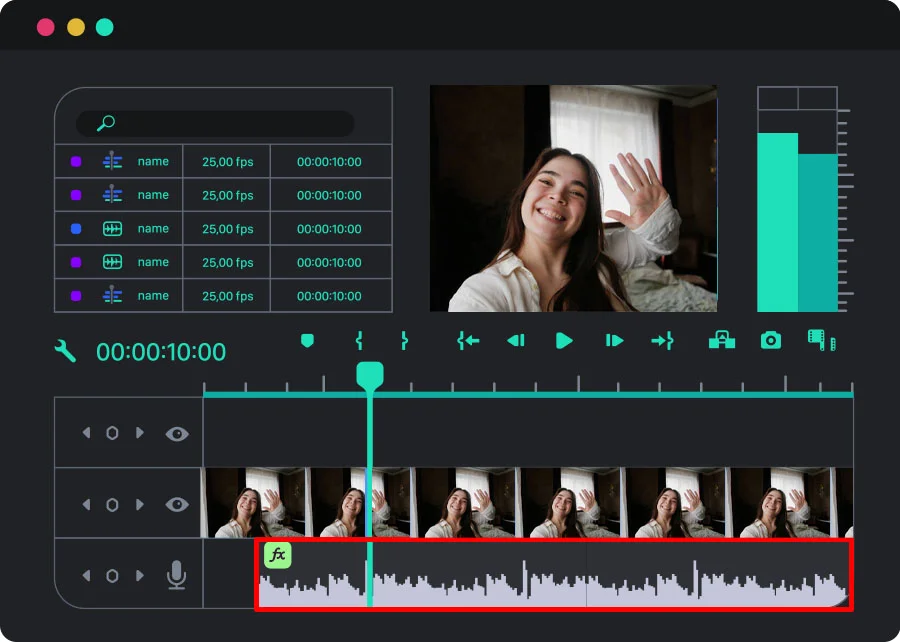
Lip sync, short for lip synchronization, is a process where the character’s lip movements are matched with pre-recorded audio, like dialogues or songs. This process is useful, especially when dubbing videos and movies.On the other hand, audio synchronization is where the editor matches the audio with what is happening on screen. For example, lining up shots of a running rive with sounds of rushing water or punching sounds in fight scenes.
-
LUT (Lookup Table)

A lookup table (LUT) is a predetermined set of formulas that help transform existing colors into desired colors. A number represents each color, and LUTs change these values into new ones, changing the original colors into completely new ones.Simply put, LUTs completely change the colors in your footage by altering particular attributes. They automatically adjust gamma, contrast, saturation, luminance, and hue to alter the original colors and make them completely new. LUTs can target single or multiple colors, making color grading faster.
-
Video cutting and splicing
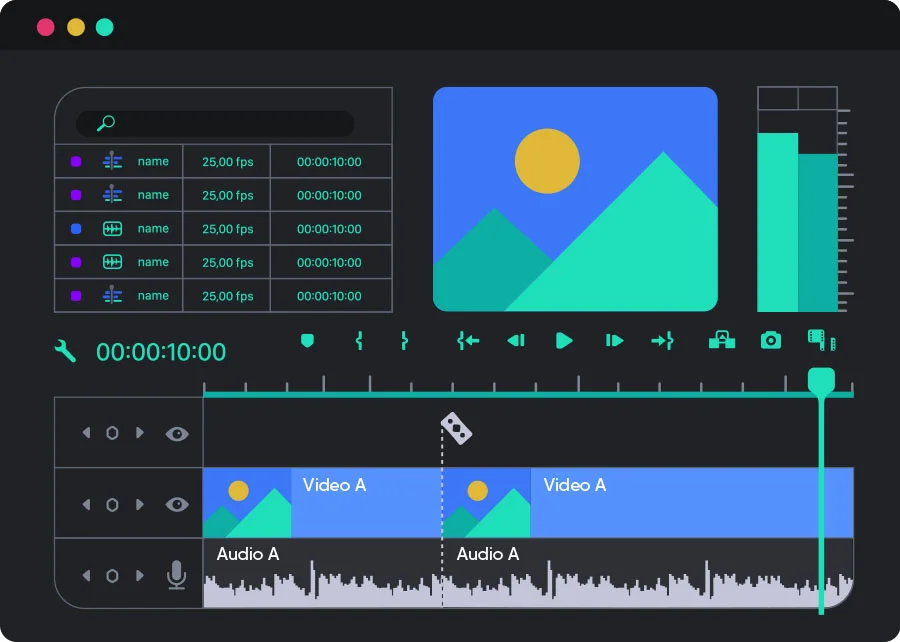
Video cutting is where an editor places two cuts in a video clip, removes the middle section, and joins the remaining sections at the “cut”. If you are merely cutting a clip to work on the sections separately without removing any of them, then you are splitting a video.Splicing is when you join two video clips together to form a single shot. For example, a clip of a fish swimming is followed immediately by a clip of a man fishing by the riverside.
-
Keyframes
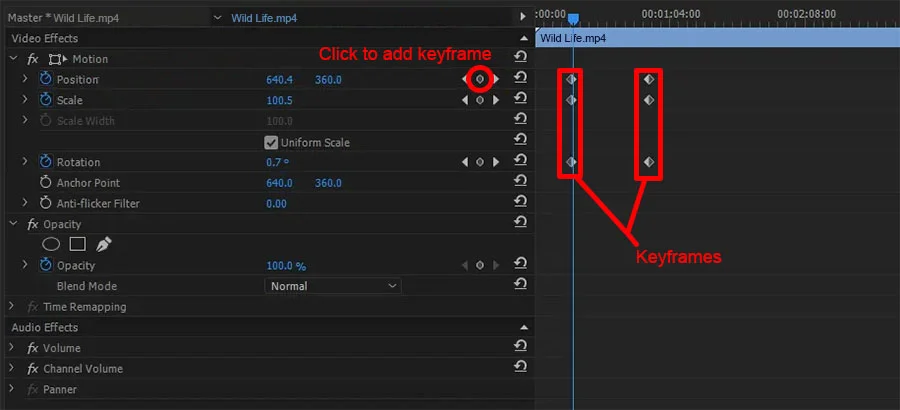
Keyframes serve as anchor points on your project timeline and indicate where an animation begins or ends. They act like coordinates on the timeline and mark the beginning or end of an object’s transition. They inform your editing software where the animations like fading, rotating, or scaling objects start or end.Keyframes are an industry-standard tool used in projects by professional video editors.
Wrapping up!
So, how many of these terms have you heard before? Wasn’t it interesting to find out what those words actually mean and where they come from?
We hope this glossary of common video editing terms will make it easier for you to become an expert video editor and enhance your video editing process. All the best!
Useful Articles:
- What is video editing?
- Common terms and phrases used in video editing
- Aspect Ratio
- A-roll
- B-roll
- Bitrate
- Color correction
- Color grading
- Color Temperature
- Compositing
- Cut-in (Insert Shot)
- Motion Graphics
- Frame Rate
- Transition
- J-Cut
- L-Cut
- Jump Cut
- Keying
- Resolution
- Shot List
- Storyboard
- The Rule of Thirds
- White Balance
- Non-Linear Editing
- Masking
- Layering
- Rendering
- Rough Cut
- Stitching
- Timelapse
- Voiceover
- Foley
- Lip Sync and Audio synchronization
- LUT (Lookup Table)
- Video cutting and splicing
- Keyframes
- Wrapping up!


