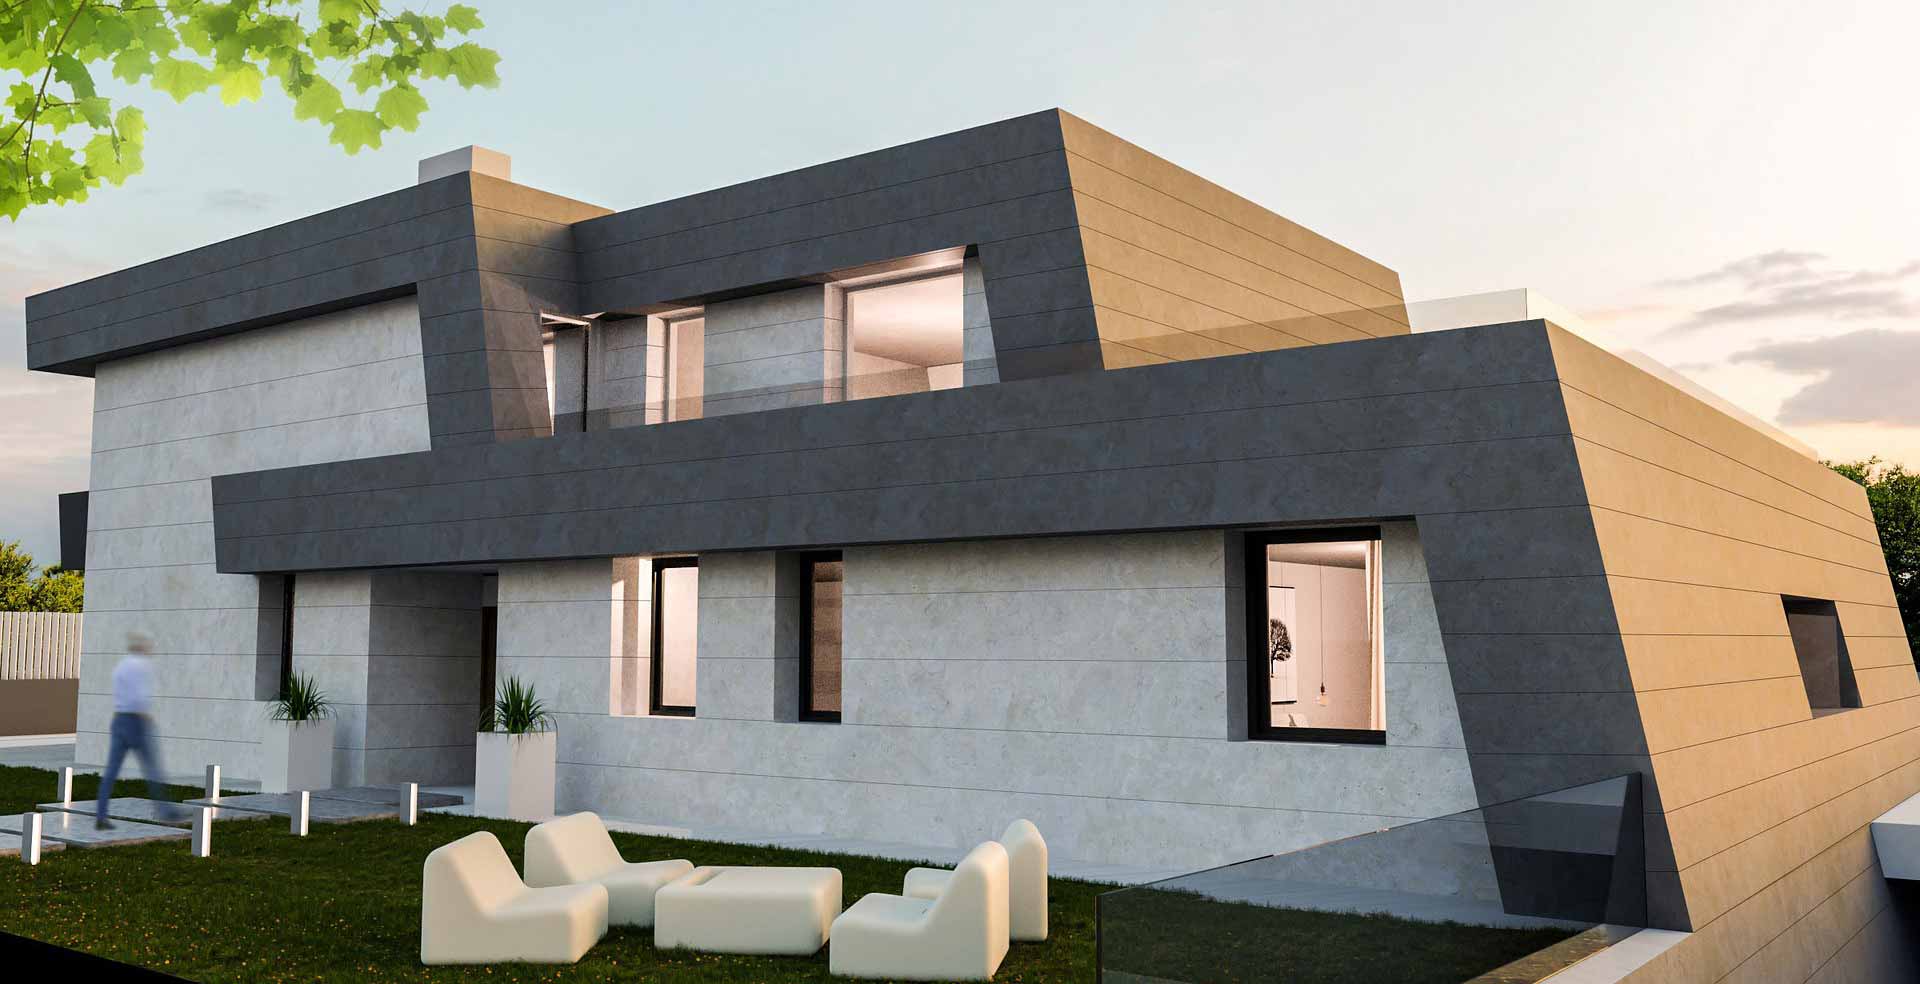
In the recent decades, architects have increasingly started to use Photoshop as the go-to program to get assorted images or illustrations edited with utmost aesthetical value. Due to the extensive image editing and enhancement provisions the program offers, it has become an indispensable instrument for businesses that rely on images in one way or the other. Whether you want to render an image from scratch, augment them or provide the groundwork for 3D modeling, Photoshop will never let you down.
Architectural Rendering Photoshop Post Processing Tips
Many renowned companies and professionals leverage the limitless possibilities of Photoshop when it comes to image manipulation service and architectural visualization. With the help of expert professionals backed by robust software programs, a mediocre image or illustration can obviously be transformed into an enticing and stellar piece of art. However, as an architect, learning about these simple yet powerful Photoshop image editing tips will surely help you in many ways.
Utilize the non-destructive workflow
While executing a project, it is imperative that you are able to exert a certain degree of control and navigate various steps back and forth with ease without losing grip over any of the work being done. Like most of the utility software programs used for rendering videos, despite being an image-editing program, Photoshop also needs this sort of attention as a non-destructive workflow will provide you with the much-needed flexibility and time. It will certainly spare you from several issues.
In Photoshop, you can always use adjustment layers and masks to sustain the flexibility of work that you carry out. Limit the number of layers in the layers palette so as to tweak certain elements and experiment with them to know how they render and interact with each other with every little change being made.
With the help of masks, you can effortlessly cut portions out of diverse layers. Also, adjustments to specific areas of the images can be made. It is always wise to group layers as you go on to get rid of any confusion that might otherwise arise.
Smart Objects
If you have ever tried placing a photograph on the canvas and scaling it down, you would have seen the adverse effect it has on the quality of the image.
If you use smart objects, you will no longer have to be anxious about them. When they are used:
You can scale them up or down as much as you need.
They can also be rotated as needed.
And they will never lose their quality, unlike a rasterized photograph.
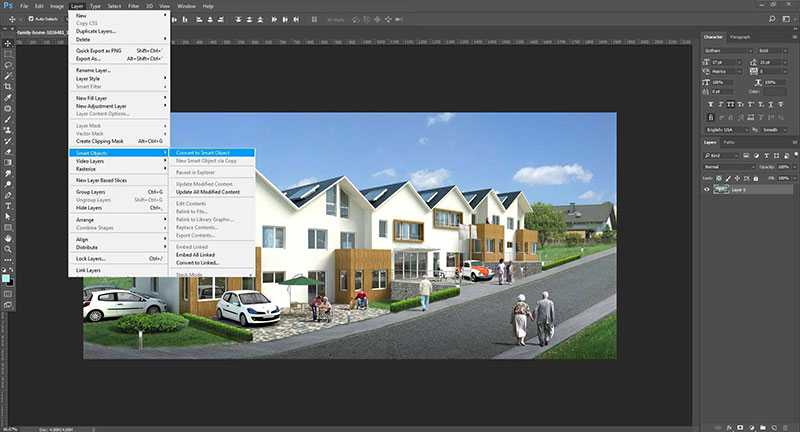
Using Smart Object Feature To Maintain Quality
Another important feature of Smart Objects is that they instantly save the Free Transformation choices that you might apply to them from time to time. This feature helps you preserve the original characteristics of the image even after distortion to make the necessary changes later. You will also have the freedom to duplicate Smart Objects.
Use hotkeys as much as possible
When you use hotkeys, the workflow will naturally pick up speed. Learning to use the hotkeys from the keyboard lets you access specific options and features in no time.
Following are some of the hotkeys that you will find frequently useful:
Creating a layer
- MAC: Shift+Cmd+N
- WINDOWS: Shift+Ctrl+N
Flattening Layers
- MAC: Cmd+Alt+Shift+E
- WINDOWS: Ctrl+Alt+Shift+E
Inverting selection
- MAC: Cmd+Shift+I
- WINDOWS: Ctrl+Shift+I
Deselecting the entire image
- MAC: Cmd+D
- WINDOWS: Ctrl+D
Creating a new layer through the copy
- MAC: Cmd+J
- WINDOWS: Ctrl+J
Creating a new layer through the cut
- MAC: Cmd+Shift+J
- WINDOWS: Ctrl+Shift+J
Increase/decrease the size of the brush
- MAC: ]/[
- WINDOWS: ]/[
Free transform
- MAC: Cmd+T
- WINDOWS: Cmd+T
Blend Modes
- MAC: Shift+plus (+) or minus(-)
- WINDOWS: Shift+plus(+) or minus(-)
Changing the size of the image
- MAC: Cmd+Opt+I
- WINDOWS: Ctrl+Alt+I
Changing the size of the canvas
- MAC: Cmd+Opt+C
- WINDOWS: Ctrl+Alt+C
Sampling colors outside Photoshop
When you need to sample a specific color from an image, you usually export the same to Photoshop to sample, right? However, if you know this tip, you don’t have to take the long-route now.
All you need to do
- Pick the Eyedropper tool
- Left-click on the same and hold
- Drag the cursor anywhere to sample the color
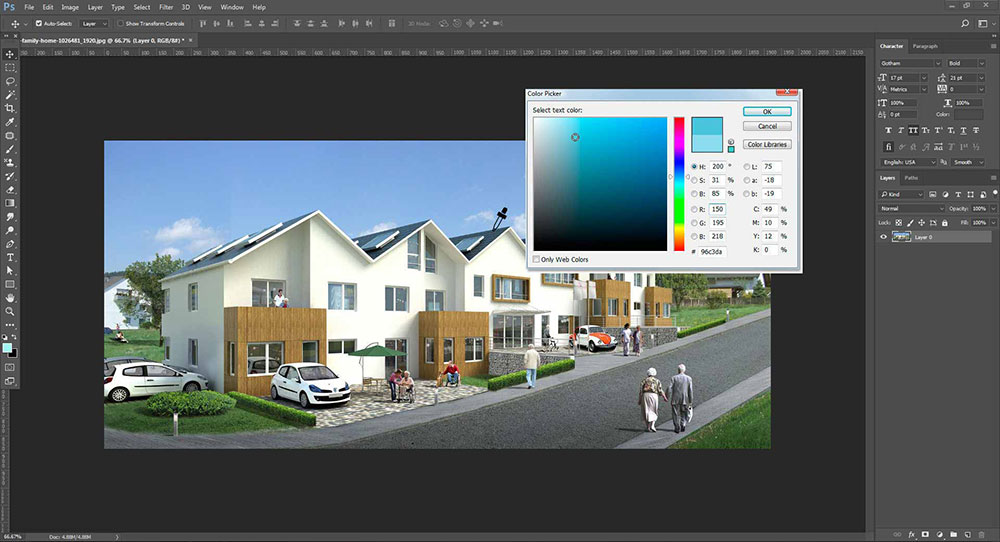
Color Sampling In Photoshop
Never leave your images unprotected
When you work in an industry for a lot of clients offering 3D interior rendering services and 3D exterior rendering services, you will need to regularly send your Photoshop files to clients. When you do that, chances are there that the images may be used by the clients without your permission. In such cases, when you need to share images, you can always encrypt the file so that it will need a password to edit or print.
In order to do that, you can save your file in the PDF format and follow these steps:
- Choose Security
- Head over to Permissions
- Enter the desired password
This way you can avoid unnecessary worries about the security of your work.
Use the function ‘Reveal All’
While you are working on a project having many layers and images, you may fail to realize that there might be pixels outside the canvas hidden, as well. At this stage, “Reveal All” can help you greatly.
For this, you need to head over to Image and then choose”Reveal All“. This will help you render the canvas bigger so as to fit all the pixels from each and every layer used.
Test the filters out
Since applying filters to images is a relatively memory-intensive operation, it takes time to execute. In order to ensure that you have the best filter applied to the image, you always have the freedom to apply it on a small area. Check if it gives the look and feels you expect. You can choose another if you are not satisfied.
Strike a consistent coloration
When you have a large project that involves several images, it might be hard to strike a similar coloration scheme individually to each of them. In order to get it done effortlessly, you can use the Match Color command, which will save a lot of time.
In order to achieve this, you can do the following:
- Open both the images—the target image and the source image—as individual images.
- Now go to Images, then to Adjustments and choose Match Color from there.
- From the Source pull-down option available, choose source image.
While doing this, the software will read the color specifications of an image and apply the same onto the other. In the same way, color intensity, fade and luminance can also be adjusted. As such, it can be used to offer distinct architectural rendering styles to the images quite efficiently.
The importance of letting go
There is no doubt that enhancing images on Photoshop can take away a lot of your time. As such, it is important to know when to stop and not to go on forever. You need to schedule your editing to a specific timeframe and stop there.
Working on the same file will only take away your precious time and you need to rely on a clearly defined project work schedule.
The Role of Photoshop in Architectural Rendering
Everybody knows that gone are the days when everyone had similar frames and portraits for their images. Today is the era of Photoshop where even the most difficult editing tasks are carried out with relative ease. The same story goes for architects offering architectural rendering services as well.
Photoshop for rendering architecture – how impressive architectural images are created?
Of course, 3D designers of modern times don’t use hand-drawn images; they use digital images. As such, the foundation to create the exterior designs or interior designs as required is created using specialized software programs and the widely used one is 3Ds Max. But it has to be understood that getting an architectural visualization rendered in 3Ds MAX isn’t going to solve the problem and there is still room for extensive improvement.
This is why the majority of editing and enhancement is done in Photoshop. But why is Photoshop so valuable?
In simple words, editing in Photoshop will save you a lot of your time and effort than doing it on 3Ds MAX as Photoshop is extremely versatile and scalable, unlike 3Ds MAX. By leveraging the possibilities of the same process and steps, you can carry out the post-production of the interior of a home, a restaurant and even an office.
Further, raw files from 3Ds MAX or any other 3D software program can’t be displayed to the clients. They must be edited and enhanced with special efforts to make them look enticing.
Using Photoshop architectural renderings – the most eminent methods
As newer visualization algorithms have been developed, architectural rending is made easier and effortless. In addition, there are programs that utilize various algorithms offering photorealistic architectural rendering to make the final image filled with impeccable details.
However, let us consider the simplest of methods.
- Light tracing: It is impossible to trace each of the light rays in any given scene as it will take an indefinite time. As such, four different methods are there that are much more effective than simulating each light ray that illuminates any given interior scene.
- Rasterization: It, along with scanning, is one of the most widely used architectural rendering techniques in Photoshop. It is by projecting all the objects on the screen that visualization is carried out and while doing so, the perspective effect upon the person observing is not really taken into account.
- Raycasting: A scene is simply an observable for a given point. Rays are directed to various items on the scene from the point of observation. This helps in determining the appearance as well as the pixel’s colors on the 2D screen. Unlike in the method that relies on reverse tracing, the propagation of the rays is stopped here when they finally reach any of the objects on the scene or the background of the scene. If one wants to add some special optical effects, it can be done via any simple method.
- Ray tracing: It is similar to the method where throwing of rays is used. Here rays are directed to various items on the scene from the point of observation. This helps in determining the appearance as well as the pixel’s colors on the 2D screen. However, unlike the previous methods, the rays will not stop propagating. Instead, the rays are split into three ray-elements, each of which adding to the pixel’s color on a 2D screen. It is the presence of such elements that decide the quality and photorealistic nature of the image making it exceptional.
- Path tracing: This method utilizes a principle similar to ray tracing. However, this leans towards the physical edicts that govern the propagation of light. Adding to the concern is that it is resource-intensive, too. Still, it can help you get your work done much faster than all other manual rendering techniques.
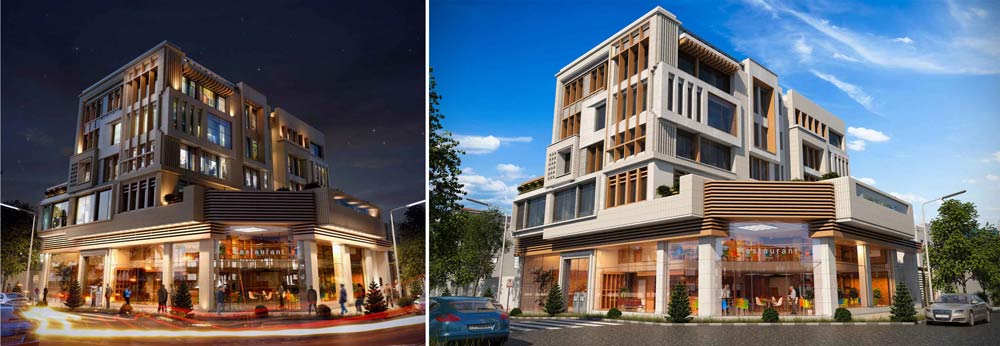
How can Photoshop architecture rendering help?
One of the easiest ways to understand the importance of Photoshop architecture rendering is to look at an image before and after rendering. The raw image would feel more or less like a skeleton of the rendered image as it will certainly lack the character and personality that the rendered image boasts of so impressively.
Benefits Of Using Photoshop For Architecture Rendering
Some of the frequent and pressing concerns of the raw 3Ds MAX images are given below:
- The lamps do not work
- The mirrors and glasses look alien and not realistic
- The picture fails to attract eyeballs
- The ceiling is dark
- Windows seem artificial
- Unsaturated shadows
One can argue that these issues themselves are not grave individually. However, when rendered together these minute concerns take away the attention of the client reducing the otherwise impeccable image to nothing but ordinary. If that happens, it will affect business, for sure. As such, it must be taken care of using various architectural rendering Photoshop tricks.
All the tricks that one can use in Photoshop are categorized further into three and are given below.
Color Correction
Use Photoshop For Color Correction
This includes the following
- Adjusting white coloration
- Image highlighting
- Addition of shadow and contrast
- Severance of visible light and shadow
Adding Lens Effects of Camera
This includes the following
- Improving the depth of field
- Aberrations
- Vignetting
- Distribution of plans
Addition of light effects
- Sun’s glare
- Light from the lamps
- Volumetric light
- Light from the sky and window
Once the image is edited well, you can see that
- The lamps not work
- The mirrors and glasses look realistic
- The picture lures eyeballs
- The ceiling is lit
- Windows seem real and natural
- The shadows feel saturated
This is not the end of architectural visualization and there are several ways to improve the same. You may use various filters such as “DIFFUSE GLOW” to make the image seem more attractive to everyone looking at the same.
These are the major elements you can pay attention to while trying to edit architectural images in Photoshop at the basic levels. However, there are several advanced and intricate methods for architectural editing and digital animation that you can become adept at, too.