In Photoshop, the magic wand tool is a popular selection tool. Image pixels are selected by grouping them on the basis of color and tone. Other selection tools, in contrast, select pixels by identifying the shape and edges of the object.
The pixel selection process may seem tedious sometimes because you may feel that you are not able to control the pixels. Despite this, the magic wand tool in Photoshop allows selective masking of image portions quickly and easily. Resultantly, you can modify certain sections of image without impacting others.
The tool is commonly used as photo background remover or swapper for eCommerce advertisement purposes. Backdrop is removed and the image’s subject remains intact.
If you are searching for some tips on how to take the background out of a picture in photoshop or how to use magic wand tool to remove background this article is for you. Let’s start the step-by-step process by using one of the famous selection tool known as magic wand tool. Before seeing the step-by-step process first, we can understand what magic wand tool in Photoshop is and how it is used.
Quick Overview
What is magic wand tool in Photoshop?
The magic wand tool is one of the useful selection tools in Photoshop. Using the magic wand tool, the selection process becomes easier. The desired part of an image which is having similar color can be selected automatically with one click.
This tool helps you in making selection on the basis of color, choose any color in the picture present and this tool will identify the similar colors automatically.
Here, to make a precise color selection, you can use the ‘Tolerance’ option present in the top panel, this gives photoshop a range and tone to choose.
Using magic wand tool
The shortcut key for using magic wand tool in Windows and mac is “W“. You can find the tool below the quick selection tool. If you are not able to find the tool in your toolbar, check this video to fix the missing tool.

How To Remove Image Background with Photoshop Magic Wand Tool?
-
Starting Photoshop
To remove image background, open Photoshop (minimum 0.87 or any latest higher version 2021) on your preferred OS. In the previous version, the tool may be located in a different section.

Opening Photoshop Software -
Opening the Image for Editing
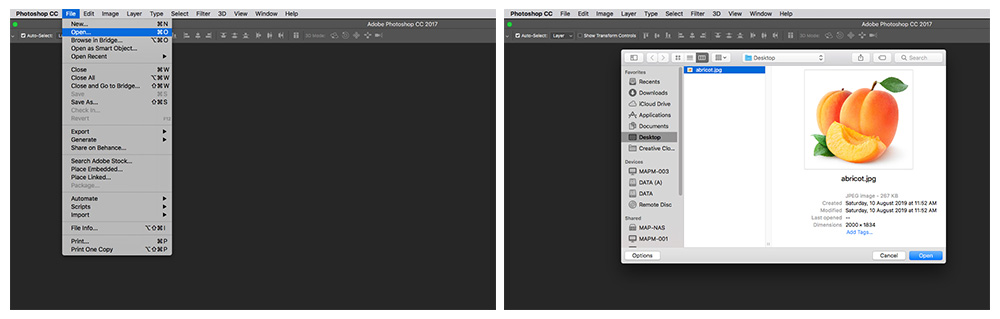
From the menu bar, choose ‘File >Open’. Navigate to the location of image, select it and click ‘Open’.
Opening the required image for editing -
Selecting the Layer
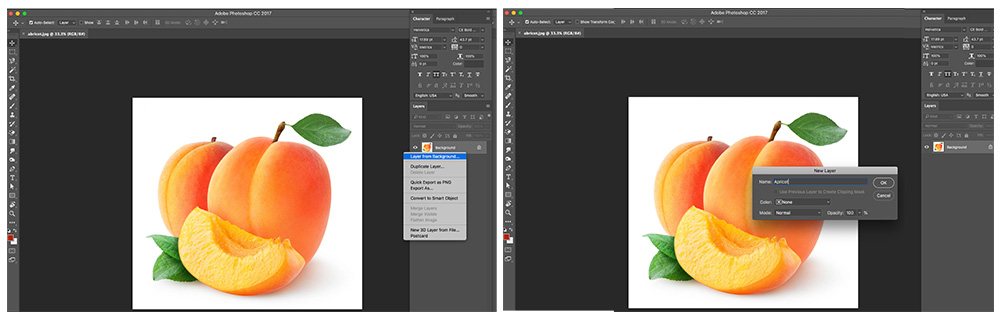
Navigate to ‘Layers’ panel and right-click on the ‘Background’ layer. Now, you have to click on ‘Layer From Background’ for renaming it to your preferred name. Click ‘Ok’. Image background would become transparent only when the layer is removed.
Selecting the layer -
Selecting the Magic Wand Tool
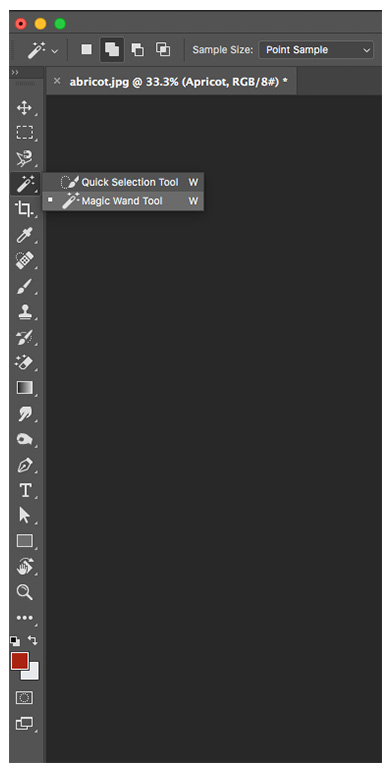
In case you are using Photoshop CS2 or any other earlier versions, then you can select the “Magic Wand Tool” by clicking on its icon. This icon will be available in the Tools palette. However, if you are using Photoshop CS3 or later versions, then you need to click the “Quick Selection Tool” present in the Tools panel. The reason why you first need to select the “Quick Selection Tool” is because it is nested with the Magic Wand Tool. After selecting, hold down the mouse button for a second or two. A fly-out menu will appear. Now, from the menu you can select the Magic Wand Tool.
You need to click on 4th icon from top of the vertical toolbar on left. This would lead to selecting o ‘Magic Wand’ tool.

Selecting Magic Wand Tool -
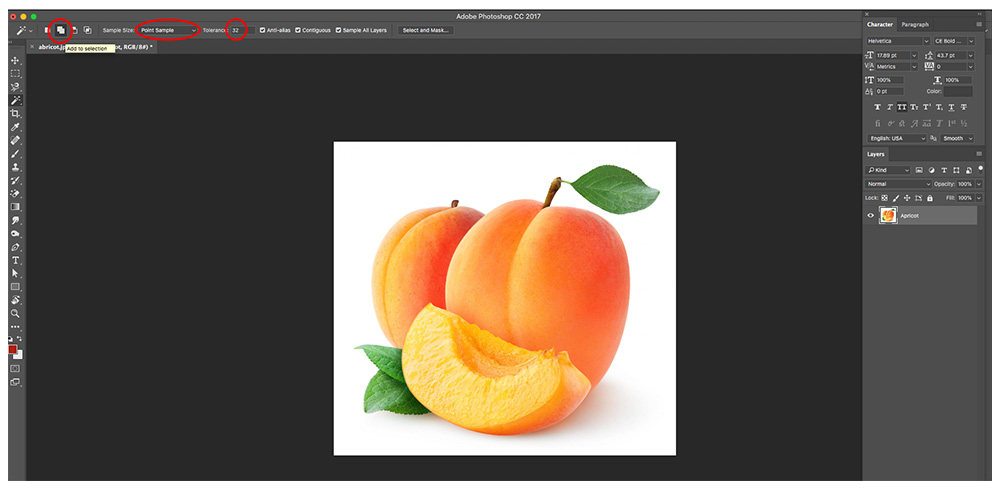
Adjusting the Selection Settings
In the settings of ‘Magic Wand’, click ‘Add To Selection’. Next, the sample size and tolerance have to be changed to ‘Point Sample’ and ‘32’ respectively. You need to check ‘sample all layers’, ‘contiguous’ and ‘anti-alias’.
The ‘New Selection’ allows the generation of new and unique selection on every mouse click. The ‘Add to Selection’ allows the selection of multiple objects or different parts of the same subject. Upon choosing, the new selection is created with each click which gets added to the present selection.

Adjusting the selection settings ‘Subtract From Selection’ is helpful in correcting errors or removing sections of the selection. If selected, each mouse click would lead to removal of clicked part of the present selection.
‘Intersect with Selection’ helps in selecting those image parts which intersect. Upon mouse click, the tool scans the present and initial selections for retaining only the overlapping area.
‘Tolerance’, when set to 32, would lead to the inclusion of present selection along with other pixels which are up to 32 shades brighter or darker. A higher value would expand the size of selection whereas lower value would shrink it.
Anti-alias upon selection allows smoothing out of edges through addition of little blur to them. Selection of ‘Contiguous’ would allow inclusion of pixels lying side by side which satisfy the color and tone set by tolerance option. ‘Sample All Layers’ would lead to inclusion of all active or inactive layers in your selection.
-
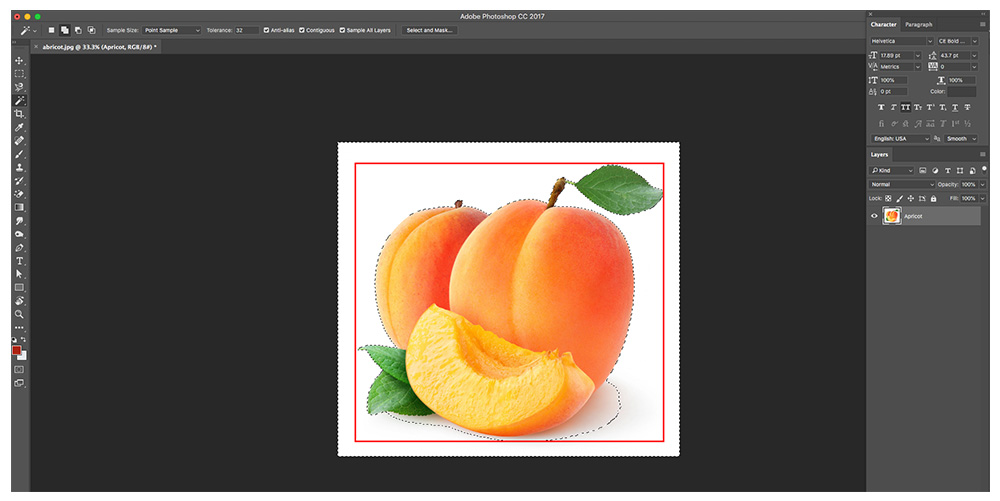
Making Initial Background Selection
For an accurate selection of background, click on the part that lies away from the image’s subject. This initial selection would be represented by animated dots. Click only once to make the selection.

Background Selection If the entire image or wrong part of background has been selected, you can undo it by pressing Ctrl+D in Windows and Cmd+D in Mac.
-
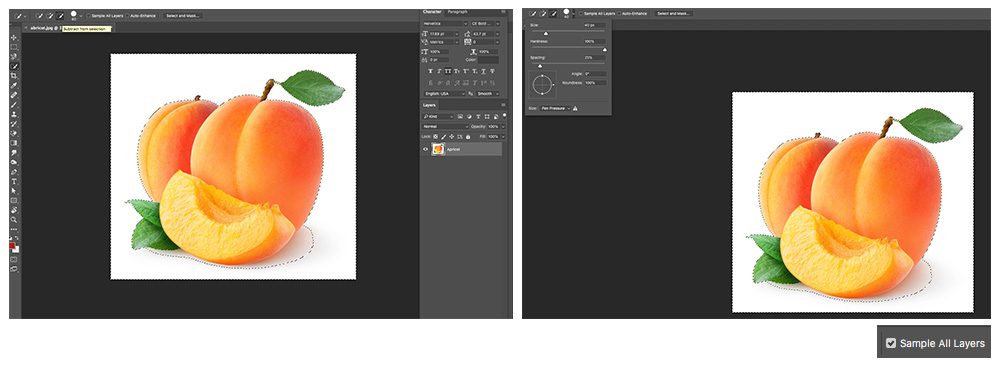
Refining the Selection
If any part of the background has not been selected, you can do so now. For removing selection’s portion, right-click on the Wand icon and then click on ‘Quick Selection Tool’. From the horizontal toolbar, you need to click on ‘Subtract From Selection’. For adding newer portions to the selection, you have to now click on the ‘Add To Selection’ icon.
Now, you have to choose the brush size. For working with details, the brush size should be smaller. For selecting larger areas, keep the size of brush larger. You can change the brush size by clicking a downward arrow sitting on ‘Subtract from Selection’ icon’s right. The size would become larger when the slider is dragged to the right and vice versa.
After selecting moderate sized brush, the ‘Quick Selection’ tool has to be clicked and dragged for adding or removing selection’s portions.
Ctrl+Z or ⌘ Cmd+Z helps you undo a wrong move whereas you can redo an action by pressing Ctrl+Shift+Z or ⌘ Cmd+Shift+Z. For restarting the selection, you have to press Ctrl+D or ⌘ Cmd+D. Alternately, you can select ‘Deselect’ after right clicking to make the animated dots disappear.

Refining The Selection You need to press Z to activate the Zoom tool, which allows better viewing through zooming in or out. You can click at any place in the workspace to zoom in. To zoom out, you need to hold down the Alt or Option key and click on the workspace. Your selection or image would not be impacted.
-
Finalizing the Selection
You have to keep refining the selection till the complete background is accurately selected. The animated dots must be outlining the object as well as canvas. Accidental deletion of object’s part is possible if overlapping of animated line occurs with object. Keep refining if you observe overlapping or no outlining of the canvas.

Completing the Selection -
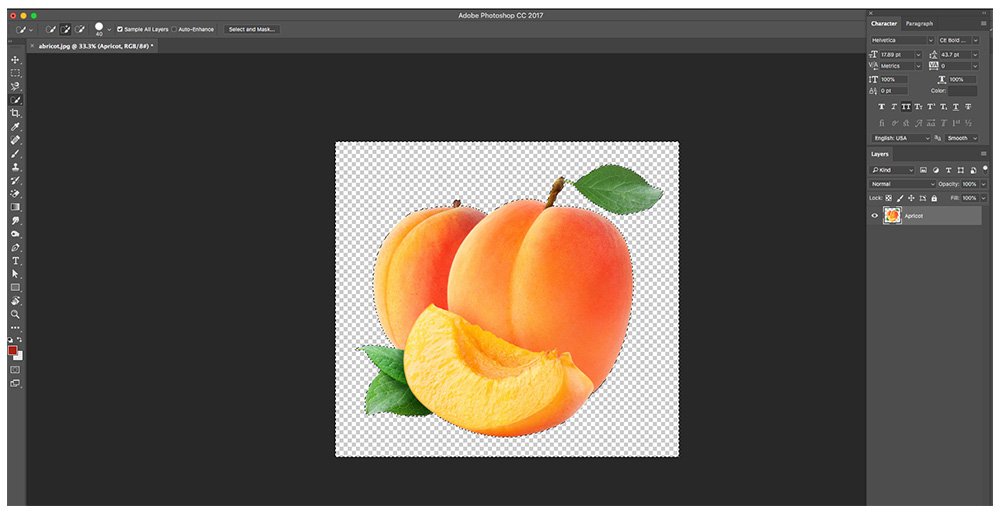
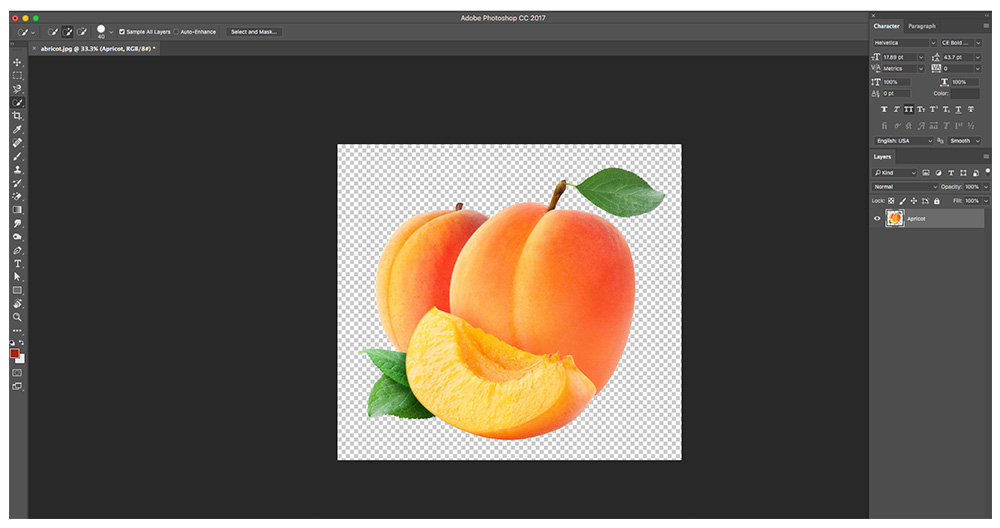
Removing the Background
After pressing delete (Mac) or Backspace (Windows), you would find your image’s background replaced by a white and gray checkerboard pattern. In Photoshop make the background transparent with this method. When the image is placed in MS Word document or presentation, only the image will be copied without the background.

Removing the Image Background -
Deselecting the Selection
To deselect magic wand selection, you need to press Ctrl+D (Windows) or ⌘ Cmd+D (Mac). The checkerboard pattern would stay back.

Deselecting the selection for removing background -
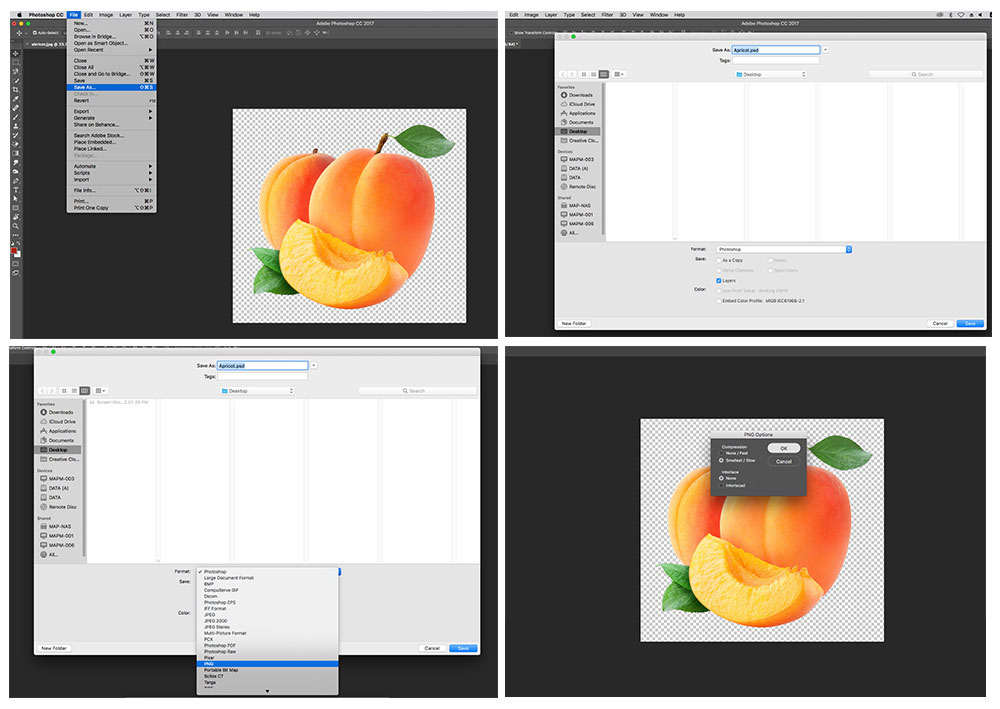
Saving the Image
From the ‘File’ option in menu, click on ‘Save As’. Give a name to your file and then choose ‘PNG’ from the Format’ drop down. Select ‘PNG’ format and save the image.

Saving the final output with transparent background


Useful Article: Change Background Color in Photoshop in Simple 2 Ways
Conclusion
The Magic Wand is an awesome Photoshop tool that facilitates seamless removal of background from the image. You can use the image’s object for various purposes after segregation. Attractive documents, presentations, or web materials can be created. Your creativity would be the main driving force. Utilize Magic Wand tool to work wonders.
If you need any assistance with Photoshop services, don’t hesitate to get in touch with our experts. We can assist you with end-to-end photo editing support that includes color correction, clipping path, drop shadow creation, batch image processing, and more.
Other Useful Photoshop Tools Used for Background Removal
Christa Elrod 


Christa Elrod serves as a senior graphic designer at ProGlobalBusinessSolutions. She is a creative designer with robust skills in typography, UI/UX designs, printing designs, video post-production, and 3D designs. Possessing years of experience across diverse industries, Christa loves to educate fellow designers with her experience and domain knowledge.